Use these bread baking tips from Grandma and learn how to bake better bread with the perfect rise, chewy, golden crusts, and pillowy soft crumb.
The women that went before us baked the most amazing bread at home in primitive ovens. They didn’t have temperature-controlled ovens. They didn’t have standardized yeast. Yet their bread was a staple part of the daily diet. While it’s true that some of these ladies never got the hang of light loaves with crispy crusts, others became locally famous for their baking. If you had the privilege of helping your grandma or a neighbor in the kitchen on baking day, you probably caught some of these bread baking tips. For the rest of us, I offer my own bread baking tips, won by both observing the grandmothers and by not-a-few failed loaves. Here are 16 bread baking tips that will surely improve your chances at attaining that perfect crust and crumb. These tips focus on yeast bread rather than flat breads, sourdough breads, or quick breads. You can use bread flour or all purpose flour to bake homemade bread.
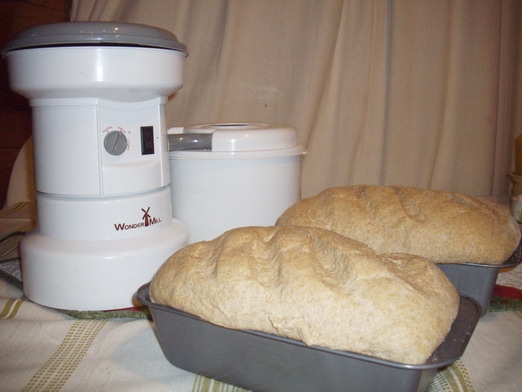
Start with fresh, organic ingredients
This first bread baking tip considers the freshness of your ingredients. Fresh organic flour that you grind yourself includes the vital wheat gluten, the germ, and the bran. This is the best flour to use with your bread. It’s rich in enzymes and protein to make your loaves rise well. If you don’t yet have a grain mill, no problem, buy the freshest flour that you can find from a store with a fast turnover of flour, so that you can be assured of the freshness. Flour oxidizes quickly after grinding and loses some of the protein and vitality that gives home made bread its lightness and rise.
Use high protein wheat or add gluten
Add vital wheat gluten to increase the rise and spring of your bread and make it lighter. Commercial bread machine flour and specialty bread flour has vital wheat gluten added. I prefer Bob’s Red Mill Gluten Flour. I’ve always had good success with it. You don’t need much. 1/4 cup per 5 cups of whole wheat flour is enough to make your loaves lighter. You can use all purpose flour but if you find that the dough isn’t as light as you want, adding vital wheat gluten can give it the oomph you are looking for. This added gluten increases the protein content of the dough which gives the yeast something to feed on.
Rise it at 70F
The best and most flavorful bread rises slowly at cooler temperatures. In the summer in a warmer climate, you may need to put your bread in a cooler location to rise. Adjust the rising so that you can maintain this optimum temperature.
Proof your yeast
Yeast has a shelf life. Keeping your yeast in the fridge can increase its shelf life. But eventually, it loses its vitality. Always proof your yeast before adding it to your bread. Don’t add soda to increase the rise. When the yeast is vital and proofed at cooler temperatures you’ll get the rise you are looking for.
There are different kinds of yeast. For regular bread baking (not a bread machine) I prefer active dry yeast. It will work with the dough and give you a long rising time without collapsing prematurely. Instant yeast is fast but the bread isn’t given a chance to develop fully. Instant yeast will collapse with a long rising time. Wine yeast isn’t used for bread baking.
Optional dough conditioner bread baking tip
Add 1 tablespoon cider vinegar to the dough or 1 teaspoon of diastolic malt, when you mixing it as a dough conditioner. This adds enzymes and increases the lightness of your dough. Ginger can also act as a dough conditioner, add 1/4 teaspoon of dried, powdered ginger per 2 loaf recipe. This bread baking tip was listed on the bags of Roger’s flour in the 1970s. It’s a classic bread baking tip that Grandma used to get a good rise in her loaves.
Half the yeast and double the rising time
When following a commercial recipe, decrease the yeast by ½ and double the first rise. If you use this bread baking tip you’ll remove some of the yeasty, alcohol flavors of the bread. This will give it a more complex flavor and a better crumb. The lightness of the dough comes as much from the handling and rising time as from the yeast.
Use less flour than you think you need
The bread dough should be very sticky when you put it to rise for the first time. The flour will absorb a lot of the stickiness during the first rising. Don’t be tempted to make the dough “smooth and elastic” in the first kneading, as so many recipes say. Your bread will turn out heavy. Instead, reserve up to a third of the flour that the recipe calls for to add after the first rising. Then knead it in one handful at a time. And stop as soon as you can handle the dough without it sticking to your hands or the countertop. The actual amount of flour that you need will depend on the relative humidity in your kitchen on the day that you bake. Then put your bread aside for the second rise.
Knead with wet hands
Instead of flouring your hands when you knead the dough, wet them. This will keep the dough from sticking to your hands without adding any heaviness to the dough.
Don’t forget the salt
Bread without salt is tasteless and the crumb isn’t as well-formed. Salt mediates the yeast and changes the texture of the bread. Add about 1 tsp. of salt for each loaf of bread that the recipe makes. Too much salt can inhibit the yeast though, so don’t overdo it.
Use a baking stone
The baking stone increases the heat retention in the oven and gives that crisp brown crust the wood-fired ovens give. I don’t have one. If you don’t have one either, you can put two bricks in the bottom of your oven and preheat them with your oven. They will retain the heat, like a baking stone, and make the bottom crust brown evenly. For artisan bread, you can bake the loaves right on the baking stone. But for this recipe, we are using bread pans. Place the bread pans on top of the baking stone.
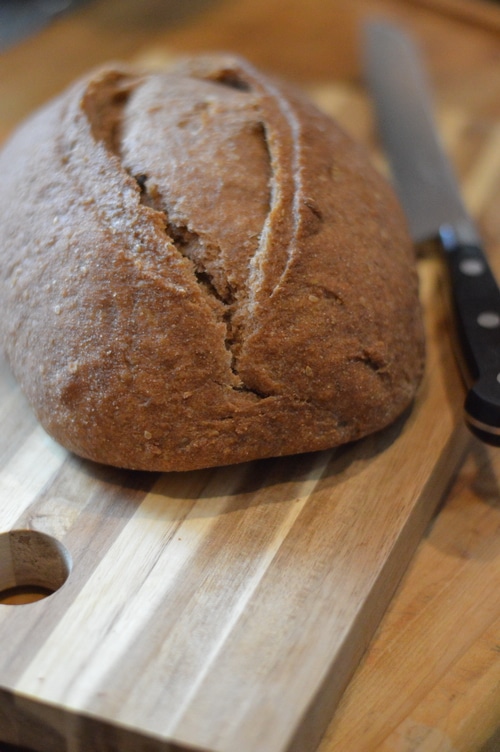
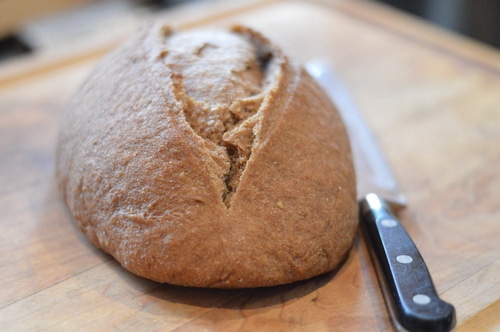
Slash the tops of the loaves
Slash loaves diagonally across the top about 20 minutes before baking. This gives space for the loaf to spring in the oven without cracking your bread. By slashing the loaves, you’ll get lighter loaves that don’t crack on the side, spoiling your sliced bread.
Create steam in your oven during baking
This is the key to making the very best artisan bread. If you don’t take anything else away from the article take this bread baking tip. Commercial artisan bread bakeries have ovens that steam the bread during the baking process. The steam encourages “oven spring” which makes taller, lighter loaves of bread. It also crisps the crust and makes the crust chewier.
You can create steam in your oven while baking, by putting a heavy pan, like a small cast iron frying pan, onto the bottom rack of your oven. Just before you put your loaves into the oven to bake, pour boiling water into the frying pan. Add your loaves and close the oven door.
Another way to create steam is to lightly spritz the oven walls with water, avoiding the oven light, at the beginning of the baking period. Experiment with your own oven and see which way works best for you. Never spritz cold water on a hot light bulb though.
Create the crust texture that you want
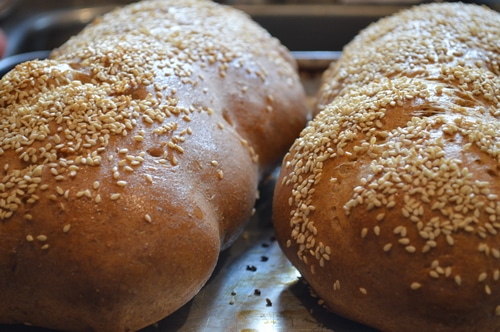
Brush loaves with water before baking for a crustier loaf. Brush with egg before baking for a softer, golden loaf. Brush with butter when you bring the bread from the oven for a very soft crust.
Use a long preheat in your oven
Don’t be in a hurry to get your bread in the oven. Preheat the oven before putting in your bread dough for at least 20 minutes. Some artisan bakeries preheat the oven for a full hour. Bake bread at 425F for a crisp browned, caramelized crust. You can’t rush this step. The best bread making tip is to let the oven preheat for the full time so that when you put your loaves in, it doesn’t lose any heat.
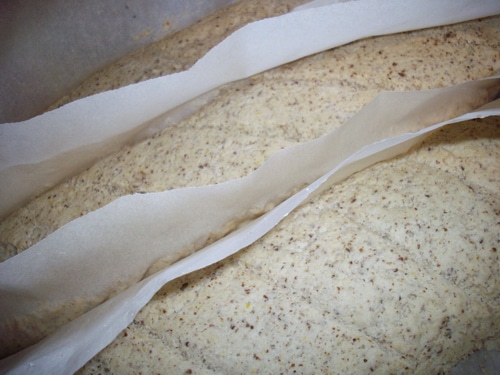
Preheat the pan before putting in your bread or place the bread pan on a baking stone – use parchment paper to transfer your dough to the pan
Don’t rush bread baking
Time – allow for at least 4 hours to make an awesome, loaf of bread. The dough needs time to ferment, proof, and bake. Don’t rush it. The actual hands-on time is less than 20 minutes. Most of the time is waiting. Start early in the day and you won’t be disappointed.
Whole grains
While bread is traditionally made with wheat, rye, oat, and other whole grains can be used alone or added to bread to increase the toothiness of the crumb and the nutrition of the bread. Grinding your own flour and using the whole grain including the germ and the bran can lead to a heavy bread. Lighten up on the amount of flour in the first kneading and give it a slower rise to compensate. You’ll be rewarded with a lighter loaf that is still toothsome, chewy, and delicious.
Bake more bread….
While these bread baking tips can set you on the right track for baking awesome bread, bread baking is an art that you learn by experience. Bake lots of bread and learn the feel of the dough and the behavior of the yeast. If you have a failure, know that we all do. Failures can be made into crumbs to add to meatloaf or hamburgers or make croutons or bread pudding. Homemade bread is worth the effort to learn to do well. It is healthier and tastes better than store-bought.
Practice these 16 bread baking tips by making this beginner’s loaf of whole wheat bread. Get the feel of the dough on your hands and observe the finished loaves. It’s only by actually baking bread that your hands will learn the feel of the ideal dough, the exact right temperature of your oven for golden brown loaves, and the smell of the best artisan loaves coming out of your oven. These are clues that you are getting bread-making intuition just like grandma and you’ll be turning out amazing bread on a weekly basis too.
This is an easy beginner’s loaf of whole-grain bread. Additional vital wheat gluten is added to give the bread spring and increase the lightness of the loaf.
Ingredients
Scale
1 tablespoon yeast
1 ½ cups of warm water (110F)
1 teaspoon organic sugar or honey
1 tablespoon butter, melted
2 teaspoons salt
4 to 5 cups of whole wheat flour, divided
¼ cup of vital wheat gluten
Instructions
Proof the yeast: Mix yeast, hot water, and sugar or honey in a 2 cup measuring cup. Allow to sit for 10 minutes. Active yeast will bubble up. If your yeast doesn’t bubble then discard and try again with fresh yeast.
In a mixing bowl add the proofed yeast, butter, and salt. Mix in 3 cups of the whole wheat flour and the ¼ cup of vital wheat gluten. Mix well with a dough hook. This batter will be the consistency of heavy, wet dough. Keep mixing until you see threads forming in the dough. This is the gluten. Once the threads form add 1 cup of flour more. Beat with the dough hook to incorporate well. The dough should be slightly sticky.
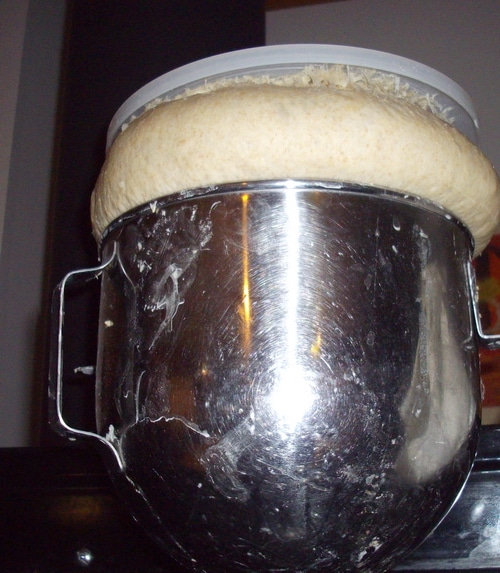
Cover and let rise for 1 ½ to 2 hours at room temperature. As it rises, the dough will dry out as the water in it is absorbed by the flour.
Remove the dough from the bowl onto a lightly floured surface. Knead in a small amount of flour, as needed. Less is better than too much.
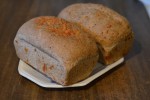
Divide dough into two portions. Form two loaves by stretching the dough and tucking under the edges, so that the surface of the dough is smooth on top. Place in two well-buttered bread pans. Cover with a floured towel and allow to rise for 1 hour.
Preheat oven to 425F. Place a pan of water in the bottom of the oven during the pre-heat.
Before you put the bread in the oven, slash the top with a thin, sharp blade, to allow for oven spring. Place the bread pans in the oven and with a spray bottle of water, spritz the wall of the oven, avoiding the oven light. Close the oven door and repeat the spray after 2 minutes, and again after 4 minutes. Now keep the oven door closed and bake for 20 minutes until the loaves are a deep golden brown. Turn off the oven heat but leave the loaves inside the oven for an additional 5 minutes.
Remove the bread from the oven and turn out of bread pans onto a cooling rack. Allow cooling for at least an hour before slicing. The bread continues to bake while it is cooling and the crust draws air into the hot loaves, increasing the flavor and complexity of the bread as it cools. Don’t rush the cooling period.
Recipe Card powered by
Basic whole wheat bread
Ingredients:
1 tablespoon yeast
1 ½ cups of warm water (110F)
1 teaspoon organic sugar or honey
1 tablespoon butter, melted
2 teaspoons salt
4 to 5 cups of whole wheat flour, divided
¼ cup of vital wheat gluten
Method:
Proof the yeast: Mix yeast, hot water, and sugar or honey in a 2 cup measuring cup. Allow to sit for 10 minutes. Active yeast will bubble up. If your yeast doesn’t bubble then discard and try again with fresh yeast.
In a mixing bowl add the proofed yeast, butter, and salt. Mix in 3 cups of the whole wheat flour and the ¼ cup of vital wheat gluten. Mix well with a dough hook. This batter will be the consistency of a heavy,l wet dough. Keep mixing until you see threads forming in the dough. This is the gluten. Once the threads form add 1 cup of flour more. Beat with the dough hook to incorporate well.
Cover and let rise for 1 ½ to 2 hours at room temperature. As it rises, the dough will dry out as the water in it is absorbed by the flour.
Remove the dough from the bowl onto a lightly floured surface. Knead in a small amount of flour, as needed. Less is better than too much.
Divide dough into two portions. Form two loaves by stretching the dough and tucking under the edges, so that the surface of the dough is smooth on top. Place in two well-buttered bread pans. Cover with a floured towel and allow to rise for 1 hour.
Preheat oven to 425F. Place a pan of water in the bottom of the oven during the preheat.
Before you put the bread in the oven, slash the top with a thin, sharp blade, to allow for oven spring. Place the bread pans in the oven and with a spray bottle of water. Spritz the wall of the oven, avoiding the oven light. Close the oven door and repeat the spray after 2 minutes, and again after 4 minutes. Now keep the oven door closed and bake for 20 minutes until the loaves are a deep golden brown. Turn off the oven heat but leave the loaves inside the oven for an additional 5 minutes.
Remove the bread from the oven and turn out of bread pans onto a cooling rack. Allow cooling for at least an hour before slicing. The bread continues to bake while it is cooling and the crust draws air into the hot loaves, increasing the flavor and complexity of the bread as it cools. Don’t rush the cooling period.
Get more bread baking tips on Bluprint (formerly Craftsy)
Now that you’ve tried a basic loaf of whole wheat bread, learn to make artisan bread from a professional artisan baker. Pick up Bluprint‘s Bread Baking Basics for free.
If you are ready to commit to learning this homesteading skill well, go deeper by taking a Craftsy class, in the comfort of your own home, and at your own pace. Peter Reinhart, author of many books on bread baking, including his newest book Bread Revolution, teaches Artisan Bread Baking on Craftsy.
It’s an excellent course to give you the basics in a format where you can ask questions and get feedback from a professional. Post your own pictures of homemade bread as the course progresses and learn from the instructor’s comments. It’s the perfect learning environment.
What is Crafts?
Peter Reinhart’s course is also available in the Craftsy membership, for one low annual or monthly fee, you can watch all the classes anytime you want. It’s less than the cost of a cup of Starbucks once or twice a month, for all the baking, cooking, crafting, and photography courses that you want. Plus there are other perks, too, like a discount on crafting supplies, and a monthly forever class that is yours to keep. Get started with Craftsy now.
Your tips has been helpful. I actually wanted to throw in the towel cos I had crumbled loafs too many a times. Now I’ll continue baking till I get it right. Thanks Nancy.
Joybilee Farmsays
Thanks for sharing your method. It sounds yummy.
Stevesays
This is my Ciabatta bread.
I make a biga ( 14% protein flour, water pinch of dried yeast) cover w/ saran wrap and towel and let it sit for 24 hours. Add the rest of the ingredients (flour, yeast, salt, lemon juice, water, mix with wooden spoon), cover, let rise for 45 min. Un cover, wet hands, lift and fold 4 times whilst turning the bowl 1/4 turn, cover and sit for another 45 min. Total 3 – 45 min lift and folds. Dough is very wet ans sticky, no kneading. Let rise again however or whatever you bake on for 1 hour. Pan of water at pre-heat to 450 F. Check at 18 min. Make sure inner loaf is 200 F. Take out and cool for 1 hr. I’m a believer if the bread isn’t right, whatever is on it or in it won’t be very good. I have baked bread that wasn’t what I remembered as a kid in an Italian household . . . finally combined recipes and came up with this method and this one only to bake Ciabatta . . .It’s my perfect bread.
Meerasays
Very informative article…..thank you.
But why u r using so much yeast in your bread…2 tablespoon for 4-5 cup flour?
According to me,1/2 teaspoon is enough for one cup. Even if you are using whole wheat flour without adding vital wheat gluten.
Belinda Wildmansays
Thanks for all the wonderful bread baking tips! Great site. Started baking sour bread March 15, 2020 as I knew I would have time. I love sourdough bread and I’ve been adding citric acid to my bread since June. It makes the bread more sour…yummy. It’s natural, fine grain and non-gmo. I have been cooking and baking since I was 11. I’ve love making kids birthday cake and have done a few wedding cakes. I was always intimidated about making bread, now I have for sure made over 200 loafs since I started. Love all the help bread bakers are willing to share.♥️ Thanks
When you subscribe and join our VIP Community, I'd like to send you the free resource, "Using Ginger for Cold and Flu Relief." with tips for using common kitchen ingredients to feel better faster.


Your tips has been helpful. I actually wanted to throw in the towel cos I had crumbled loafs too many a times. Now I’ll continue baking till I get it right. Thanks Nancy.
Thanks for sharing your method. It sounds yummy.
This is my Ciabatta bread.
I make a biga ( 14% protein flour, water pinch of dried yeast) cover w/ saran wrap and towel and let it sit for 24 hours. Add the rest of the ingredients (flour, yeast, salt, lemon juice, water, mix with wooden spoon), cover, let rise for 45 min. Un cover, wet hands, lift and fold 4 times whilst turning the bowl 1/4 turn, cover and sit for another 45 min. Total 3 – 45 min lift and folds. Dough is very wet ans sticky, no kneading. Let rise again however or whatever you bake on for 1 hour. Pan of water at pre-heat to 450 F. Check at 18 min. Make sure inner loaf is 200 F. Take out and cool for 1 hr. I’m a believer if the bread isn’t right, whatever is on it or in it won’t be very good. I have baked bread that wasn’t what I remembered as a kid in an Italian household . . . finally combined recipes and came up with this method and this one only to bake Ciabatta . . .It’s my perfect bread.
Very informative article…..thank you.
But why u r using so much yeast in your bread…2 tablespoon for 4-5 cup flour?
According to me,1/2 teaspoon is enough for one cup. Even if you are using whole wheat flour without adding vital wheat gluten.
Thanks for all the wonderful bread baking tips! Great site. Started baking sour bread March 15, 2020 as I knew I would have time. I love sourdough bread and I’ve been adding citric acid to my bread since June. It makes the bread more sour…yummy. It’s natural, fine grain and non-gmo. I have been cooking and baking since I was 11. I’ve love making kids birthday cake and have done a few wedding cakes. I was always intimidated about making bread, now I have for sure made over 200 loafs since I started. Love all the help bread bakers are willing to share.♥️ Thanks