
How to make apple cider vinegar
Cider is raw, unpasteurized, pressed juice from apples – any and all apples, including crab apples. The best cider comes from mixing 3 or 4 different varieties of apples together in the cider press. You can include sweet table apples, tart cooking apples, and hard cider making apples or crab apples. Use what you have on hand, from several apple trees. Once you have your apple cider made you are ready to learn how to make apple cider vinegar.
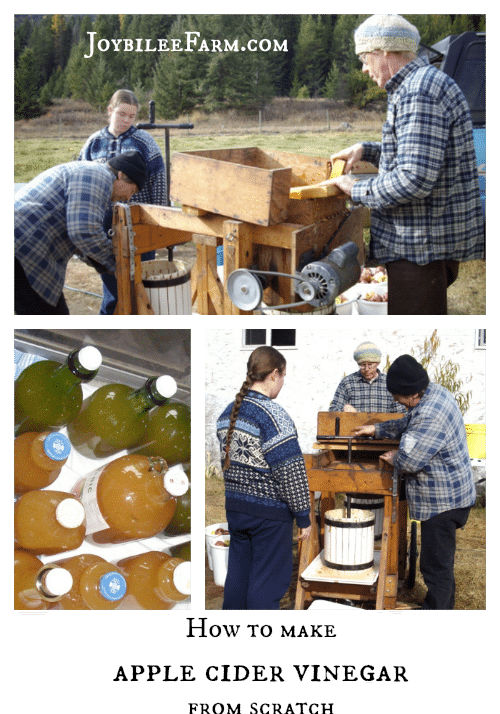
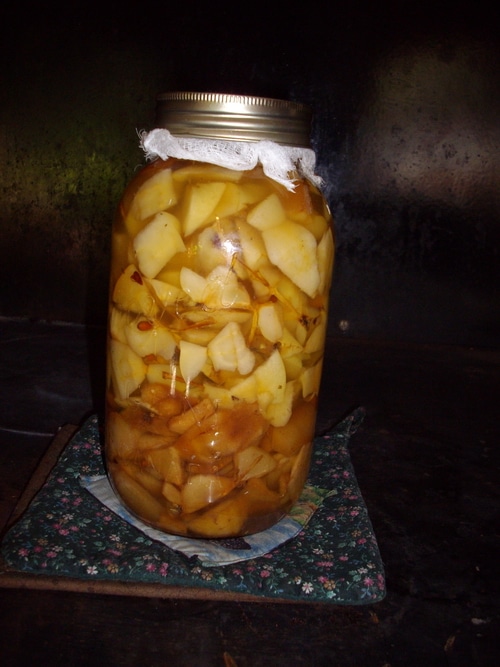
First, make apple cider
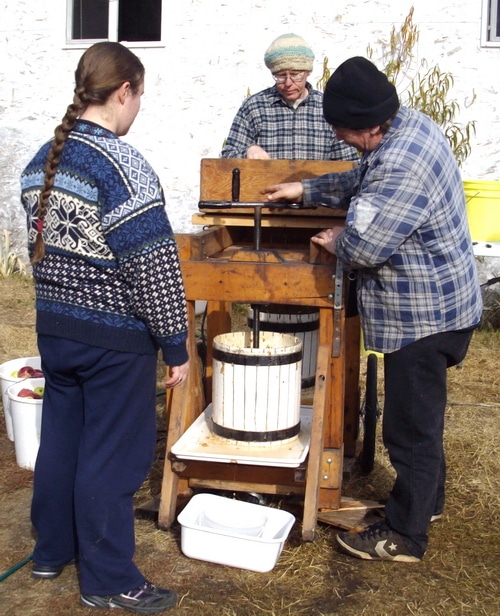
Cider vinegar making is a three-step process. First, you have to make the cider. To make cider, ripe apples are washed, and any bad bits are cut out and discarded. Then the prepared apples are pulped in a machine, which tears apart the apple flesh, core and all. The finely pulped apples are put into a press and the juice runs down into a catch bucket. The juice is then strained and bottled. This strained juice is raw cider. If you want to keep it as unfermented juice you’ll need to pasteurize it to 160°F (hold for 6 seconds) and then bottle it into hot bottles and seal with a cap. But if you want to make cider vinegar instead of pasteurizing it, you’ll follow these easy steps.

Cider vinegar is easy to make at home once you understand the two-stage process. It takes time but not a lot of attention. Always begin with raw cider, not pasteurized cider. Apples naturally contain yeasts on the outside of their skin. The yeast is that white blush you see on the apple that is more obvious on red apples than on yellow and green apples. But it’s there on all apples, even when it’s not obvious. You want the live yeast colonies active in your cider to make the process successful. When you begin with pasteurized cider you have to add the yeast and you don’t have as many options for live yeast colonies. Not all yeast makes good apple cider vinegar. Natural yeast is best.
If you tried to make apple cider vinegar before and you were unsuccessful, it may be because the apple cider that you used wasn’t raw apple cider, or because the natural yeast colonies weren’t active enough to outgrow any bad bacteria present on the apples or in the pressed juice. This can happen if apples were picked up off the ground or if mold was introduced from the press or from bad apples. Always wash your equipment well before beginning and prepare the apples by washing in cold water and scrubbing off any dirty spots from the apples, cutting off any bad spots before pressing. Any bad bacteria in the cider will be crowded out by good bacteria in the cider making process – or it will be visible as mold on the surface of the vinegar. Properly made cider vinegar cannot support the growth of mold.
Step 2 – make hard apple cider:
Place your raw apple cider into narrow necked glass bottles. Use glass because the apple juice is acidic and plastic will give off toxic chemicals that you don’t want in your finished cider. Don’t cap tightly or your bottles will explode from the increasing pressure of the ferment. I like to use a wine airlock for this step but you don’t need it. Your apple juice will ferment without it. If you don’t have a wine airlock you can just cover with a clean and sterilized handkerchief and secure it with a tight rubber band. This will keep fruit flies away from your cider.
The first step in apple cider vinegar making is to allow the raw apple cider to naturally ferment. It will turn into hard apple cider, as the naturally occurring sugar in the apple cider converts to alcohol. Depending on the ambient temperature your apple cider will begin to ferment about 3 days after pressing and continue to actively ferment for about a month. During the fermentation process, fine bubbles will appear on the side of the glass bottle and the cider will increase in volume. It might overflow the bottles because of the carbon dioxide increasing. Once the fermentation process stops, the bubbles will stop as well. Your cider will smell a bit yeasty from the alcohol. You’re ready for step 2.
Step 3 — turn hard apple cider into apple cider vinegar:
Apple cider vinegar is twice fermented cider. The first fermentation is anaerobic, as all winemaking is. Your second ferment is aerobic and requires exposure to oxygen. After a month or so, when the fermenting cider is no longer actively bubbling, and the anaerobic fermentation has slowed down, remove the airlock or cap if you used one. To ensure good vinegar add a ¼ cup of raw cider vinegar to each 1 quart bottle of hard cider that you have. Cover with a clean, sterilized handkerchief, tightly secured with an elastic band. Put it in a warm, dry place where it can ferment undisturbed for 2 or 3 months. Yes, it takes patience to make good apple cider
If you begin this process at the end of September when the apples are ripe, you will have cider vinegar by Christmas. During the fermentation time, the cider smells yeasty-sweet. Over time, it gradually takes on more of a pleasant acidic scent. When it’s ready it will smell like strong vinegar, as all the yeast coverts to alcohol.
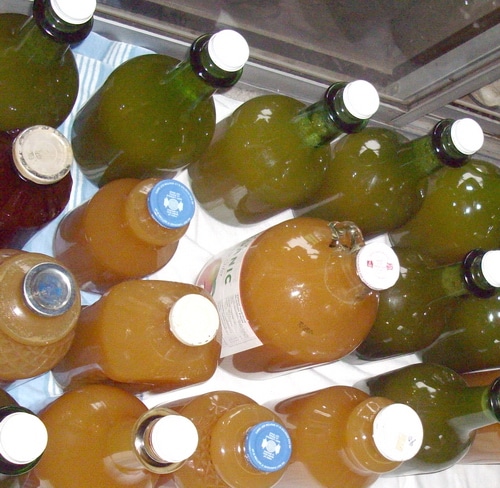
When the cider is finished the liquid will clear. There will be threads of yeast in the bottom of the bottles and a thin scoby beginning to form on the top of the liquid. This is the vinegar mother. You can save this scoby for next time, by leaving it in one of the bottles of vinegar, but you don’t have to. Next time, just use ¼ cup (per quart) of this finished vinegar to get your new batch off to a good start. You will lose 20% of your liquid through evaporation. This will concentrate the vinegar somewhat. The wider the neck of the jar or bottle that you use for the ferment, the greater will be your loss through evaporation. Since evaporation concentrates the vinegar it is beneficial.
Filtering the finished apple cider vinegar
At this point, strain the vinegar through a fine sieve, leaving the dregs in the bottom of the bottle/jar. As you pour it, the vinegar will become cloudy from the sediment but it will settle out again in the new container. You’ll be leaving behind the dregs in the first bottle. Now you can use your homebrewed vinegar anyway that you would use Braggs Apple cider vinegar. It has the same benefits and it might even be stronger. Using your home brewed vinegar, however, for vinegar pickles isn’t recommended. Commercially made vinegar is 5% acid. Your home-brewed vinegar acid profile will vary.
Troubleshooting:
If you notice any mould forming on the top of your jars your batch was contaminated. Discard the batch. It isn’t safe to consume. Begin with fresh apple cider and sterilized bottles or jars and inoculate with raw apple cider vinegar that contains the mother and try again.
The apple cider doesn’t begin to ferment on its own. You may be using pasteurized apple cider or you may have the jars in a cooler room. You can add wine yeast to the apple cider and see if that gets it off to a better start. Pay attention to the surface of the apple cider though. If the fermentation didn’t begin on its own, there may be opportunistic mould spores that colonize your batch before the yeast has a chance to work. If this happens see above. Mould in the cider is bad for you.
The bottles exploded during the first ferment. Keep the bottles uncapped during the first ferment, or use a wine airlock to keep bad bacteria out. Don’t cap the bottles tightly. The carbon dioxide needs a way of escape.
The vinegar is still fermenting after 3 months. Your room was too cool, try moving the vinegar to a warmer spot in your home, keep covered with a clean cloth, and wait a little longer.
The vinegar is sweet-tasting instead of sour. Wait another month before bottling. It will get more sour as it continues to ferment. The naturally occurring sugars in the apple cider will convert to acetic acid with time.
Now you know how to make apple cider vinegar. It isn’t a complicated process. It’s a double ferment so it seems a little mysterious. Begin it during apple picking time and put aside 2 gallons of fresh-pressed apple cider — follow the easy process and you’ll have 6 quarts of apple cider vinegar ready by Christmas. My yield for 1 gallon of fresh apple cider was 3 quarts of raw apple cider vinegar. Your yield may vary.
Apple Scrap Vinegar
You can also make cider vinegar by using the scraps from making other apple preserves like apple pie filling or dried apples. See my article on apple scrap vinegar here.

Then the best bet is to let it turn to wine and then once you have wine, open it up so that it is exposed to air, but protect it from insects. It that doesn’t turn it to vinegar in a month, you can get unpasteurized apple cider vinegar and add a couple tbsp. of that to the wine-cider. And that will do the trick.
Great read, thank you for the information. I bought apple cider from the refrigerator section of my store. The ingredients states no preservatives added but UV treated.
The last time I purchased it, it turned to wine in the refrigerator. Do you think this cider can successfully be turned to vinegar? Also I don’t have any raw ACV to add can that step be skipped?
Thank you
Stephanie, the apple cider will ferment on it’s own. Once the fermentation stops bubbling, that’s the point to add the scoby/mother into the cider.
I have successfully made my first batch of apple cider vinegar and have a beautiful scoby. I would like to use this to make future batches. Can I use just apple cider after pressing or do I need to do the first fermintation before adding the scoby.
Good article!! Thanks for the info,I feel possibly I can try this! By the way, under your trouble shooting section,you may want to change the word “mould” to “mold”,,unless of course you cider skills actually make moulding for the wood work lol 🙂