Fermented honey garlic is a tasty way to take garlic, which is less acrid than taking a raw garlic clove on a spoonful of honey. This fermented garlic is quick to make, and has many immune and health boosting benefits. It is one of the many non-culinary ways to take garlic for health.
Fermented honey garlic is a staple in my apothecary cabinet. It’s a great immune booster, and has a better flavor and less acridity than taking just garlic on a spoonful of honey. Even that method has a bit less acridity and spice than just trying to take a garlic clove on it’s own though. Honey has it’s own immune and health benefits, as does garlic, and combining the two makes it into a much more interesting herbal remedy.
I make a quart jar of this fermented honey garlic every fall, with freshly harvested garlic heads, and freshly harvested honey from my beehives. You can make a pint or quart of this blend at any time of the year, however. There’s no need to wait for fall, as long as you have a few heads of garlic on hand, or can grab them from the local store.
This fermented honey garlic is different from fermented black garlic, in that the garlic cloves are macerated in honey for several weeks. Black garlic is fermented in a crock, on it’s own, without the addition of honey. The cloves in honey will stay white, and not change color. However, some of the same fermented benefits will still be present in the fermented honey garlic, as they are in the black garlic.
Fermented Honey Garlic:
So, let’s get started. This is a fairly quick to assemble recipe and most of the time needed is wait and observation time. Since the garlic will need to be peeled, chose heads of garlic with large cloves. Many of the garlic heads in the grocery store are multi cloved, with small cloves. Chose heads with larger cloves whenever possible, as this makes peeling the garlic way easier. A farmer’s market may be a good source of local, large-cloved garlic. I love Russian Red garlic for this, due to the large clove size.
Print
Easy Fermented Honey Garlic
Description
A simple fermented honey garlic recipe.
Ingredients
- 1 to 1 /12 cups raw liquid honey, local is best.
- 1 1/2 cups peeled garlic cloves.
Instructions
- Peel your garlic cloves. There are two ways to make this easier, one is by partially slicing through the butt end of the clove, and hand peeling. The other is to slightly crush the clove with the flat of a large knife, so that the skin pops open. Use your favorite peeling method for peeling the garlic.
- Measure your cup and a half of garlic cloves into the pint glass jar. If using a quart jar, use 3 cups of garlic cloves instead.
- If your unpasteurized honey is crystalized, you’ll want to warm it in hot water before adding it to the garlic so that it pours.
- If you have already liquid raw honey, skip the warming step and simply pour the honey over the garlic until the honey reaches the shoulders of the jar.
- Stir with a flat knife, or butter knife to remove air bubbles and ensure all the cloves are coated in honey.
- Set the jar on the catch plate, and lightly secure the lid. The lid should be secure enough to not fall off, but not fully tightened down. As the fermentation process starts, bubbles will form in the honey and the gasses will need a route to escape.
- Burp the jar every 12-24 hours as the fermentation process starts.
- If the garlic starts floating, secure the lid and flip the jar for a few hours to let the garlic move through the honey and keep the fermentation going. As the garlic juices mingle with the honey, the honey will thin and the garlic is more likely to float.
- The main active fermentation will conclude about 3 days after the fermentation process is started, if your house is warm. It can take up to a week if your house is cooler or if it’s kept in a cool spot. It is safe to let the fermented honey garlic ferment for up to two weeks. The longer it ferments the more melded the flavor will be, the less allicin and more flavinoids, and the more the honey will take on the garlic tones.
- When you’re satisfied with your fermented garlic honey, move it into the fridge to stop the fermentation process.
- The fermented honey can be used in sauces, and as a condiment. The garlic can be included in culinary dishes, or eaten along with the honey as a herbal preparation.
What you need:
- A pint or quart sized wide-mouthed glass mason jar.
- A well fitted lid, two part works.
- A small plate or tray to rest the jar on
Ingredients:
- 1 to 1 /12 cups raw liquid honey, local is best.
- 1 1/2 cups peeled garlic cloves.

Directions:
- Peel your garlic cloves. There are two ways to make this easier, one is by partially slicing through the butt end of the clove, and hand peeling. The other is to slightly crush the clove with the flat of a large knife, so that the skin pops open. Use your favorite peeling method for peeling the garlic.
- Measure your cup and a half of garlic cloves into the pint glass jar. If using a quart jar, use 3 cups of garlic cloves instead.
- If your unpasteurized honey is crystalized, you’ll want to warm it in hot water before adding it to the garlic so that it pours.
- If you have already liquid raw honey, skip the warming step and simply pour the honey over the garlic until the honey reaches the shoulders of the jar.
- Stir with a flat knife, or butter knife to remove air bubbles and ensure all the cloves are coated in honey.
- Set the jar on the catch plate, and lightly secure the lid. The lid should be secure enough to not fall off, but not fully tightened down. As the fermentation process starts, bubbles will form in the honey and the gasses will need a route to escape.
- Burp the jar every 12-24 hours as the fermentation process starts.
- If the garlic starts floating, secure the lid and flip the jar for a few hours to let the garlic move through the honey and keep the fermentation going. As the garlic juices mingle with the honey, the honey will thin and the garlic is more likely to float.
- The main active fermentation will conclude about 3 days after the fermentation process is started, if your house is warm. It can take up to a week if your house is cooler or if it’s kept in a cool spot. It is safe to let the fermented honey garlic ferment for up to two weeks. The longer it ferments the more melded the flavor will be, the less allicin and more flavinoids, and the more the honey will take on the garlic tones.
- When you’re satisfied with your fermented garlic honey, move it into the fridge to stop the fermentation process.
- The fermented honey can be used in sauces, and as a condiment. The garlic can be included in culinary dishes, or eaten along with the honey as a herbal preparation.

Using Fermented Honey Garlic:
The garlic-infused honey is safe for adults to take. However, due to the potentiality of honey harboring botulism spores, it is not recommended for children under one to have honey of any form. The fermentation is done by different bacteria, and there is no danger of botulism for adult digestive systems from honey, or fermented honey. The danger is only to under one year old infants, as their digestive systems are not fully developed yet.
I like taking the fermented honey garlic by the spoonful during cold and flu season as an immune system booster, alongside fire cider. The flavor is mild enough that the garlic doesn’t burn, and the honey helps sooth. It’s a good blend for soothing a sore throat, and the honey can also help suppress coughing.
Honey garlic is also a great flavor for use in marinades, like those for chicken wings, and for other culinary purposes. It’s a tasty addition to sweeten up salad dressings, without having to mince garlic too. It blends well with apple cider vinegar for dressings, or if you use apple cider vinegar in fire cider, or as a medicine, it can pair well.

Garlic Benefits:
Garlic has many health benefits and has been researched for it’s heart healthy properties, including lowering cholesterol. Fermented garlic, and fermented black garlic, have higher anti-oxidant properties compared to raw garlic. You can learn more about black garlic here.
The compounds in garlic can have a blood pressure lowering effect. Garlic is often used against infections, especially bacterial, and many people take garlic for seasonal illnesses like colds and flu.

Garlic, on it’s own, can be hard on tummies, though fermented garlic is less challenging on the stomach than raw garlic. If you don’t want to take garlic due to nursing, or due to sensitivity to garlic in the tummy, then there are other herbs to use too. It’s always good to have multiple herbs in your knowledge base and alongside garlic, ginger is great for colds and flu too.

A Little Ginger Therapy for Colds and Flu
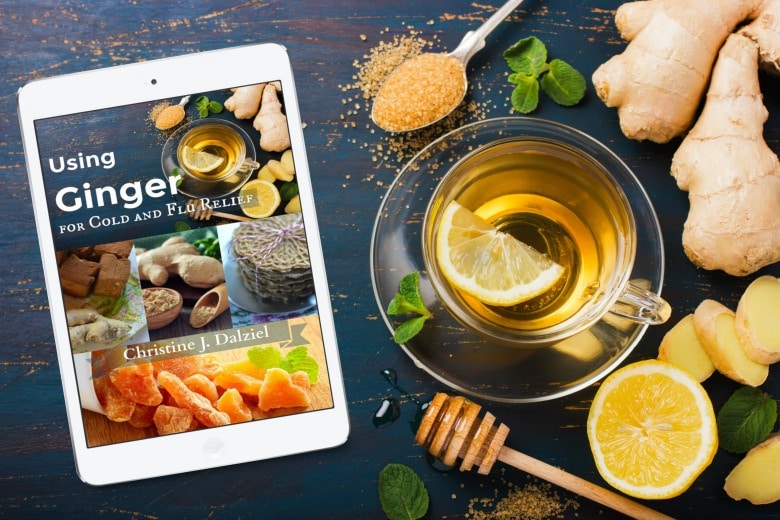
You probably already have ginger at home, too. You can use ginger for quick relief of a headache, cough, congestion, and even nausea. I was updating my DIY Herbal Apothecary Course this week to add more downloadable files (one of my New Year goals) and in the process went down the “rabbit hole” digging deep into the benefits of Ginger. I created this ebook, Using Ginger for Cold and Flu Relief so that you can feel better faster, using what you already have in your kitchen.
You can download a copy of this FREE the Using Ginger for Cold and Flu Relief ebook here.


Take the garlic cloves with the honey.
First time to make garlic honey. Wanting to know: do you strain the garlic cloves out prior to refrigerating. Do you ‘take’ only the honey? What about the garlic cloves – can it be used – or can they be eaten with the honey? Thanks in advance.