Learn how to grow sprouts and add fresh greens to your diet all year round. Sprouting is an inexpensive way to grow your own fresh greens through the winter months, in any size space. It is a flexible, fun, and tasty hobby to help your health and self-reliance.
I’ve been sprouting for almost 40 years as a regular part of our indoor food growing, especially in winter. We sprinkle sprouts on bagels, egg dishes, salads, sandwiches and even in soup and rice dishes. Sprouts are an easy way to get those 9 servings of vegetables in, especially when the garden is covered in snow.
Sprouting is almost fool-proof. Seeds want to grow. If you give them moisture and the correct temperatures for germination, they will grow.
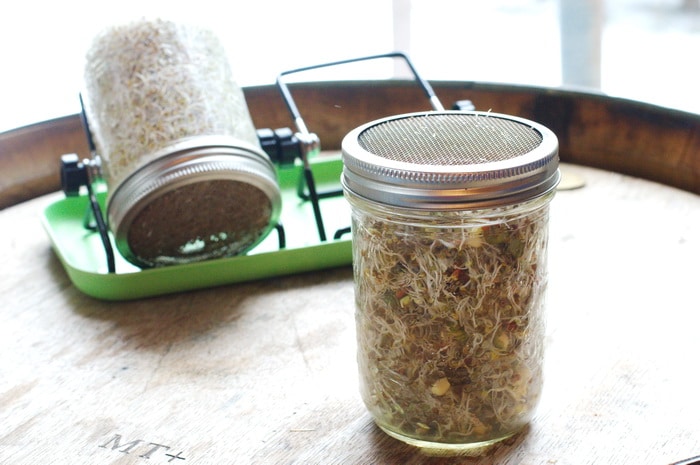
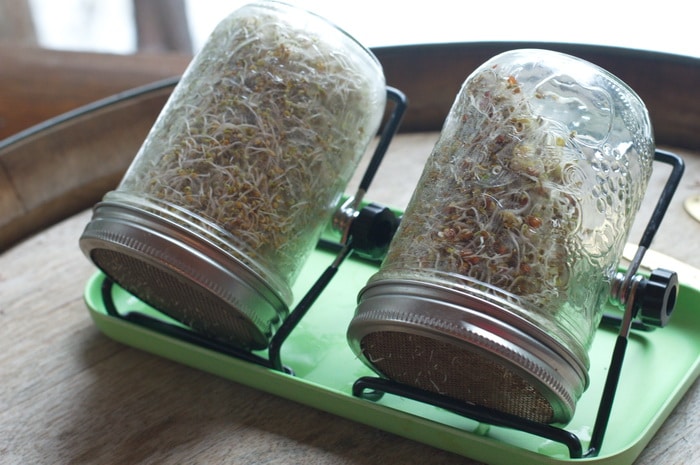
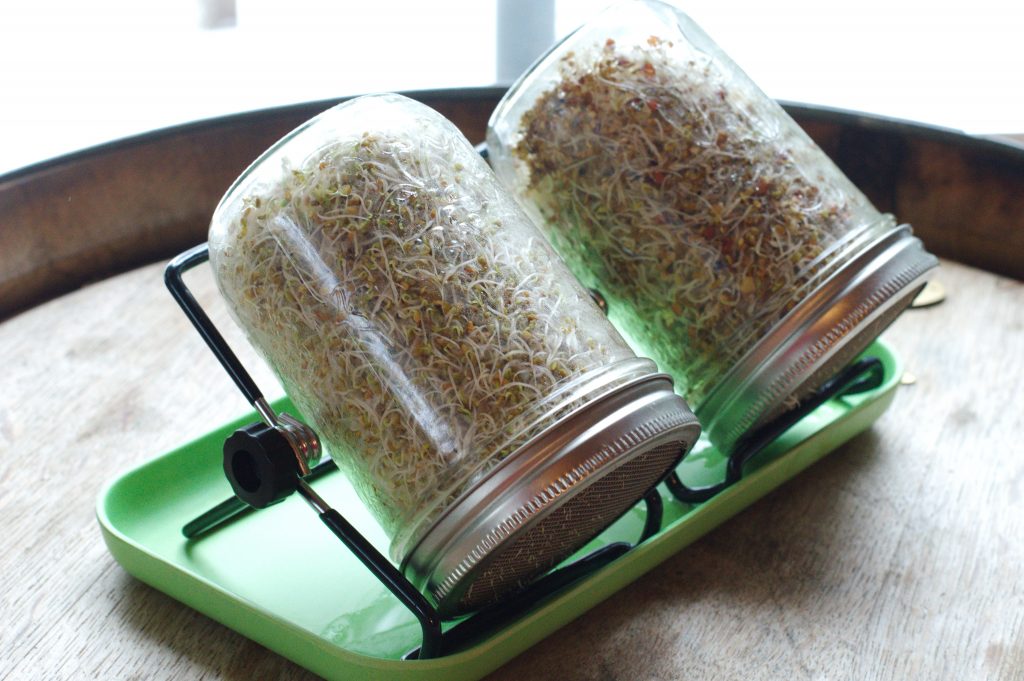
I’ve used various methods for sprouting from dedicated sprouting trays, Mason jars with window screen over the jar opening, held on with a rubber band, muslin bags, and more. My favourite sprouting lid right now is a stainless steel screen with stainless steel jar ring, that fits a wide mouth mason jar. I have a stand that holds the jar upside down at a 45-degree angle for optimal drainage. Using this set up I get fresh sprouts every 4 to 5 days, keeping us in a wide variety of sprouts to support our winter menus.
If you are new to sprouting or it’s been a while since you used your sprouting equipment, use this tutorial to get up to speed quickly.
Sprouting is easy
It packs a nutritional punch that has kept armies on their feet. The Russian army beat Napoleon because of the wheat sprouts in their woolly pockets. Full of vitamin C, enzymes, minerals, and vitamins, with increased protein, sprouts will help you add variety and nutrition to your diet. Sprouting increases the anti-oxidant value of seeds while removing the antinutrients. Learning how to grow sprouts is simple, easy, and fun.
- You can grow sprouts with inexpensive equipment
- You can do it year-round, on your kitchen counter, in your kitchen, even without a window.
- When you grow your own you get a pure, uncontaminated food
- Sprouts are high in vitamin C and were used in the past to prevent scurvy on long naval voyages.
- Sprouts support your health and natural immunity by giving your immune system the building blocks your cells need
Have I convinced you to learn how to grow sprouts?
Let’s get started.
To grow sprouts you need:
- A wide-mouth glass jar with a screw ring lid, or better yet 3 or 4.
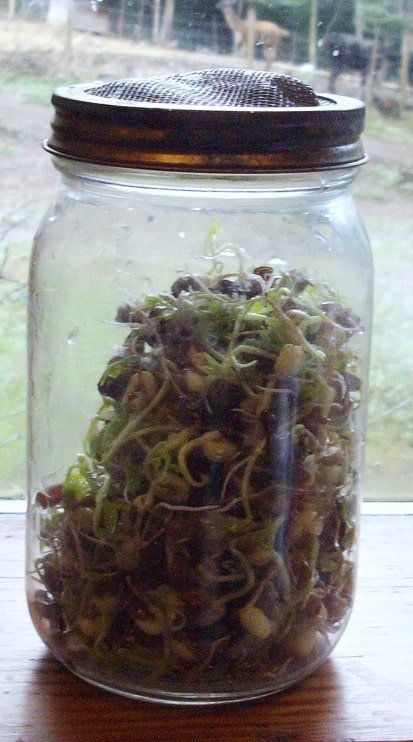
- A stainless steel screen lid with canning jar ring (or another way to cover the top but let water in and out)
- Seeds to sprout
- Potable water
Step 1: Put 2 to 3 tablespoons of seeds for sprouting into a jar. Cover seeds up to 1 inch over the top of the seeds with water. Place screen inside the ring. Screw the ring on the jar.
Step 2: Allow seeds to soak for 3 to 8 hours. (This varies depending on the kind of seed. Smaller seeds need less soaking time) Drain. Leaving most seeds overnight is fine. Broccoli seeds should only be soaked for 3 hours. Don’t leave them longer than this as they will become starved for oxygen.
Step 3: Rinse the seeds in freshwater. Turn jar onto drainboard to fully drain. Repeat this step twice daily about 12 hours apart. If you forget, the seeds can dry out and not sprout properly. When learning how to grow sprouts, it may be a good plan to write a reminder.
Step 4: Some seeds will be ready in 4 to 5 days. Some take a little longer. Once your sprouts are ready to eat, dump the contents of the jar in a colander. Rinse well, and stir it to get rid of the spent seeds. The spent seeds will be flushed away through the wide holes in the colander. While the sprouts will be retained.
This step will ensure that your sprouts last at least a week in the fridge. The spent seeds will speed the deterioration of your finished sprouts so remove as many as possible. Drain in the colander for at least an hour.
Step 5: To store your sprouts, place a folded paper towel in the bottom of a glass container. Add your sprouts. Top with a second folded piece of paper towel. This will absorb excess moisture while preventing your sprouts from drying out. Cover with an airtight lid. Store in a spot in your refrigerator where there is no chance of freezing. Sprouts will last 5 to 7 days in storage.
Repeat steps 1 to 4 at 3-day intervals to keep your home in freshly grown sprouts.
Some seeds to try sprouting:
-
- Mung bean sprouts and adzuki bean sprouts are easy to grow and ready in only 4 days. For long straight sprouts though you will need to use a special growing technique. Using a jar you’ll get curly sprouts that are still delicious. Use 3 tablespoons per quart jar.
- Other beans will also sprout — Stir fry them or steam them briefly before you eat them. Beans have an anti-nutrient that needs brief cooking before they are digestible. Don’t sprout soybeans — they need to be fermented for up to 2 years to make them safe to eat.
- Alfalfa seed, clover seed, Cress seed are easy to sprout too.
- Radish seed, kale, cabbage, kohlrabi, or turnip seed and other Cole plants. Radish sprouts can really spice up your winter food. These sprouts are high in cancer-fighting sulforaphane, too.
- Lettuce seed, onion seed, chive seed, beet seed are slower to sprout and I prefer to use these as microgreens.
- Red clover seed makes a mild and juicy sprout that is high in protein and vitamins. Red clover is also a source of phytoestrogens that are great for bone health and hormone balance. Use 2 tablespoons per quart jar.
- Wheat, barley, oats are all easy to sprout but don’t use these seeds if you have a gluten-allergy.
- Broccoli sprouts are a little tricky to sprout but it’s worth the effort because it is one of the highest sources of sulforaphane. See this post on sprouting broccoli seeds. Use 3 tablespoons of broccoli seed per quart jar.
- Fenugreek sprouts have become my new favorite. They taste and smell like maple syrup though some people describe the flavor as slightly bitter. Like clover they are a legume and have some hormone balancing benefits. Fenugreek is a key food for nursing moms as it support a robust milk supply. Use 3 tablespoons per quart jar.
- Lentils, another legume, grow quickly and develop some earthy spiciness when they are sprouted.
Are there any seeds that you shouldn’t sprout?
Avoid seeds from plants with known toxicity such as tomatoes, peppers, and eggplant. But of the seeds that are known to be safe and edible, some grow better as microgreens rather than sprouts.
Any seed that takes more than 4 days to germinate has a risk of bacterial contamination. But these seeds can still make delicious microgreens.
Sunflower seeds and sunflower sprouts are not that exciting but sunflower microgreens can be used as a salad all on their own.
Other slower growing seeds like amaranth, beets, chard, basil, chives, make delicious microgreens.
Cautions
Don’t use seed that has been treated with a fungicide. Some seed has been treated with an anti-sprouting compound — don’t use those seeds.
Use seed that you grow yourself or seed that is sold as sprouting seed. Garden catalogue seed might be contaminated with bacteria. Seeds sold specifically for sprouting or human consumption have normally been tested against pathogens like e. Coli, listeria, and other foodborne illnesses. So choose seeds for sprouting that are sold specifically for sprouting or microgreens.
You can grow your own seeds for sprouting. Just allow bok choy, radishes, kale or broccoli to flower and go to seed. Save the seed before it falls to the ground and finish drying in the house. Winnow the seed to remove chaff and store in a glass jar in a cool, dry place. Use your homegrown seeds in your seed sprouting arsenal now that you’ve learned how to grow sprouts.
What do you do with the seed once it’s sprouted? Use it in salads, as a sandwich filling, add it to your veggie juice or morning smoothie, eat it right out of the jar as a snack.
Here is my favourite salad using sprouted seeds. This is easy to make after you learn how to grow sprouts.
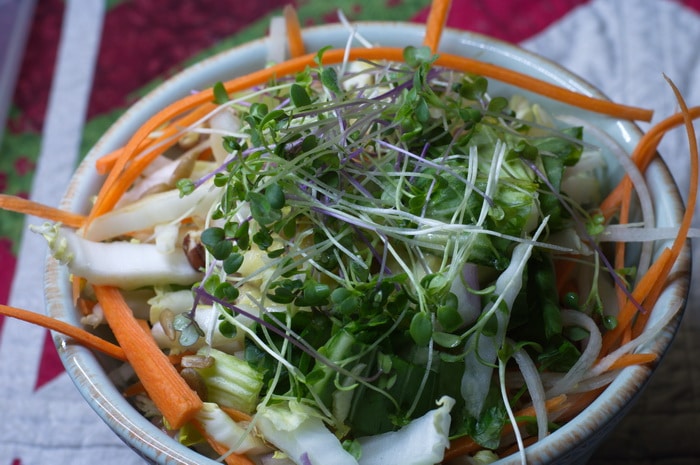
Napa Cabbage Salad with Ginger dressing topped with purple kohlrabi and broccoli sprouts.
Where to find sprouting seed to sprout? This post has a curated list of sprouting seed and microgreen seed suppliers for you to peruse.
New to growing sprouts?
Check out the Fill Your Salad Bowl workshop and learn how to use 3 different growing methods, at home, so you can fill your salad bowl with super food, nutrient dense, greens every single day. These are greens you can use in your salad bowl, greens you can add to soups, stews, and pasta dishes, and even greens you can use in a stir fry.
In this mini workshop you will learn how to fill a salad bowl every day with food you grow yourself.
- Even if you don’t have any land.
- Even if there is 3 feet of snow covering your garden
- Even if you’ve killed house plants in the past.
- Even if you think you have a black thumb.
Have a look at what’s covered in this workshop and see if its a good fit for you, by clicking/tapping the blue button below.





I wish I would have read this sooner. I’m on day 4 of my sprouts and they smell awful. My roots are slimy. I didn’t know that I needed to make sure they were well drained before putting them back on the base. I’m using a stainless steel screen pan w/ lid. The extra water laid in the bottom of the pan and unfortunately, the roots laid in that water. Well, time to start over!
Hello Chris and thank you so much for all of this information! I just placed my first order from Mumms Sprouting and I’m so excited. I also purchased two lids with that great stand for draining.
It will be such a treat to eat fresh sprouts and micro greens while there’s still over a foot of snow in the backyard in Edmonton!
I use 2 tablespoons in a pint jar or 3 tablespoons in a quart jar. This is just a general guideline. For larger seeds like peas, mung beans I use 1/4 cup of seeds per quart jar (aka. 4 tablespoons).
2 Tbsp. of seeds in a pint jar? The photo is of pint jars. Just confirming.