
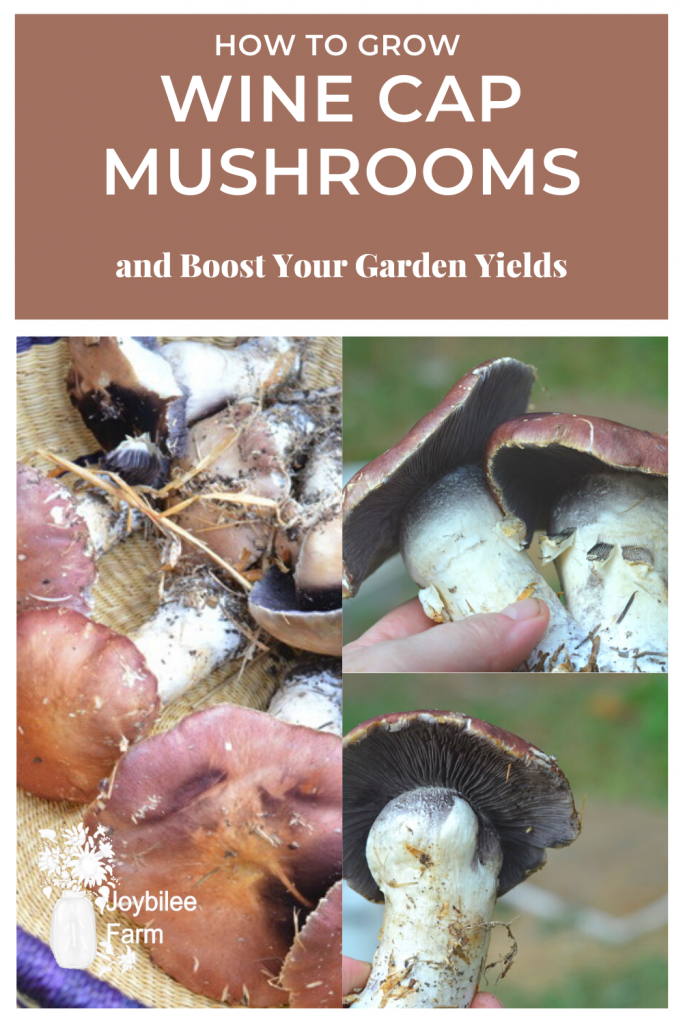
Wine cap mushrooms, also known as king stropharia, or garden giant. Whichever name you call them by, this gorgeous dark burgundy mushroom is a gardener’s dream come true. These giant mushrooms are both fun, and easy, to add to your garden.
Whether you have mulch paths, use the “back to Eden” method, or decide to create a hugulkultur bed for them, Stropharia rugosoannulata or Wine Cap Mushrooms are an easy to include, second crop, for your garden space. These mushrooms need soil contact, and straw or wood chips to use as a growing medium. These mushrooms also act as companion plants, consuming soil nematodes, improving soil fertility and available nutrients, attracting worms, and generally being beneficial background garden friends. When wine cap mushrooms are seeded under fruit or nut trees they increase the number of flowers and fruitfulness by making more nutrients bioavailable to the trees. They are excellent companion plants in a the garden and in the orchard.
Once added to a gardening area, wine cap mushrooms will begin producing mushrooms in 3 months, to one year.
Growing wine cap mushrooms
Wine caps mushrooms can be started outdoors anytime between spring and fall, though the earlier you begin the more mushrooms you’ll have a chance to harvest. There is no need to wait until all danger of frost has passed before you start wine cap mushrooms. Mushroom mycelium is very cold hardy and will grow under a thick straw or wood mulch without being damaged by frost. Stropharia rugoso-annulata can be grown in shade or even in full sun. It is one of the few mushrooms that don’t mind sunlight.
To get started you’ll need:
- Wood chips, no more than 25% conifer or soft woods, and hardwoods are prefered.
- A bag of sawdust spawn for wine cap mushrooms (1 bag per 16 square feet of mulch-able space)
- Mulched space, around trees, bushes, shrubs, or garden paths
- Cardboard or landscape fabric
Wood chips, particularly if a fresh chip drop, need to be aged for 2-3 days before the mushroom spawn is added. However, chips dry out faster than whole logs, so should only be aged a few days, not a few weeks. This is to let the wood’s natural anti-fungal properties degrade enough for the spawn to easily take hold. Wine cap mushrooms are a naturally aggressive mushroom type, and can grow on nearly anything. To help inhibit other mushroom varieties, however, chips should be placed on top of cardboard. A cardboard or landscape fabric barrier will also help reduce weed re-growth through the mulch. Plan to replenish the wood chips in the spring or if you see other mushrooms getting a foot hold in your bed.
You can either store chips in a pile for three weeks, and then place in the mulch zones, Or, you can place cardboard as an additional layer of weed suppressant, and layer the wood chips and mushroom spawn on top.
Inoculating new chips with wine cap spawn is best done in early spring, while there is still a lot of rain. If you do it later in the year, you will have to water the mulch, rather than relying on the local weather to keep the bed moist. Mushrooms need moisture to full colonize the wood chips.

Placing Wine Cap Mushrooms and Mulch:
Use hardwood chips that are at least 2 weeks old. These can be fresh chips that have been aged two weeks, or branches that were aged two weeks or more and recently chipped. If you don’t have a supply of wood chips, bagged hardwood pellets, like the kind sold for pellet stoves will also work. These won’t need to be aged. Just add water to dissolve the glue coating and fluff up the sawdust before applying it to your mushroom bed.
If it’s your first year adding mushrooms to your garden, don’t worry about inoculating every single mulched area in your yard. Chose a few trees, or bushes, to add the mushrooms to first. Once those are established, it will be easy to propagate the mushrooms to the rest of your yard.
I highly recommend adding wine cap mushrooms to the root zone of walnut and butternut trees. These trees produce a natural growth inhibitor, known as juglone, and the mushrooms will help break that down so you can plant sensitive plants closer to those trees.
Place cardboard in the areas you want the mulch to be a strong weed-control, and trim back any grass or weeds that are in the area. If working with a front yard, you may want to use landscape fabric for this. If landscape fabric is already present, you do not need to remove it or add another barrier layer before placing fresh wood chips.
- Cardboard should be the plain paper style cardboard, no glossy cardboard.
- On top of your barrier layer, place one inch of wood chips.
- Dampen down the wood chips with a mister, or spray hose.
- Sprinkle your wine cap mushroom sawdust spawn in a very thin layer over the chips.
- Add two to three inches of chips on top of the first layer and soak down again.
Water your plants normally. If using drip irrigation, hand water the mulch zone where the mushroom spawn is at least twice a week. If you are using sprinkler irrigation, your normal watering schedule should be sufficient for the mushrooms to proliferate in the mulch. It took about 60 days for the area under my butternut trees to fruit.
Mushrooms will myceliate the substrate first — in this case it’s the cardboard and chip mulch. Once the mycelium is completely through the substrate, the fruiting bodies begin to form. They will emerge when the temperature and humidity is right for the spore to survive. Usually that’s in spring and fall, but if your climate is cooler you may see fruiting in the middle of the summer.
Increasing Your Wine Cap Mushroom Area:
Your first mulch-zone of wine cap mushrooms should begin producing the following spring, at latest. If conditions are right you may see fruiting within 2 months of planting, as I did. Wine caps are aggressive colonizers and move through the substrate quickly. Once you start having wine caps fruiting, it is easy to spread them to other portions of your yard, wherever you have a wood-chip or straw mulched area. Winecaps don’t grow as easily in conifer wood chips, though, so make sure the wood chips you are using are hardwood.
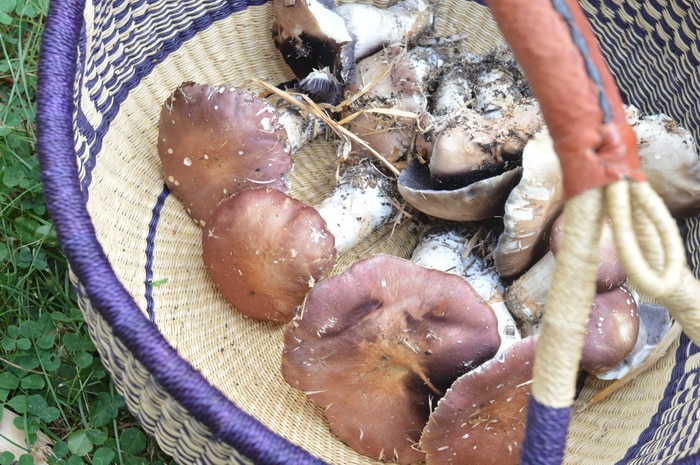
When you harvest fresh wine cap mushrooms, pull them out of the ground and then trim off the lower, dirt-covered end. There will be threads of mycelium on the stem end of the mushroom. After trimming all mushrooms, take the stem ends and tuck them under the mulch in the next area. The mushroom mycelium will take it from there, and next year you’ll have an extended mushroom patch. Repeat this process, with the stem ends, until all your mulch areas are also growing mushrooms!
Wine Cap Look-Alikes
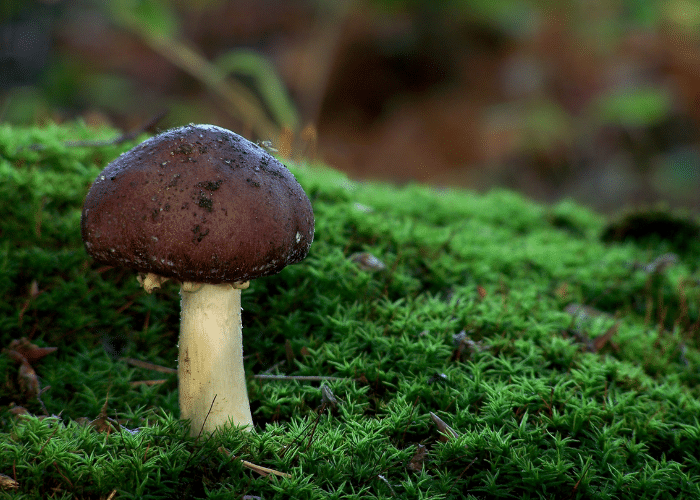
Wine caps have a deep burgundy or tan-brown cap (depending on sunlight exposure). They have some dots around the edge of the cap and might be marked on the top. They have a veil when open and lavender-grey gills, l Mature specimens are flat topped with a paler, tan cap.
The color of the cap can vary from deep burgundy to almost tan, but never white. It has a white stalk and a ring veil will be visible if the cap is open. As they mature the ring travels down the stalk and breaks apart into radial pieces, giving it the appearance of spokes on a wheel. Know what it looks like, so that you don’t confuse a large white, potentially toxic mushroom for wine cap mushrooms.
Large white amanita mushrooms have scaly caps and can look similar to Wine caps in the button mushroom stage. But they are white or cream and lack the coloring of wine cap mushrooms.
When to harvest wine cap mushrooms
I prefer to harvest wine cap mushrooms at the button mushroom stage when the caps are still closed. They are dense and meaty at this stage and easy to slice for dehydratrating. I go out every other day over a few weeks to harvest the young mushrooms. If left to mature this Godzilla mushroom can reach up to 5 pounds per mushroom, but eating quality is not as good. Start looking for mushrooms to harvest anytime after the first six weeks after planting. They will continue to produce till early Fall when the hard frosts come. Mulch the bed with organic matter like sawdust, wood chips, or straw again after the final harvest to protect the mycelium during the winter and give the mycelium food for next season.
![]()
![]()
Predators to Wine Cap mycelium
Honey bees will harvest the metabolites of mushroom mycelium from the soil. A honey bee colony can strip a wine cap bed in a few days. Your best prevention is to create many areas for the wine caps to grow in your garden beds and under fruit and nut trees so that the honey bees have a wide area to choose from. Earth worms are also drawn to mushroom mycelium and can devastate a small patch of mushrooms. Again your best defence is to grow mushrooms over a wide area, giving them an opportunity to out compete the worm population.
How to Eat Wine Cap mushrooms
Wine cap mushrooms can be eaten in the same way that you eat button mushrooms. Clean them with a quick dip in water to remove any sawdust. Slice them thinly or just cut in half or quarters. Fry them in butter. They have a mild flavor that takes on whatever you fry them in making them ideal for sautéing, braising, frying, or grilling. It’s important to cook them completely, as raw mushrooms can contribute to gastric upset. Experts suggest that you limit wine cap consumption to no more than twice a week, to avoid stomach upset.
How to Preserve Wine Cap Mushrooms
To preserve wine cap mushrooms use a dehydrator. Slice the wine cap mushrooms into 1/4 inch slices. Lay in a single layer on dehydrator mesh trays. Dry at 115F. for 8 to 12 hours. Vacuum seal dried mushrooms in glass jars with oxygen absorbers for long term storage.
Learn more about growing mushrooms in the garden
Sarah’s new book, Growing Mushrooms for Beginners, A Simple Guide to Cultivating Mushrooms at Home, is available on Amazon and Barnes and Noble. In this concise resource Sarah guides you step by step through growing mushrooms on logs, on straw, on wood chips in the garden, or even in Mason jars in your kitchen. The book includes instructions for growing seven mushrooms including shiitake, oyster, lions mane, garden giant/wine cap, and more. Learn the unique characteristics, flavors, health benefits, and specific growing requirements for each mushroom as well as space saving tips and recipes to get the most out of your mushroom harvest.
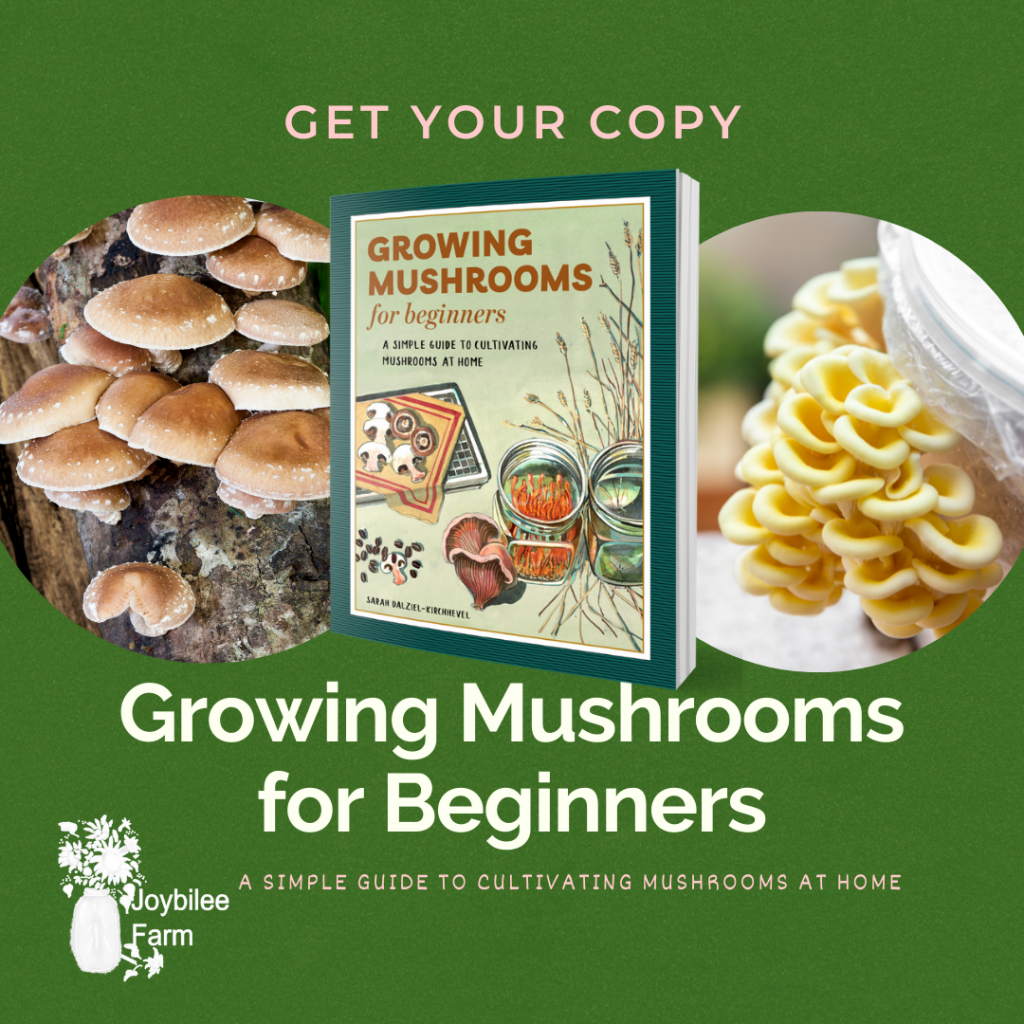
Get your copy of Growing Mushrooms for Beginners now.


Leave a Reply