Weave a rustic, round willow basket, part 3 – weaving the “upsett”
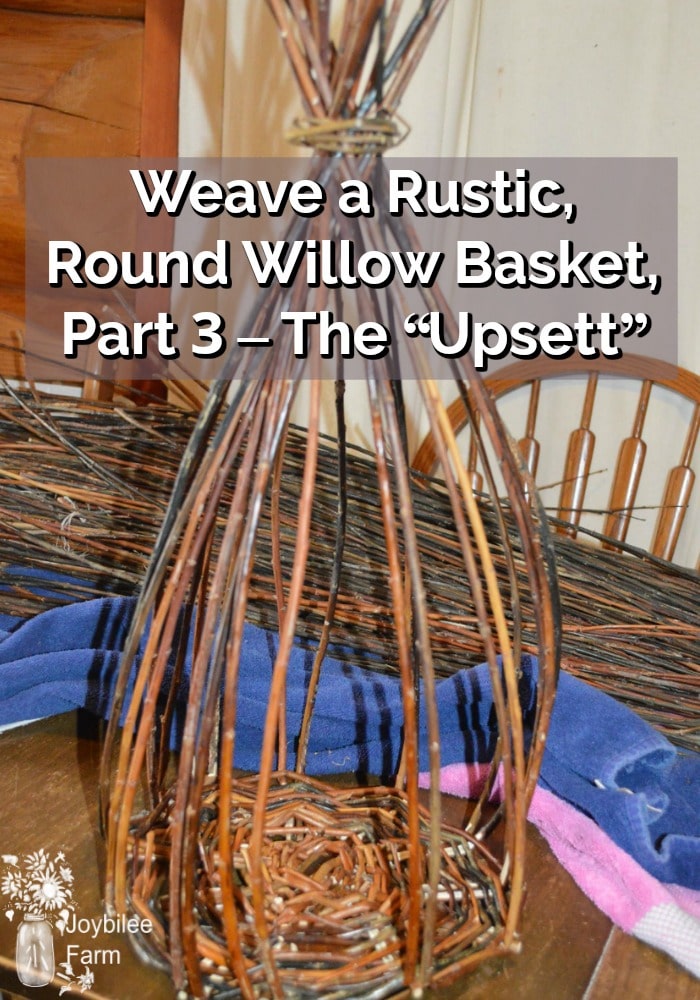
Basket weaving is a skill that can be learned. This is part 3 of the tutorial, where I’m going to show you how to do the “upsett”. Check out all 5 parts of this series to learn how you can make your own willow basket.
Basket weaving is one craft that cannot be done by machine. It takes human hands to weave a basket. I love that about basket weaving. Even when basket weaving is done industrially and mass-produced, like wicker laundry baskets made in China, there is a human signature to every one of them.
Meet Jano Demandre, willow weaver, following family tradition
Professional basket weavers create uniform, aesthetically pleasing, balanced baskets. Each basket is a work of art. There’s a young basket weaver in our community, Jano Demandre, who comes from a long line of French basket weavers, going back hundreds of years. He grew up on a homestead on Hardy Mountain, near Grand Forks, where the family is known as the “French basket weavers.” He learned basket weaving from his father, a professional basket weaver and artist on Salt Spring Island. We have two of Jano’s remarkable baskets, from Hardy Mountain Baskets. Jano also sells his baskets at the Gallery 2 gift shop, in Grand Forks, and at his dad’s basket weaving studio on Salt Spring Island, BC, Canada.
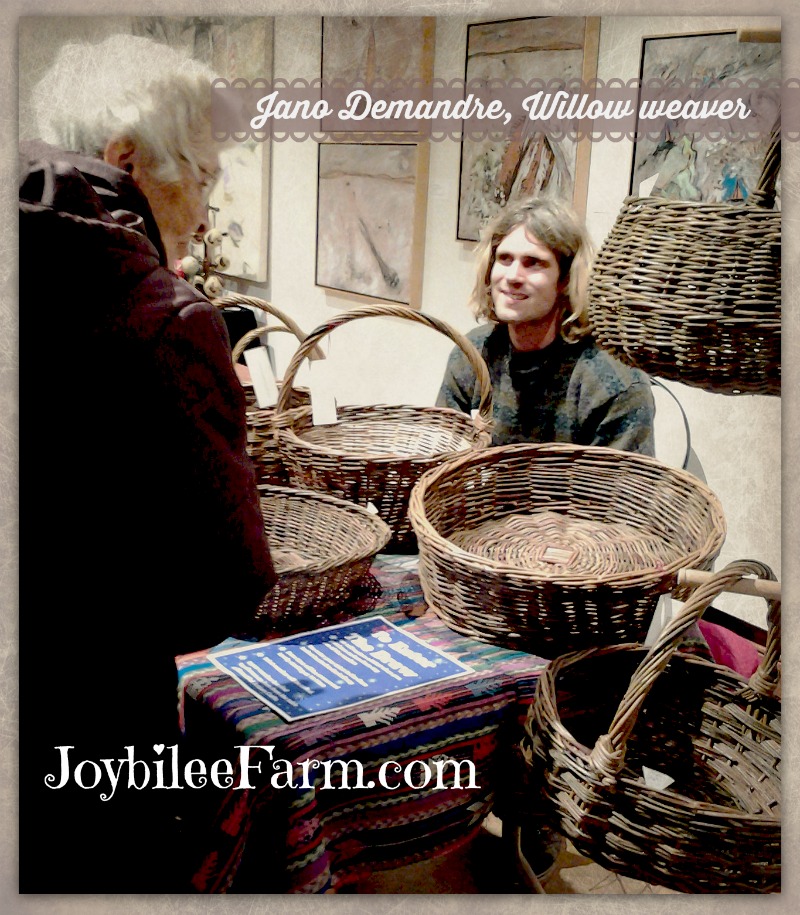
Jano was one of the artists at the Gallery 2 Christmas Faire last December (2013). Sarah watched his booth for part of the show, and we had a chance to talk baskets with him for 2 days. Jano made all the baskets for his booth in about 2 weeks, working just in the evenings – about 40 baskets – average price $45-$55. He wove baskets as he sat and spoke to visitors at the show and his hands intuitively worked through each step, evidence of years of craft practice. I was amazed to see his thoughtful dexterity with the willow rods. There was a pile of them damp and wrapped in newspaper on the floor of his booth. He soaked his willow at home in the bathtub using hot water and wrapped it in newspapers to keep it damp for weaving. Jano confessed that his biggest hindrance to success was his own slothfulness. He had to “put his head down and make baskets.” Good advice, don’t you think?
The Demandre family grows specialty basket willows on their homestead, just for their own craft. The rods are long, straight, and fine. Jano learned, from years of weaving willow baskets with his Dad, how to pick just the right rods from the pile of soaked willow rods, for each aspect of his basket.
His baskets are symmetrical and perfectly shaped. The ribs rise in a bowl shape up the side of the basket and each rib is equidistant from the other ribs, forming even spokes around the circumference of the basket.
My baskets are as unlike his beautiful works of art, as a child’s sketch of a chickadee is unlike a Batemen masterpiece. It doesn’t bother me. I am a beginner basket weaver. Maybe one day Jano will teach a workshop on willow basket weaving, and I will be one of his students. After such a workshop, my baskets still won’t look like Jano’s baskets. There are hundreds of hours of body memory, and thinking intuition behind every one of Jano’s baskets. And there are only a few hours of learning behind each of mine.
As you weave your first few willow baskets, don’t be discouraged if your own basket doesn’t look professional. Don’t be discouraged if there are gaps between the base and the sides, or if the basket ribs are unevenly spaced up the sides of the basket. Basket weaving is a skill that can be learned. While you might think that Jano was born being able to weave baskets, due to his genetic code, most likely he also had to invest the time to learn.
“Don’t despise the day of small things.” You are making a beginning now. Invest the time. Even if you don’t like your first, second, and third baskets, keep making baskets, keep weaving. Grow some willow in your yard (away from your house foundation and septic field) and rejoice in a craft that doesn’t cost much money. Develop your skills. Invest in a workshop or two. I venture to guess that after you’ve woven 25 willow baskets, you’ll weave better baskets than I do – unless I also weave 25 more baskets.
How to weave a round, rustic, willow basket – what we’ve covered so far
In part 1 of this series I showed you how to gather your willow, dry it, and then soak it to ready it for basket weaving.
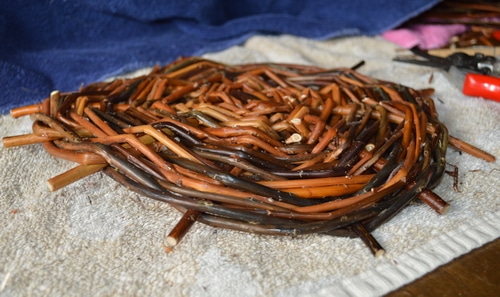
Base before trimming, showing the spaces where the slyped stakes will be inserted, one on each side of every base stake.
In part 2, I showed you how to weave the base for a round, rustic, willow basket. The base can be used as a trivet or hot plate or it can be the base for a round basket. Expert willow basket weavers often weave a lot of basket bottoms like this one, for future basket weaving sessions.
In part 3 of this tutorial, I’m going to show you how to do the “upsett”. This is where your basket changes from a flat trivet or tray to a 3-dimensional basket. Let’s get started.
Staking up and upsetting
When you learn a new craft, there are always new words to add to your vocabulary. The handwork is confusing enough but adds to it, what seems at first, like a brand new language, and the task of learning can be overwhelming.
Basket Weaving terms defined
So let’s begin by demystifying some basket weaving terms.
Mary Butcher, in her book Willow Work (1986) defines “staking up” as “The process of putting stakes into the base.” The “stakes” are the thicker willow rods that will become the foundation for the sides of the basket. In weaving terms, these are the “warp” for your basket weaving, while the weavers themselves are more like the “weft.”
“Upsetting,” as defined in Willow Work is the weave used after the stakes are pricked up to hold them into position.
“Stakes” are the thicker willow rods used for the framework of the basket, as oppose to the weavers, which are referred to as “rods.”
“Pricking up” is defined in Willow Work as, “The turning up of the stakes after staking up. A knifepoint is pushed into the stake and turned through a right angle while the rod is lifted with the other hand.”
“Slype” is the 1 inch long diagonal cut, made with a knife, in the butt of the willow rod. It is used in the staking up to help the rod slide into the base of the basket.
Staking up
Take the base that you wove in part 2 of this tutorial, and place it with the convex side facing you and the concave side down on the table, away from you. Your basket will side on the concave side of your base, giving it a firm footing.
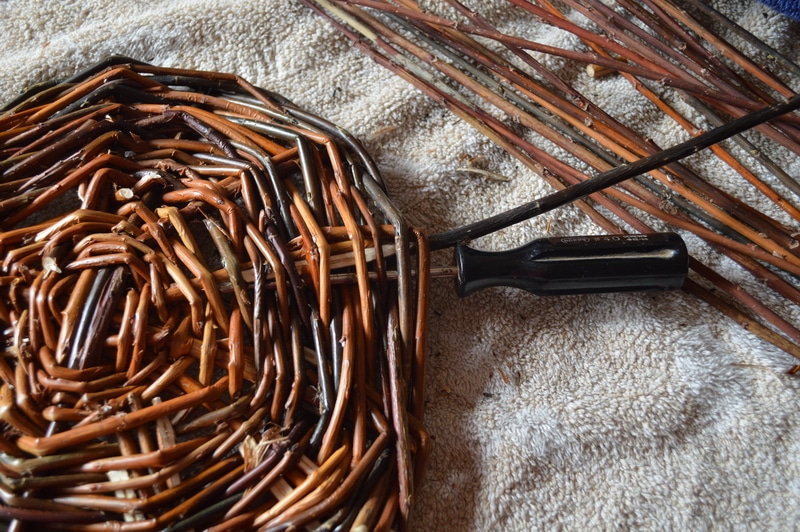
Pick 24, straight, unbranched, willow rods. Match them as closely as possible for width and length. These will become the stakes in your basket and will determine the final shape of the basket. Be sure they are well soaked and flexible.
Determine the belly and the back of each rod, as you did when you wove the base. Slype each rod by making a 1-inch diagonal cut in the belly of each rod. Find the belly by gently bending each rod in the direction of its natural curve. Make your cut on the inside of the curve. Slype all 24 rods.
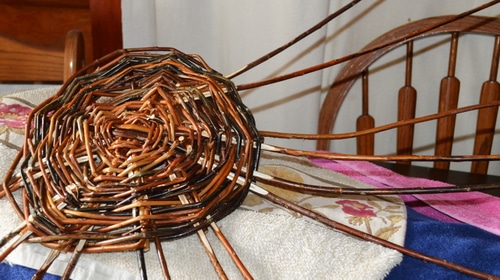
You are going to push each slyped stake into the base beside each base stick – one on each side of each base stick. Push your bodkin down beside one of the base sticks, getting it as close to the base stick as possible. Dip your slyped stake in water, to lubricate it, and slide it into the space made by the bodkin. With the belly of the rod facing you and the convex side of the base facing you, place a slyped stake in the space. Then do the same on the other side of the stake with a second slyped stake. You will have one stake on each side of the base stake.
Insert two slyped stakes at each base stake – one on either side. Continue until you have placed all the slyped stakes. Your base will look like the sun with rays evenly spaced around the base, in pairs.
Pricking up
Pricking up allows very sharp bends to be made in the rods without breaking them. If a rod should break during this step, simply remove it from the base, cut off the broken end, slype it again and put it back in the base, where you took it out.
With the convex side of the base facing you, place the base on a firm surface, like a table. You’ll need both your hands for this part and you won’t have a hand to hold the basket steady on your lap. Using the tip of your pocket knife, prick the slyped stake at the place where it meets the outer edge of the base. Push the tip of the knife into the stake at this point. Using your non-dominant hand, bring the stake into a vertical position while twisting the knife through a right angle. Don’t cut the rod any deeper. Release the rod. It will fall back again but it can now be bent up again in the same position without cracking.
On smaller baskets, that use rods of only 3 or 4-foot length, you can do the pricking up with your thumbnail, by pushing it into the rod, where the bend is needed, and lifting the rod to vertical against the thumb prick. On larger baskets, the rod is too thick to easily bend against the thumbnail.
Holding up the stakes
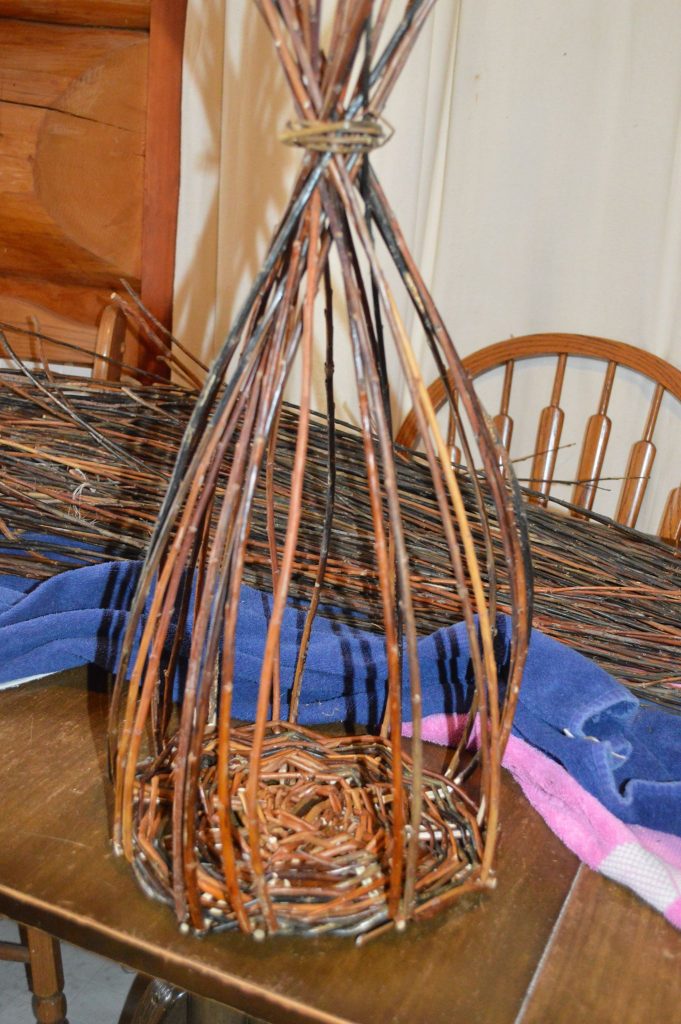
Gather all the rods into position, ensuring that they are centred over the middle of the base. Take a fine piece of willow rod, and wrap it around the top of the stakes about 2 or 3 times to make a loop, securing the stakes in an upright position. Secure the ends of the loop under the loop to hold the rods securely.
Weaving the upsett
The upsett is woven using 4 willow rods and is called “waling.”
Take 4 rods, matching them for width and length. They should be of finer width than the stakes. Place your basket on the table, with the concave surface facing you. Insert the tips of the four rods into a single space in the base, beside a stake.
Arranging the rods for the upsett
Arrange the rods by moving the lowest rod, behind the first stake to the right of it, and bring it forward into the first space. Take the second rod and move it behind two stakes and bring it forward into the 2nd space to the right. Take the third rod and move it behind three stakes and bring it forward into the 3rd space to the right. Take the fourth rod and move it behind four stakes and bring it forward into the fourth space. You now have four rods coming out of four sequential spaces, each in its own space.
You’re ready to weave the upsett.
Mark the space where you inserted the four tips of the weaving rods with a clothes peg. This is the beginning of your row. Take the left-hand rod of the four rods, and bring it in front of the three outside stakes and under the other three upsett rods. Carry it behind the fourth rod and bring it out in front again, in the next space. Pull the rod toward you and down and leave it off.
Now pick up the second rod on the left, bring it in front of the next 3 rods, and under the weaving rods, and carry it behind the next rod and back in front. Pull the rod toward you and down and leave it in the space.
Pick up the third rod on the left, bring it in front of the next 3 rods, and under the weaving rods, and carry it behind the next rod and back in front. Pull the rod toward you and down and leave it in the space.
Pick up the fourth rod on the left, bring it in front of the next 3 rods, and under the weaving rods, and carry it behind the next rod and back in front. Pull the rod toward you and down and leave it in the space. Repeat this pattern with every left-hand rod until you reach the marked stake. This completes the first round of upsetting or four-rod waling.
Before continuing with the second round of whaling you will change to 3-rod whaling by dropping off the weaving rod immediately to the left of the marked stake, or if there is a damaged stake you can choose to leave that one off instead.
The basket weaving continues with each left-hand stake now passing in front of only two stakes and behind one stake. If you need to join in a new willow rod, match butts to butts and tips to tips. The old butt is pulled to the left and another butt is pushed in beside it, allowing for about 1 ¼ inch of overlap between the two rods. You can join all three rods at the same time or stagger them as necessary around your basket, for a more rustic look. Continue weaving with the new rods until one complete round is done and you end at the tips of the new rods. Leave these tips on the outside of the basket and your upsett is complete.
What if you have to leave your basket weaving for a few days?
If you have to leave your basket weaving overnight, wrap the basket up in a damp towel and place it in a plastic bag to keep the stakes from drying out. Keep your weavers wrapped in a damp towel as well to keep them supple. If necessary you can spritz your materials with a spray of water, or resoak them in a bathtub of hot water. If you will be called away for a week or more, it is best to allow your materials to dry out and resoak them a day before you are going to continue working with them.
Our next tutorial will teach you how to weave the sides of your round, rustic willow basket.
The other basket weaving tutorials in this series:
Part 1 picking your weaving rods and preparing them for basket weaving
Part 2 Weaving the base of your rustic, round basket
Part 3 Doing the upset to begin weaving the sides of the basket (this post).



I am looking for step 4 and any other steps for DIY making a rustic willow basket. This is a great tutorial. Please help.