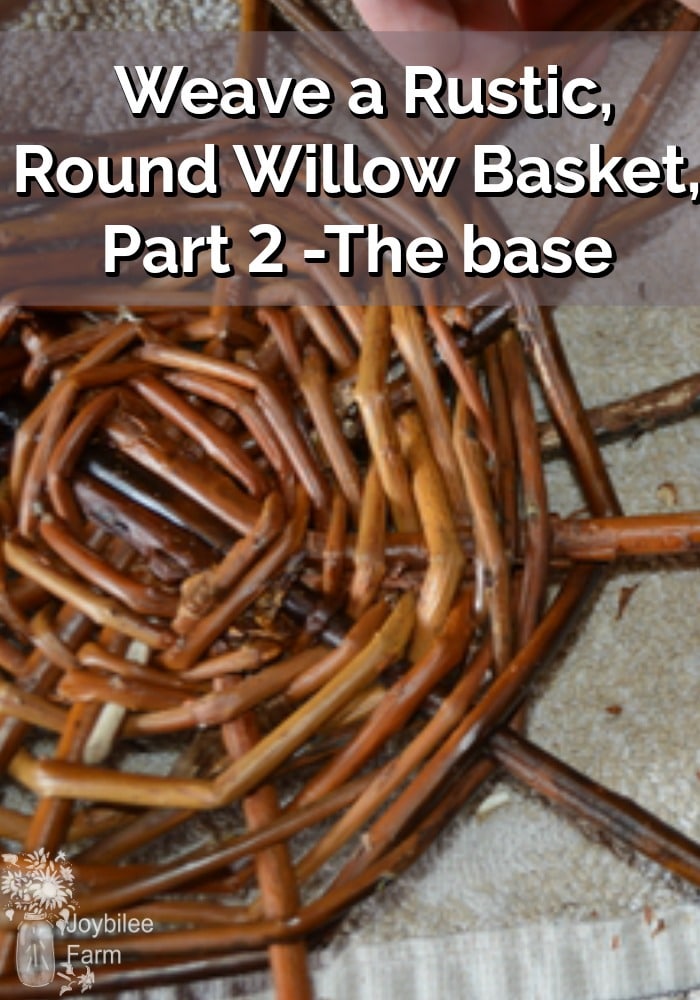
Weave a Rustic, Round Willow Basket, Part 2 – The base
Basket weaving is a skill that can be learned. This is part 2 of the tutorial, where I’m going to show you how to weave the base. Check out all 5 parts of this series to learn how you can make your own willow basket.
To see the tutorial on how to harvest willow rods for basket making, part one of this tutorial go here.
If you followed part 1 of this tutorial you now have a good collection of soaked willow rods ready for basket weaving. You’ll want to drain the willow rods, once they are finished soaking and wrap them in one or two towels to keep them supple. You can leave them wrapped in the towels for up to a week.
You’ll start your basket by making a base. You can stop after making the base and use it as a trivet or you can go on to make a basket. Professional basket makers often make several bases and put them aside for more concentrated basket weaving sessions later.
The round base
For the base of your rustic willow basket, you’ll need 6 fairly thick willow rods. This is a good spot to use your branched rods because you’ll only use about 12 inches of the bottom of the rod and set aside the remainder.
If the rods are misshapen at the very end, clip this off so that you have a fairly smooth, slightly curved rod. Using a ruler, measure 12 inches from the base of the rod. Clip each of 6 rods using pruning shears, making a straight cut at the 12-inch mark. You’ll have 6 – 12 inch sticks.
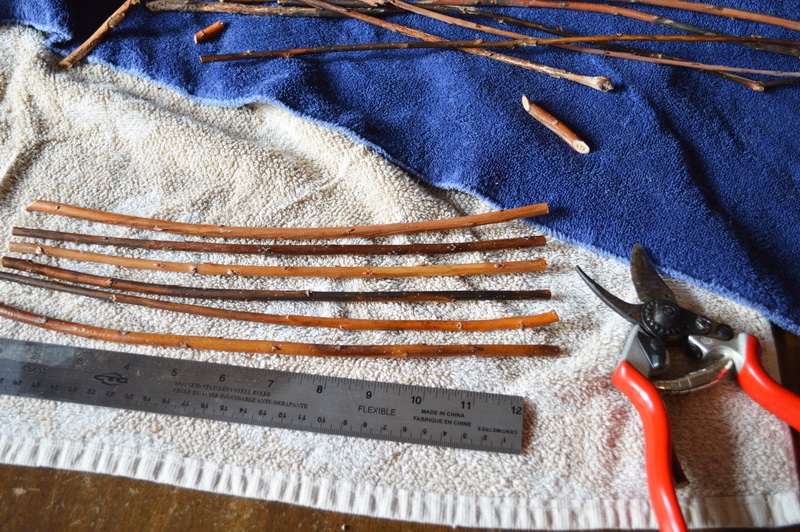
Notice the natural curve of the willow rods. You want these all going in the same direction in your slath (basket foundation).
The natural curve of the rod
Each stick has a natural curve. Hold up the stick and check the curve – the outside of the curve is called the back and the inside of the curve is called the belly. The butt of the rod is the thickest part that grows out of the willow stool. The tip of the rod is the thinnest part, the top of the willow rod. Once you’ve measured and cut your 6 willow sticks, determine the back and the belly of the rod. You’ll want to orient the sticks so that all the rods are facing with the belly down, and the back facing you, giving you a convex shape to the bottom of your basket. This will ensure that your basket lies evenly on the table.
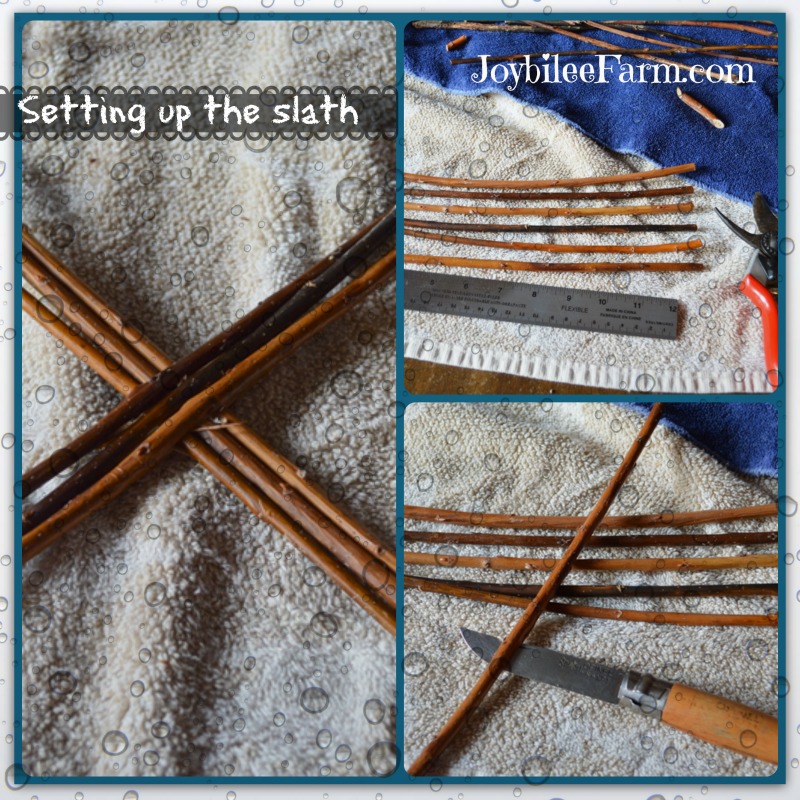
The slath is the foundation of your basket.
Making the slath for a round willow basket
The slath of the basket is the arrangement of base sticks that are used to start the base. For this round basket, you will need 6 base sticks.
Take the 3 thickest sticks and at the 6-inch mark, using a pocket knife, poke the tip of the knife into the side of the first stick at the 6-inch mark, with the base upward and the belly downward. Wiggle and twist the knife gently back and forth to create a 1 ½ inch slit in the rod. Slide 1 unsplit stick into the slit in the first stick.
Now make a slit in the two of the remaining base sticks, in the side with the back upward and the belly downward. Thread these two sticks beside the first stick– alternating the orientation of the 3 sticks with the base of one stick, beside the tip of the other stick. For an even basket, you want the sticks to alternate, between butt end and tip end. The back of each of the sticks should be facing you, with the belly down.
Finally push the two remaining sticks in through the three split sticks, again alternating butt end and tip end. You’ll have a cross-shaped base.
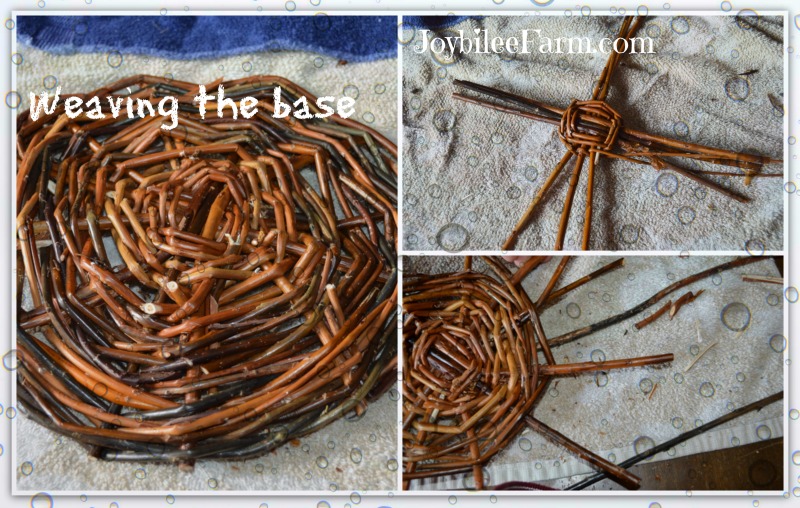
Starting to weave –tying in the slath
The base is woven with a twining or pairing weave always using two weavers at the same time. One weaver goes in front, while the other weaver goes behind, with each weave. In the next step, the weaver that is in front goes behind the next rod, and the one behind comes in front. I bring the back weaver to the front, over top of the front weaver that is moving to the back, and pull the weaver downward to tighten up the weave as I go.
Clockwise or counter-clockwise
As I’m weaving I move the work clockwise and move my weavers counter-clockwise. This may be the opposite of what other basket-weaving teachers tell you to do. Do whichever your own hands find the most comfortable. It’s your body that must live with your decisions, not the teacher. You may have more dexterity to move in one direction than the other.
First two rounds of twining tie in the slath
To begin tying in the slath, select two weavers from the finest bundle of rods in your soaked willows and match them as closely as possible. Trim off 2 inches of their tips, if they are dry and brittle. Push the tips of the weavers into the split-in-the-base sticks. Leave one weaver in the front and take the other weaver behind 3 base sticks. Then bring it forward. Take the first weaver across the front of the same 3 base sticks and bring it behind. Repeat until you’ve taken the weavers around all base sticks once. Continue in this manner for a second round. Each time you bring a weaver forward from the back be sure that it lies overtop of the front weaver going to the back. In this way, your weavers twist on secure the weave in your base. This secures the base sticks in place, in a cross shape.
Continue to weave your willow basket
Now you will go around the base again and this time you will separate each of the 12 base sticks to form the spokes on a wheel. Continue to take each weaver in front of one stick and then behind the next stick, while the alternating rod goes behind one stick and then in front of the next stick. You will be turning the base clockwise as you weave and moving the weavers from right to left.
As you get to the butt end of the weavers, insert a fresh weaver into the space in the bottom weave to hold the end secure and continue weaving as before. Each time you run out of weaver, insert another weaver, butt end to butt end and tip end to tip end. Finish your last round with the tips, to make a smooth finish.
Hint:
If you try to take the rod to the back, behind a stick and then forward again all in one movement, you may find that the weaving isn’t as tight as it could be and that there are gaps between your rows of weaving. If you pull well down as you bring the back weaver to the front, after the first half of the stroke, your weaving will be tighter and more secure.
What to do if one of your base sticks breaks
If, as you are weaving one of your base stick breaks, simply take another 6-inch stick about the same thickness as the broken stick, and slype the end, by making a long diagonal cut on the butt of the rod. Slip this end into space beside the broken rod. Keep weaving around both this rod and the one it replaces, if possible. If the broken rod is completely broken, you can remove it and weave the new rod in its place.
To join in new weavers:
Select two more well-matched weaving rods. Join them by slipping the end into the space adjacent to where you ran out of weavers; tuck it securely into space. If you finished with a butt end, begin the new weavers at the butt end. If you finished with the tip end, join the new weavers with the tip end.
Continue weaving your willow basket
Continue twining as before, but as you weave, position the base sticks to keep them evenly spaced around the base. Pull them gently into position as you are weaving around them. As you continue to weave, push the base sticks slightly away from you to give the base a curve. This is called “crowning”. A basket with a crowned base will sit on its rim and will sit without wobbling. It will be steadier and stronger.
Weave until you reach the end of the base sticks or as near them as possible. You want to finish weaving the base with the tips of your last weavers. To secure the base, tuck them into space, in the previous row of weaving. This will keep your base from unravelling.
Tidy up the base of your willow basket
Go over your base with pruning shears and clip off the overhanging base rods just past the end of your weaving. Also, trim any butt ends of weavers that overhang your weaving on both sides of your base.
Your base is complete
This is the base for all-round baskets. You can stop here and use this as a trivet or hot plate. You can make several of these bases to memorize the technique before moving on to the next step. Professional basket weavers often just sit and make bases and then store them until they are ready to make more baskets. Bases take up less storage space than completed baskets.
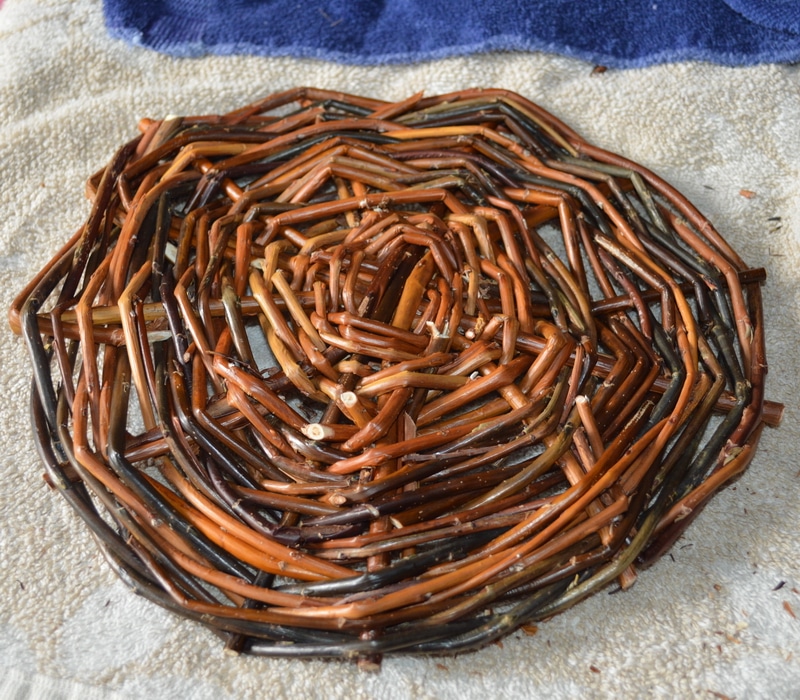
The completed willow basket base
Part 1 picking your weaving rods and preparing them for basket weaving
Part 2 Weaving the base of your rustic, round basket (This post)
Part 3 Doing the upset to begin weaving the sides of the basket
Part 4 Weaving the sides of your rustic, round basket
Part 5 completing the rim of your round basket
Resources to help you weave a willow basket:
Books:
Willow Basketry published by Interweave Press is one of my favourite textbooks for willow basket weaving.
Cane, Rush, Willow has several intermediate patterns to let you expand beyond this basic basket
This is a classic reference and while it is expensive at first glance — it’s the best book for those who want to advance quickly in their skills, Mary Butcher is a professional basket weaver from the UK. My copy of this book is stained and worn from so much use.
Tools:
These are the pruning shears I use for my willow work. They have replaceable springs and replacement parts available and will give you decades of frequent use. You can even sharpen the cutting edge and adjust for cleaner cuts.
I use an awl, ground from an inexpensive screwdriver that Mr. Joybilee made just for my basket weaving. This awl is very similar. You will use the awl to loosen the weave, so that you can insert the upstakes, in the next step of weaving your rustic willow basket.
The Opinel pocket knife has a good tip and a sharp blade for willow work. You won’t be disappointed with this knife.
The only other item that you will need is a tool to press down the sides of the basket. I use a small, lightweight hammer. Some basket weavers have a special steel weight that they hit the weaves with to compact them as they are weaving the sides of the basket.



Leave a Reply