You probably learned in school that it takes 500 years to make 1 inch of topsoil. According to a study done by Cornell University Professor of Ecology, David Pimentel, the USA is losing topsoil at 10x the rate of replenishment. China and India are even worse off, with a rate of 30x soil erosion per rate of replenishment.
In the winter of 1995-96, the state of Kansas, alone, lost 650 tons of top soil per hectacre of farmland, about 2 inches per hectacre. Soil erosion and degradation is the 2nd most serious ecological problem facing the world and one of the easiest to fix. Keeping the soil in place with cover crops, forests, and crop residues, prevent soil erosion. And in fact. using permaculture principles, you can prevent erosion from stealing your topsoil, AND you can even build fertile, organic top soil in one season.
Here’s 9 ways to build topsoil organically this winter and be ready for next spring’s garden season. The best garden soils combine several of these methods to grow good topsoil. At least a few of these topsoil building methods will be within easy reach for you this fall. So even if you live in the city, and only have a postage stamp size yard, you can start a garden by building your own topsoil.
1. Sheet mulching
Use sheet mulching when you are building a new garden over grass or sod.
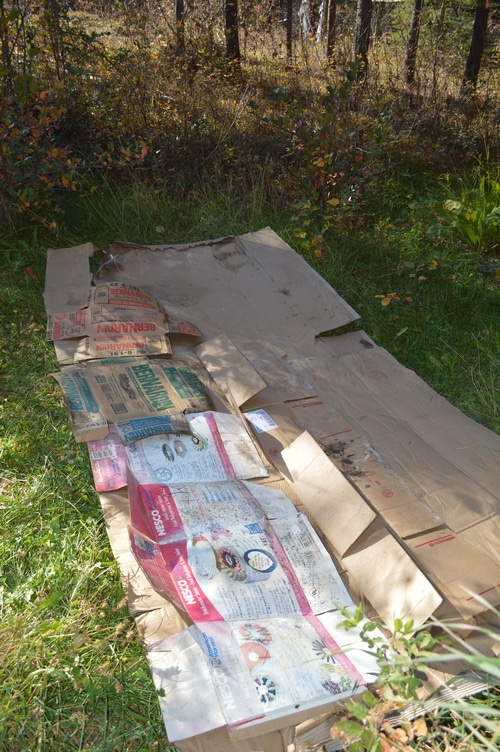
Sheet mulching is probably the easiest way to begin a new garden where there is already something growing. Use this on a garden that’s been taken over by weeds. Sheet mulching involves laying down newspaper or cardboard over the existing ground cover to block sunlight. This prevents weed growth by blogging light, allowing soil microbes and worms to break down densely rooted sod into organic soil.
By using a mulch of cardboard or newspaper, you can avoid digging up the sod or double digging to prepare your garden for planting. If the weeds are long, begin by mowing or cutting down weeds with a weed wacker or lawn mower.
If the weeds are compact, just lay down newspaper or cardboard over the weeds or sod. Soak the paper or cardboard well. Then layer leaves, chipped branches, and grass clippings on top of the sheet mulch in equal amounts, to a depth of 1 to 1 1/2 feet. Wet the whole pile well, with a garden hose. Protect it from chickens, if you have them. They will scratch and disassemble your pile, looking for the worms. Leave it till early spring.
Depending on how warm your winter is, you will find a crust of uncomposted material on the top of the mulch, but the inner workings of the pile will be semi-composted. The cardboard will be broken down. The pile will be smaller, too. In Spring, turn the pile to areate it. And turn it again 2 to 3 weeks later. You’ll be able to plant in it then. The soil will be rich in earthworms, too.
2. Chicken composting
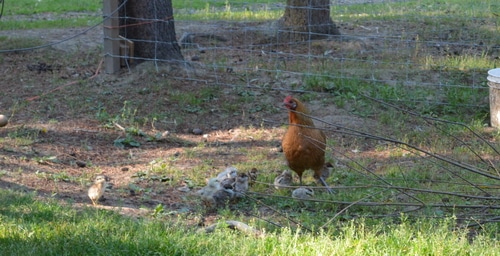
I mentioned that you needed to keep chickens out of your sheet mulch area. If that seems like too much work, you can let your chickens create the topsoil for you. Chickens naturally scratch looking for worms and insects in a compost pile. They also eat weed seeds and waste vegetables. Let them do what chickens do naturally and they’ll turn kitchen and garden waste into garden soil in short order.
Geoff Lawson in Chicken Tractors on Steroids demonstrates a chicken composting system, where chickens consume garden and kitchen waste and then turn it into nutrient dense compost for garden soil. You can watch the video here (it’s free but you’ll need to register with your email.) If you have chickens and a bit of land try this permaculture way of creating finished compost (aka. new topsoil).
Once the chickens are finished with the pile, move the chickens to a new area and turn the pile as you would regular compost. Like the sheet mulching method, the new topsoil will be ready in a few weeks.
Green manures and cover crops
Green manures and cover crops like hairy vetch, winter rye, winter wheat, and field peas are planted in the existing garden. These crops are chosen because they grow fast in the fall, and they increase the nitrogen capacity of the soil. Plant them as soon as you harvest your garden, during the long warm Indian Summer days. In the spring, green manures are mowed down and turned under. They are allowed to decompose over a few weeks, before the garden is planted. As they decompose they increase soil fertility and organic matter, making new topsoil.
For these to work well, you’ll need to prepare a planting area by removing any existing crop residue. Then seeding, either by broadcasting or by drilling or hand planting one seed at a time. This is a little more work than sheet mulching or chicken composting. On the other hand, it doesn’t require any animals. If you don’t have a rototiller, you can pull out the mature green manure in the spring and compost it in a compost bin. Add some carbonaceous material, since the green manure is high in nitrogen.
Hugelkultur
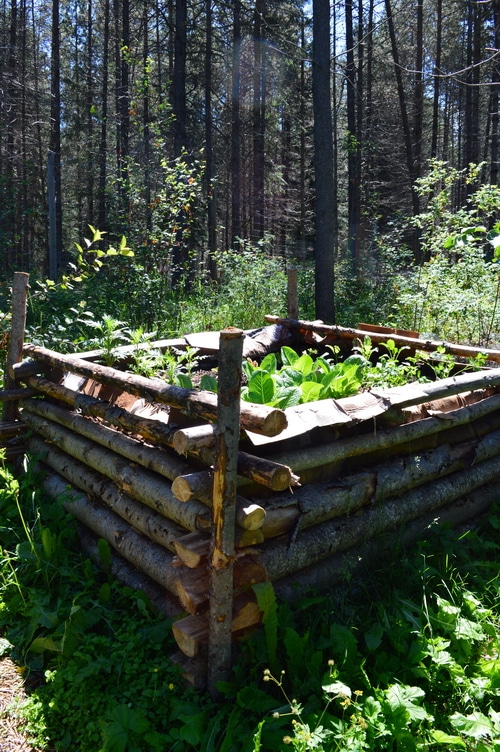
Hugelkultur is a permaculture method of using organic waste that you have available and turning it into a garden. The waste in the hugelculture mound decomposes over several years, making new topsoil that is rich in organic matter.
Hugelkultur beds have the added advantage of holding in moisture. I’ve had some issues with unwanted visitors like ants and snakes taking up residence in the hugelkultur bed. We don’t have poisonous snakes here though. The ants were easily convinced to move with the offer of some boric acid and jam. If you have poisonous snakes create a mound instead of a garden bed framed with wood.
- You begin with a base of sheet mulching with cardboard or newspaper. The cardboard defines the area for the hugelkultur bed and blocks light from the weeds underneath the mulch.
- The second layer is wood waste, large stumps, trimmed branches, prunings, and woodchips. Avoid using treated wood.
- Top this with animal manure, green vegetation, or kitchen scraps, allowing it to mix with the woodwaste making a firm layer.
- Add a layer of carbonaceous material, like fallen leaves, more wood chips, or even straw.
- On top of that add fresh animal manure or green manure, kitchen scraps, or other nitrogen rich ingredient. Even human urine is a good addition. This works to increase the heat of the pile, to encourage decomposition.
- On top of this add more wood chips, or straw, and more manure, alternatively. Keep layering wood chips and manure, kitchen, or garden scraps. Avoid meat, fat, bread, grain, pet or human manure. Milk or whey can be used in the lower layers of the bed, to add nitrogen.
- If I was making a new hugelkultur bed in the spring I’d add 6 to 8 inches of finished compost and plant it right away. But in the Fall you can finish the top layer with any nitrogen rich items. Soak the entire bed well and then layer with straw. It will decompose over the winter and the top layer will be ready to plant in.
We use hugelkultur beds at Joybilee Farm because they allow me to garden without bending over. They also make weeding easier. The height of hugelkultur beds will shrink over time as the woodwaste is decomposed. Add leaves, hay, and straw mulch in the fall, to replenish the soil regularly.
Vermiculture
Vermiculture uses worms to ingest kitchen scraps, and manures and turn them into topsoil. Worm waste is high in the nutrients that plants need to grow. Worm composting is an option if you live in an apartment or don’t have much area for a garden. Although you can purchase fancy vermicomposting kits, you can also make your own worm bin using 2 plastic buckets. See these instructions for a vermicomposting set-up you can make for less than $5 from Attainable Sustainable.
If you are raising rabbits on your homestead, vermicomposting will turn that high nitrogen rabbit manure into a nutrient dense topsoil in a very short time. In fact using worms to create your topsoil speeds up the process.
Vermicomposting is the most practical composting method for those who live in an apartment. Worm compost will give you enough soil for your container gardening projects plus liquid compost tea for fertilizing your plants. 1 lb. of red wigglers can process 1/2 lb. of kitchen waste every day. That’s efficient.
Kitchen compost
Kitchen composting systems are really outdoor systems that rotate and areate food waste in order to turn it into topsoil. These compost bins are compact. They are designed to speed up the natural decomposition of food. The process can be sped up, further, with the addition of herbs like comfrey or nettles. These compost bins still require a balance of carbon and nitrogen for adequate decomposition, usually at a ratio of 1:1.
Counter top compost bins are actually just holding buckets to collect the compostable kitchen scraps. The scraps still need to go out to the compost bin in order to decompose and make finished compost and top soil.
Animal Manures
Livestock manures need to be composted before they are used as topsoil. However, once they are fully decomposed they can be used in place of top soil, or as a top dressing to increase the nutrients in garden soil.
Manure should be covered as it decomposes, in order to protect ground water, and to ensure that nutrients aren’t leached out in the weather. Under normal conditions, it takes 2 years for a manure pile to complete it’s decomposition so that it can be used as topsoil. This process can be speeded up if the pile is turned each time the temperature in the pile drops.
Intentional composting
Intentional composting is creating a pile of garden and kitchen waste, plus animals manures in a ratio of 2:1 or 1:1 carbon to nitrogen. Dry materials like corn stocks, fallen leaves, straw, paper, cardboard, and wood chips offer carbon, while moist kitchen scraps, animal manures, and green, leafy weeds offer nitrogen.
Getting the ratio correct will allow the pile to heat up and feed the beneficial micro-organisms that cause the waste materials to turn into topsoil. If there is too much nitrogen, the pile will smell strongly of ammonia and attract flies. If there is too much carbon, the pile will take a long time to decompose.
Keeping the pile moist and turning it on a monthly or weekly basis will speed up the process. Left on it’s own, a compost pile will break down into top soil in about a year.
Wood chip mulch
Known as the “Back to Eden” method of gardening, using wood chips to maintain soil moisture and suppress weeds, has the side effect of creating more top soil. The wood chips used in this method are not bark mulch. They are the leafy branches that are the by-product of road trimming. They contain both nitrogen and carbon elements and decompose slowly.
Use this on your garden before you put it to bed for the season. But DO NOT till the wood chips into your garden. The wood chips need to remain on the surface of the garden. When they are tilled in, they bind up nitrogen in the soil to help them decompose. Your plants need this nitrogen to grow. However, when the wood chips are left on the surface the nitrogen remains available to your plants.
If you add fresh wood chips periodically to the surface of your garden, the wood chips will create more top soil, while keeping moisture and fertility levels stable.
Straw or hay can also be used as a mulch in place of wood chips, provided that the thickness of the layer is sufficient to prevent light from reaching the soil surface, germinating the weeds.




It makes sense that manure needs to be composted before it can be used as topsoil. To me personally, it seems like topsoil that you buy would be easier than making it yourself. That way you can get stuff like nitro topsoil that has more nutrients and stuff.