Gluten-free bread must be made from flour that has no gluten naturally occurring in it. But this is not enough. It must also be made from grain processed in a facility that does not process wheat, rye, or barley. The grain must be certified to be gluten-free, for those on a celiac regime. Even the smallest molecule of contamination can send a celiac sufferers gut into painful spasms for days.
Prevent cross contamination
Keep not just the grains and flour uncontaminated by gluten, but also the baking pans, mixing bowls, and bread machines. The utmost care must be taken to ensure that the celiac sufferer’s food and even plates and cutlery remain free from contamination of gluten sources. You can’t bake conventional bread in your bread machine and then add a loaf of gluten-free bread into the same machine and expect the bread to be uncontaminated.
Source your flours well and do your homework at the store. Look for the certified gluten-free label on the bag. You can also mill your own flours but again check your sources to make sure that the grain is not processed at the same facility as gluten containing grains.
In your own kitchen prevent cross contamination
Have separate pans, baking bowls, mixers, mills, and bread machines for gluten free baking, if you also bake with conventional flours in your home kitchen. Plan to bake gluten free on different days than you bake with gluten, so that even your towels and oven mitts remain uncontaminated.
If you’ve taken the necessary precautions you will have confidence that your gluten-free home baking will not make your loved one sick.
Now let’s get to the fun part – the creative process of baking gluten free. Gluten-free baking has its own rules and several different flours will bring success.
Gluten-free flours are a mixture of several grains and starches, not just a single ingredient. These flours lack the holding power of gluten and so must be handled more gently. Gums or seed mucilage are added to help them hold together. Protein is added to give the yeast food to grow on.
In this course we’ll be exploring both the flour mixtures to use in gluten-free baking plus the special handling techniques that will help you master this process.
First of all, gluten-free baking will not give you the same product as wheaten baked goods. The texture, smell and mouth feel of gluten-free baking is different. The goal of gluten-free baking is not to match wheaten baking but to give a product that can replace gluten bread in the kitchen.
Print
Gluten Free French Bread
Ingredients
- 2 cups brown rice flour
- 1 cup quinoa flour
- 1 cups tapioca starch
- ½ cup coconut flour
- ½ cup ground nuts or sunflower seeds
- 2 tablespoons yeast
- 1 tablespoon salt
- ½ cup ground flax seed or ground chia seed
- 1 cup boiling water
- 1 1/2 cups warm water
- 4 eggs
- 1/3 cup coconut oil
- 2 tablespoons organic sugar
Instructions
- Mix your flours, starches, ground nuts, together and set aside.
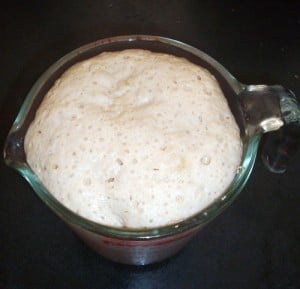
- Mix the water and yeast and set aside until yeast becomes bubbly.
- In a separate bowl combine ½ cup of ground flax or chia seeds. Mix in 1 cup of boiling water to the flax or chia. Beat well with a fork until the mixture becomes viscose. Keep beating for a minute longer.
- Allow to cool to room temperature. Add this mixture to the yeast mixture.
- Add the oil, eggs, salt, and sugar to the liquid ingredients.
- In your mixing bowl, add the flour mixture one cup at a time, mixing well after each addition. In this recipe, the eggs, the quinoa flour, and nuts, add protein for the yeast to grow with, as well as sticking power.
- The flax or chia seed mixture and the eggs help to hold the dough together.
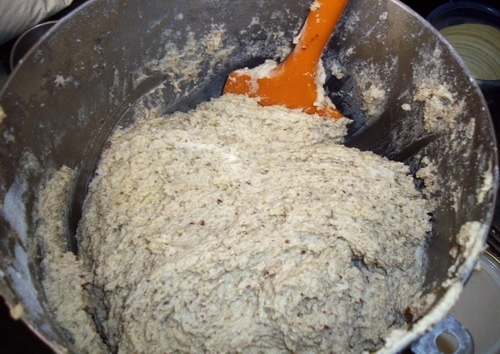
- The dough should be sticky, moist, and thick like muffin batter. You don’t want it to be dry like wheaten doughs. If it is not sticky, add a bit more water. It will seem that the batter is too moist and you will be tempted to add more flour.
- Don’t do it yet. Wait for the dough to rise. It will absorb more of the liquid as it rises.
- Gluten free doughs are not kneaded in the same way that yeast breads are kneaded. Cover your mixing bowl and let this rise for 2 hours in a cool to warm place (not too hot or you will kill the yeast), while you do something else.
- Once it’s doubled in bulk, stir it down. Add another ½ cup of tapioca starch if it is still too lose to pick up. This will only be necessary if you have a lot of humidity today, in your house. To prepare your baking pan, take 3 pieces of parchment paper and tear them about 8 inches long. Fold them in half along the long edge. Greasing them is unnecessary.
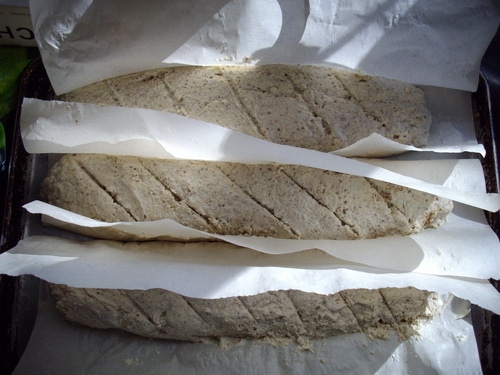
- Take handfuls of your gluten free dough and lay them in the crease of the parchment paper. Wet your hands and smooth the top of the dough. Divide the dough into 3 loaves this way, putting an equal amount of dough on each piece of parchment paper.
- Slice the top of the loaves to prevent cracking.
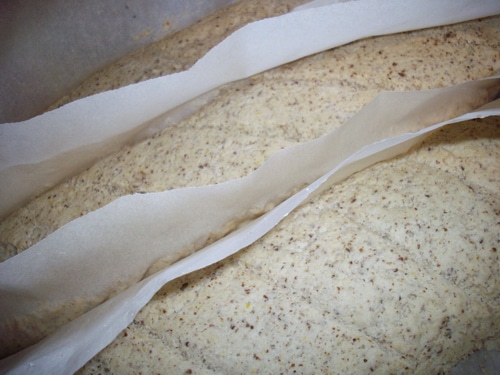
- Allow to rise for 90 minutes (be patient and you will be rewarded). They will spread widthwise more than high. This is ok. It’s the nature of gluten free baking. They will still rise a little bit higher.
- Preheat oven to 375F. Place bread in the oven and immediately turn the heat down to 350F. Bake for 30 minutes. Bottoms of loaves will be a golden brown.
- Remove from heat and place on wire cooling rack. Cool to room temperature.
Gluten-Free French loaf (makes 3 long loaves)
2 cups brown rice flour
1 cup quinoa flour
1 cups tapioca starch
½ cup coconut flour
½ cup ground nuts or sunflower seeds
2 tbsp yeast
1 tbsp salt
½ cup ground flax seed or ground chia seed
1 cup boiling water
1 1/2 cups warm water
4 eggs
1/3 cup coconut oil
2 tbsp organic sugar
If you are grinding your own rice flour, use short grain brown rice or medium grain brown rice. Look for the GMO-free label on the rice bag. Long grain rice like basmati rice, will not have the stickiness of short grain rice, necessary to help the dough hold together.
If you are grinding your own quinoa flour, use quinoa grains that have already been washed to remove the saponins from them. If you are using your own quinoa that you grew, rinse it until no more bubbles wash off the grains, and then dry thoroughly before milling.
When milling your own, put about 1/3rd less whole grains than you need for the final measure of flour. Ground grain is fluffier than the whole grain.
Mix your flours, starches, ground nuts, together and set aside. Mix the water and yeast and set aside until yeast becomes bubbly. In a separate bowl combine ½ cup of ground flax or chia seeds. Mix in 1 cup of boiling water to the flax or chia. Beat well with a fork until the mixture becomes viscose. Keep beating for a minute longer. Allow to cool to room temperature. Add this mixture to the yeast mixture. Add the oil, eggs, salt, and sugar to the liquid ingredients. In your mixing bowl, add the flour mixture one cup at a time, mixing well after each addition. In this recipe, the eggs, the quinoa flour, and nuts, add protein for the yeast to grow with, as well as sticking power. The flax or chia seed mixture and the eggs help to hold the dough together.
The dough should be sticky, moist, and thick like muffin batter. You don’t want it to be dry like wheaten doughs. If it is not sticky, add a bit more water. It will seem that the batter is too moist and you will be tempted to add more flour. Don’t do it yet. Wait for the dough to rise. It will absorb more of the liquid as it rises.
Gluten free doughs are not kneaded in the same way that yeast breads are kneaded. Cover your mixing bowl and let this rise for 2 hours in a cool to warm place (not too hot or you will kill the yeast), while you do something else.
Once it’s doubled in bulk, stir it down. Add another ½ cup of tapioca starch if it is still too lose to pick up. This will only be necessary if you have a lot of humidity today, in your house. To prepare your baking pan, take 3 pieces of parchment paper and tear them about 8 inches long. Fold them in half along the long edge. Greasing them is unnecessary.
Take handfuls of your gluten free dough and lay them in the crease of the parchment paper. Wet your hands and smooth the top of the dough. Divide the dough into 3 loaves this way, putting an equal amount of dough on each piece of parchment paper.
Slice the top of the loaves to prevent cracking.
Allow to rise for 90 minutes (be patient and you will be rewarded). They will spread widthwise more than high. This is ok. It’s the nature of gluten free baking. They will still rise a little bit higher.
Preheat oven to 375F. Place bread in the oven and immediately turn the heat down to 350F. Bake for 30 minutes. Bottoms of loaves will be a golden brown.
Remove from heat and place on wire cooling rack. Cool to room temperature.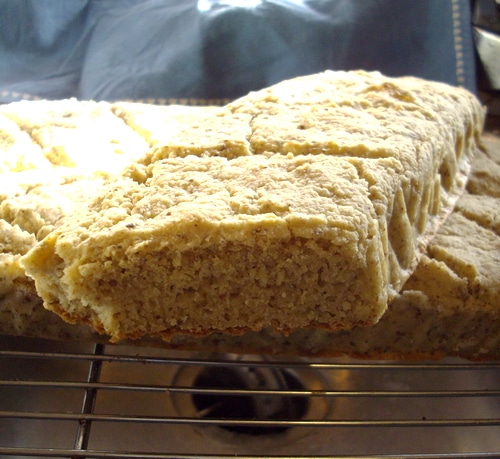
Most gluten-free bread recipes tell you to add xanthan gum or guar gum to the flours. I have omitted them in this recipe. If you have trouble with celiacs, the gums can give you continued stomach upset and bloating. I use flax or chia seeds in this recipe to serve the same purpose. It’s important to mix the ground seeds with boiling water and beat them with a fork to excite the gelling when using them as a substitute to guar or xanthan gum. The gum gives the bread a heavier texture.
If you want to try this bread dough in a bread pan for a taller loaf – you’ll get two loaves from this. Fill your well greased and lined with parchment, bread pans about 2/3rds full. Allow the dough to rise to the top edge of the pan and bake as per the instructions, for the oblong loaves. Gluten free bread will not rise over the top of your pans, without overflowing the sides.
What if you don’t have a grain mill?
You can use commercial gluten-free flours in this recipe:
A simplified Gluten-free flour recipe
2 cups of brown rice flour
1 cup of sticky rice flour
1/2 cup of tapioca starch
1/2 cup of potato starch
You can use this flour in place of gluten flour in your experiments. Always add ½ cup of ground flax plus 1 cup of boiling water or 1 tbsp. xanthan or guar gum to add holding strength to the gluten-free flours.
The premixed gluten free flours have a high percentage of sugar added. Read the ingredient label before you opt for a premixed gluten-free flour.
Other flour that may be used in Gluten-free bread baking:
Teff
Quinoa
Buckwheat
Sorghum
Oat flour (be sure it is certified gluten free)
The addition of the starches – potato and tapioca, lighten the bread making it less heavy. So use the ratio of 3 cups of grain flour to 1 cup of starch plus ½ cup of flax seed, or chia seed and 1 cup of boiling water; or 1 tbsp. xanthan or guar gum. If you use the flax, decrease the water that the recipe calls for — for a total of 2 ½ cups of water per 4 cups of flour.
Print
Gluten-free bread
- Prep Time: 60 minutes
- Cook Time: 30 minutes
- Total Time: 3 hours
- Yield: 3 loaves 1x
- Category: Gluten-Free
- Method: Baking
- Cuisine: Bread
Description
A good starter gluten free loaf to try.
Ingredients
- 2 cups brown rice flour
- 1 cup quinoa flour
- 1 cups tapioca starch
- ½ cup coconut flour
- ½ cup ground nuts or sunflower seeds
- 2 tbsp yeast
- 1 tbsp salt
- ½ cup ground flax seed or ground chia seed
- 1 cup boiling water
- 1 1/2 cups warm water
- 4 eggs
- 1/3 cup coconut oil
- 2 tbsp organic sugar
Instructions
- Mix your flours, starches, ground nuts, together and set aside.
- Mix the water and yeast and set aside until yeast becomes bubbly.
- In a separate bowl combine ½ cup of ground flax or chia seeds.
- Mix in 1 cup of boiling water to the flax or chia. Beat well with a fork until the mixture becomes viscose. Keep beating for a minute longer.
- Cool to room temperature.
- Add this mixture to the yeast mixture.
- Add the oil, eggs, salt, and sugar to the liquid ingredients.
- In your mixing bowl, add the flour mixture one cup at a time, mixing well after each addition.
- The dough should be sticky, moist, and thick like muffin batter. If it is not sticky, add a bit more water. It will absorb more of the liquid as it rises.
- Cover your mixing bowl and let this rise for 2 hours in a cool to warm place.
- Once it’s doubled in bulk, stir it down. Add another ½ cup of tapioca starch if it is still too loose to pick up. This will only be necessary if you have a lot of humidity.
- To prepare your baking pan, take 3 pieces of parchment paper and tear them about 8 inches long. Fold them in half along the long edge. Greasing them is unnecessary.
- Take handfuls of your gluten free dough and lay them in the crease of the parchment paper.
- Wet your hands and smooth the top of the dough.
- Divide the dough into 3 loaves this way, putting an equal amount of dough on each piece of parchment paper.
- Slice the top of the loaves to prevent cracking.
- Allow to rise for 90 minutes (be patient and you will be rewarded).
- Preheat oven to 375F.
- Place bread in the oven and immediately turn the heat down to 350F.
- Bake for 30 minutes.
- Bottoms of loaves will be a golden brown.
- Remove from heat and place on wire cooling rack.
- Cool to room temperature.
Notes
Gluten -Free breads do not rise in the same manner as normal wheaten bread, they spread sidewise. The loaf will still lighten due to rising, so be patient when letting the laid-out loaves rise.
Some thoughts about gluten free bread
Don’t expect gluten-free baking to resemble baking with wheaten doughs
Since those with celiac often have other food sensitivities, experiment with different flours and additives to give your loved one a bread that they can enjoy without pain.
Gums like guar gum and xanthan gum are often added to give structure to gluten-free baking. Ground flax seed or ground chia seed can be added in place to give a lighter loaf of bread while maintaining the structure.
Eggs add both structure and protein. If you want to bake gluten free bread without the eggs increase the flax seed in the recipe, and increase the protein with the addition of nuts or ground sunflower seeds.
Since gluten-free dough lacks structure, you will have to provide the structure for the dough to rise by adapting your baking method or the pans that you use.
A handy chart to help you in your Gluten-Free baking
2 ½ cupsGrain Flour |
1 cup Starch |
½ cup bean or nut flour |
Gum or seeds(Pick one) |
1 ½ c. Water |
| Brown Rice | potato | Almond flour | ½ c. flax seed, plus 1 c. water | |
| Sticky Rice | tapioca | Pea Flour | ½ c. chia seed plus 1 c. water | |
| Teff | Arrowroot starch | Quinoa | 1 tbsp. guar gum+ 1 cup of water | |
| Sorghum | Chick Pea Flour | 2 ½ tsp. xanthan gum+ 1 cup of water | ||
| Oat flour (GF only) | Coconut Flour | 4 extra eggs | ||
| Buckwheat | Milk powder | |||
Combine the ingredients in each column to achieve the desired amount of each ingredient.
Your Turn:
What breads do you make the most? Have you made gluten-free bread before, or are you learning for yourself, a family member, or a friend? Leave a comment, I would love to hear from you.



It’s an excellent guideline for gluten-free bread preparation. You pull out the perfect point ” cross-contamination”. Many a time people overlook this and the result is often not satisfactory. It is not that you set the dough in your bread machine and you are done and dusted. There is more behind the scene. Thnx for sharing such details.