Hummus and pita bread from scratch
There’s a significant saving when making hummus from scratch beginning with dried chickpeas rather than buying premade at the deli or from canned chickpeas. Plus your homemade hummus will be free of GMOs and preservatives.
Cooking from scratch is the first step on the journey to homestead success. If farming, working, or gardening takes up a lot of your time, and you’re serving your family processed foods, from the grocery store or a restaurant, because you think you don’t have time to cook from scratch, I want to help you find the time. The reality is that if you have some basic kitchen equipment, like a slow cooker, a stand mixer, and a food processor, it takes no more time to cook from scratch than it does to open a box and cook processed food. The key isn’t in the amount of time it takes to cook from scratch but understanding how to manage your time so that the basic steps are done as you go about your day, doing other things.
I offer an example of one way to manage cooking from scratch in an already busy day.
On Saturday Sarah had a craving for hummus and pita bread, an after-effect of her summer trip to Israel. Not having any bread in the house, nor hummus we started from scratch at noon on Saturday and had both pita and hummus dip ready to eat by 7:30 on Saturday night, along with our evening meal. Most of the hands-on were done in the last hour, so while it sounds like a huge undertaking, it was very manageable. Note that hummus and pita can be made ahead and be ready for cravings like this, with a little forethought.
Let’s look at the timeline:
Make hummus and homemade pita bread
12 noon (or earlier) – rinse and soak 8 cups of chickpeas in 20 cups of water in a large soup pot. Note: I canned the leftover, soaked beans so that I’d have some chickpeas ready to go next time Sarah has a craving. If you don’t plan to have leftover beans, just soak 1 ½ cups of chickpeas in 6 cups of water.
4 pm – By 4 pm the beans had swelled to more than double their usual size. You can soak them longer, even all day and night, but on Saturday this is what I did. I took 3 cups of chickpeas from the soaking pot and rinsed them well in cold water. I added rinsed beans to a saucepan with 6 cups of cold water. Bring to a boil and simmer on low until soft – about 90 min. You could do this part in a slow cooker for over 2 or 3 hours if you weren’t at home to watch them. (Makes 6 cups of cooked beans)
Begin the pita bread: Dissolve 2 tbsp. yeast, 1 tsp. of sugar, in 2 cups of warm water. Allow yeast to bubble. (At this point I took my camera and went for a walk and left it all to work unsupervised.)
5 pm – In your stand mixer, put yeast mixture and 4 cups of bread flour and mix until it forms a soft dough. Add in ½ cup. ground flaxseed, and 2 cups of whole wheat flour. Mix with the dough hook until smooth and elastic or mix by hand. Cover and allow to rise for 1 hour, until doubled in bulk. (Hands-on time 15 min.)
6 pm – In a food processor, with a chopping blade, mix 3 cups of cooked chickpeas, juice of 2 limes, zest of 2 limes, 4 peeled garlic cloves, 2 tbsp. virgin olive oil, and ½ tsp. salt and process until smooth. If the mixture is too thick add some boiled water, 1 tbsp. at a time until mixture blends to a smooth paste consistency. Add ½ cup tahini (sesame butter). Process until well blended. Garnish with olive oil and chopped parsley. (15 min.) (You’ll have 3 cups of cooked chickpeas leftover for a second batch.)
At this point I put a whole salmon in the oven to bake as well, to serve with the hummus and pitas.
Punch down pita bread dough and allow to rest briefly.
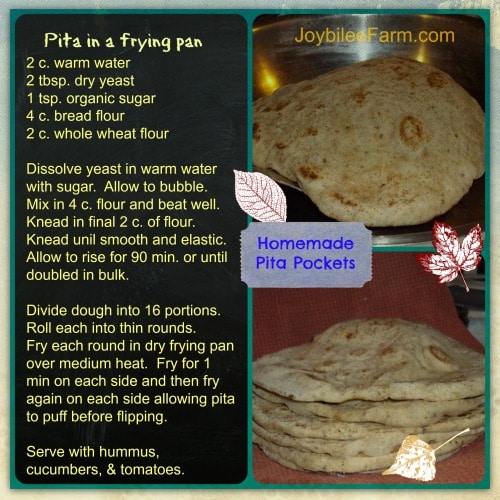
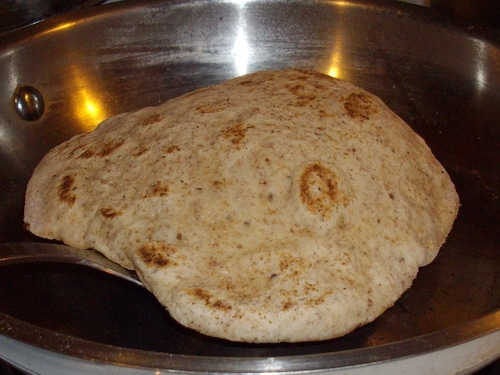
6:15 pm – Divide bread dough into 16 portions. Form into round balls. Roll each ball into a very thin circle about 6 inches in diameter. The thinner that you can roll the dough the better the pitas will puff. Flour well on both sides and set aside. Cover to keep from drying out. Meanwhile, heat dry frying pan on medium heat until water dances wildly when tossed in the pan.
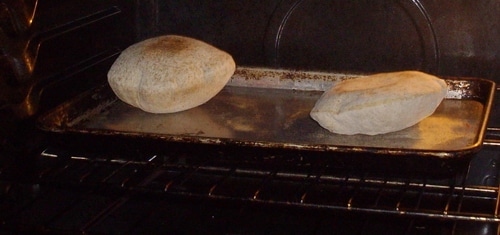
6:20 pm – (if you have a helper, this step goes faster, but only slightly) Cook each round of dough in the dry frying pan for 1 minute on each side. Then recook on each side, allowing the pita to puff up before flipping. Don’t allow the dough to burn. If the pita starts to smoke or burn, reduce the heat. If it doesn’t puff raise the heat slightly. (This part takes some experience to know when it’s just right.). Takes about 60 min. to cook the whole batch, with two people, one rolls the rounds while the other cooks. It takes just a bit longer if you are working alone.
7:20 pm – Slice tomatoes, cucumbers, cheese, and debone baked salmon.
7:30 pm – Serve dinner: Deboned baked salmon, cheese, hummus, cucumbers, sliced tomatoes, and warm pitas.
Gluten-free variation: If you are cooking gluten-free, corn flour tortillas could be substituted for the pita bread in this recipe. The hands-on time for making corn flour tortillas from scratch is about the same as for pita bread. Omit the second cooking per side.
Low carb variation: The hummus could be enjoyed with zucchini chips (sliced zucchini, drizzled with olive oil and sprinkled with onion salt then dried in the dehydrator) instead of pita bread. Adjust the time for preparation accordingly. Zucchini chips need about 7 hours in the dehydrator to dry fully. Start them in around 9 am.
Canning dried chickpeas for convenience
Sunday night: Rinse presoaked chickpeas. Fill pint jars 3/4s full of presoaked dried chickpeas. Fill jars with filtered water to 1 ½ inch from the top. Top with 2 part canning lids and rings. Process pint jars in a pressure canner at 10 lbs pressure (I used 15 lbs pressure at 2,700 ft) for 75 minutes. Turn off heat. Allow them to cool in the canner naturally before opening the canner. If you are using quarts instead of pints process for 90 minutes.
Monday: I reserved 3 cups of cooked chickpeas for the second batch of hummus. The first batch was eaten on Saturday night. Plus 2 cups of hummus and some pita bread were taken to a friend’s home, where we were invited to share Sunday lunch. We cut the pita in 1/8th wedges and served it with the hummus as an appetizer. Today, I’m making a second batch of hummus, from the cooked beans. But I’m out of pita bread. I’m serving it with washed and cut veggie sticks – cut cauliflower, broccoli, and carrots, as a side dish to my chicken-curry-spaghetti squash – a freezer meal, since we have a meeting tonight.
That’s the flow of time management. You can see it’s a combination of made ahead meals, planning for future convenience, and immediate consumption of a dish – in this case, pita and hummus dip.
Yield from 8 cups of dried chickpeas – 6 cups of prepared hummus, 14 pints of canned chickpeas.
Bonus: With the canned chickpeas, dishes like falafel, and hummus can be made in 5 to 10 minutes – less time than it takes to run to the store.
The actual hands-on time was about 1 hour and 15 minutes for the Saturday meal plus 15 min. additional preparation to process the beans in the pressure canner. The rest of the time I was able to do other things while I watched the timers. And the yield was 1 complete meal on Saturday, plus a potluck dish for Sunday, and the convenience of 14 future dishes ready to be made – hummus, falafel, or roasted chickpeas.
Making hummus from canned chickpeas
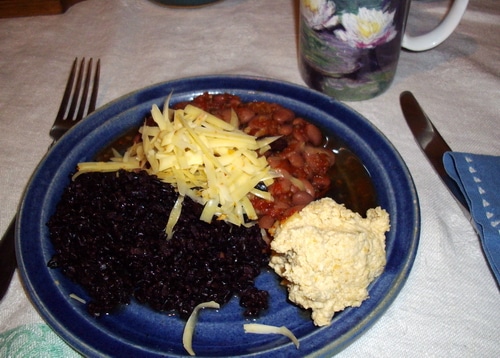
Open 1 pint of home-canned hummus. Drain and rinse the beans – you’ll have approx. 2 cups. Put into a food processor and blend until smooth, adding filtered water if needed, 1 tbsp. at a time to allow the beans to blend smoothly. Add ¼ cup tahini, 2 peeled garlic cloves, ¼ tsp. Celtic salt, 1 tbsp. virgin olive oil, and the juice and zest from 1 lemon or lime. Makes 1 ½ cups of prepared hummus. Hands-on time: 5 min.
There is also a significant saving when making hummus from scratch beginning with dried chickpeas rather than buying premade hummus at the deli or even making it from industry canned chickpeas. Plus your homemade hummus will be free of GMOs and preservatives.
Your Turn:
Are you finding the time to cook from scratch in your busy day? What are your obstacles?



Leave a Reply