Broccoli sprouts are one of the more challenging sprouts to grow at home. They can be finicky and because of the high sulfur content they can quickly turn to a slimy, smelly mess in the jar if they aren’t grown properly. But these tips will ensure that you end up with healthy, superfood broccoli sprouts in just 4 days.
My son was having trouble growing broccoli sprouts. He tried but the sprouts turned into a slimy, smelly, gross mess in the jar, even too gross to toss into the compost bucket. He gave up after a couple tries. That’s such a shame. Broccoli sprouts are so healthy and rich in anti-cancer sulforaphane that they are a first choice for sprouting and microgreens – a real super food. But he had given up trying to grow these superfood sprouts, until I talked him into trying them again.
Broccoli sprouts are a little trickier to sprout, but once you know the secret they are just like any other seed. Seeds want to grow.
Most people mess up broccoli sprouts by treating them the same way they treat alfalfa sprouts or radish sprouts and that’s where they fail. Broccoli sprouts, and all brassica sprouts heat up as they grow. If you’ve grown broccoli in the garden you know, they prefer to grow where it’s cooler. That internal heat is what causes slime and bacterial growth. Bacteria loves warmth. And slimy broccoli sprouts stink. That nutrient sulforaphane is high in sulfur and slimy sulfur smells like a swamp. If you’ve messed up growing broccoli sprouts and have given up, try these tips and you’ll enjoy superfood broccoli sprouts once again.
If you are brand new to sprouting, start here.

Use the correct amount of broccoli seed for your container
With fast growing alfalfa and clover seeds you will generally use 2 tablespoons of sprouting seed for a one quart Mason Jar. This will easily fill the jar in 5 days with beautiful, green sprouts. Broccoli seeds and other brassica seed are smaller and slower growing. And the sulforaphane content is highest after just 4 days of sprouting. (The day you soak them is Day 0) This is the ideal time to eat them. So you’ll need to use more seed to get the same amount of finished sprouts.
I use 3 tablespoons of broccoli seed for a 1 quart Mason jar and end up with about 4 cups of broccoli sprouts after 4 days.
These tips for sprouting broccoli seeds also apply to cabbage, kohlrabi, bok choy and other small seeded brassica family sprouts.
Broccoli sprouts require shorter soaking times
To successfully grow broccoli sprouts you need to counter-act the natural warmth. We do this by shorter soaking times, spreading out the seed so it doesn’t heat up, and frequent rinsing.
Broccoli seed should be soaked no longer than 4 hours. Longer soaking times smother the tiny seeds. They need oxygen to thrive.
Rinse the seed with COLD water.
Don’t worry about shocking the seed. Broccoli seeds like it cooler. Cold water cools them down. You don’t want them to heat up in the jar. Warmth leads to slime and bacterial contamination. Use cold water to rinse them.
Rinse the broccoli sprouts 3 times a day
With easy sprouting alfalfa and clover seed we only need to rinse twice a day. If your house is on the cool side, rinsing twice a day may work with broccoli seeds too. But if you’ve been struggling to get your broccoli seed to grow well, try to rinse more often. If you keep your home at a warmer temperature, rinsing three times a day can help keep these healthy sprouts cool.
Remove as much water as possible
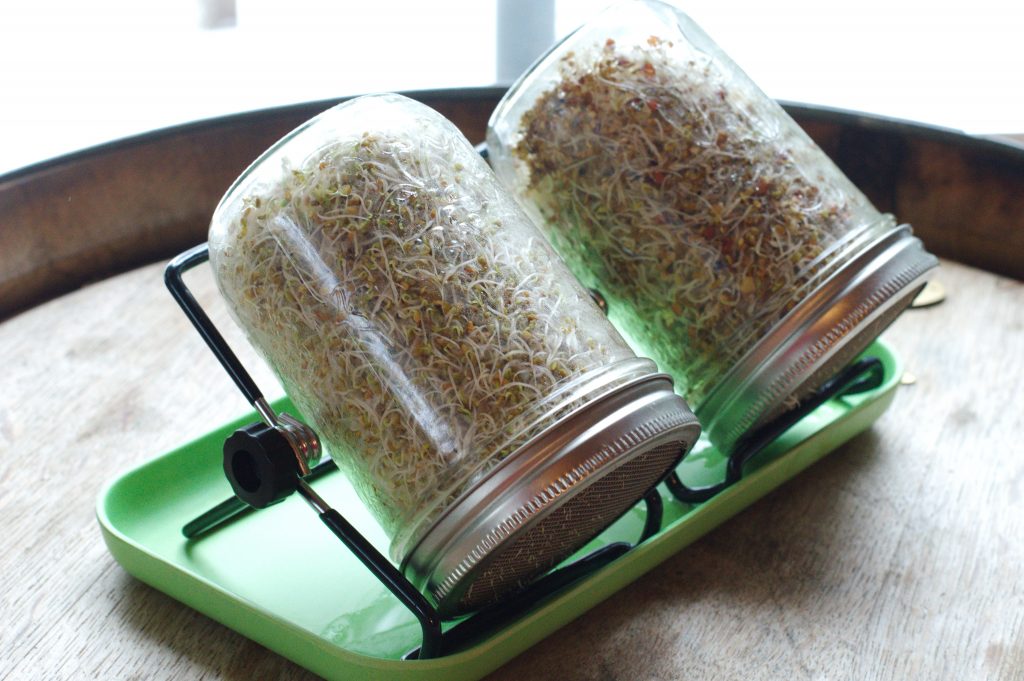
Drain the sprouting container well before setting it aside to drain. I use a Mason jar with a stainless steel sprouting lid to sprout my broccoli seeds. I shake the jar to get the water out before returning the jar to the draining rack. Spending an extra minute to ensure that as much water as possible is removed from the jar, can help ensure successful broccoli sprouts.
If when you shake the jar water still beads out, drain a few seconds longer.
Spread out the seeds
After you get as much water as possible out of the jar, spread out the seeds to a single layer. This prevents the seeds from heating up in your sprouting container. I roll the jar in my hand to place the seeds around the inside wall of the jar. For the first 2 days, the seeds will cling to the inside wall of the jar, ensuring good drainage.
The roots may become entangled on day 3 and 4. I use a fork to separate the clump of roots in the center of the jar and spread them out after rinsing. This ensures that the broccoli sprouts are getting oxygen and draining well. I only do this once a day when I’m rinsing them so it doesn’t take long.
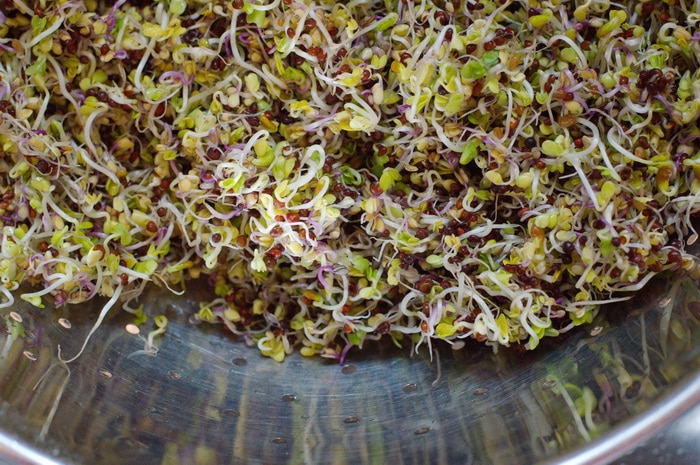
On day 4 you’ll see tiny leaves beginning to green up on your broccoli sprouts and you’re almost done.

Rinse off the empty seed coats
Leaving the seed coats on the sprouts will shorten the life of your broccoli sprouts. This is where a lot of people who are growing broccoli sprouts err. Rinse them off to extend the shelf life.
Empty the jar into a colander (like what you’d rinse pasta in) and use a gentle spray from your kitchen tap to rinse the sprouts and dislodge those loose seed coats. They will wash away down the drain.
Shake the colander to remove as much water as possible. Return your broccoli sprouts back into the jar for 8 more hours to drain. Do not rinse again.
After 8 hours transfer the broccoli sprouts to your glass storage container.
How to store broccoli sprouts
I like to use glass containers to store my sprouts. I think glass extends the shelf life. Line the storage container with a dry paper towel. Fill the container with broccoli sprouts. Cover with a second dry paper towel to absorb excess moisture. Cover tightly with the lid. Store on the bottom shelf of your fridge.
How to eat broccoli sprouts
A serving size of broccoli sprouts is ½ cup. Your 1 quart Mason jar will give you 8 cups of sulforaphane rich, superfood broccoli sprouts or 16 servings.
Add them to a sprout or microgreen salad. Serve them as a side with eggs. Sprinkle them on a sandwich or a bagel. Add them to your daily green smoothie. This superfood deserves to be served more widely.
If you are using your broccoli sprouts in smoothies, they may be frozen in ½ cup serving sizes to make them easier to use.
New to growing sprouts and microgreens?
Check out the Fill Your Salad Bowl workshop and learn how to use 3 different growing methods, at home, so you can fill your salad bowl with super food, nutrient dense, greens every single day. Like broccoli sprouts, these are greens you can use in your salad bowl, greens you can add to soups, stews, and pasta dishes, and even greens you can use in a stir fry.
In this mini workshop you will learn how to fill a salad bowl every day with food you grow yourself.
- Even if you don’t have any land.
- Even if there is 3 feet of snow covering your garden
- Even if you’ve killed house plants in the past.
- Even if you think you have a black thumb.
Have a look at what’s covered in this workshop and see if its a good fit for you, by clicking/tapping the blue button below.


You might need to sanitize your equipment even the spoon you use to measure out the seeds. It sounds like you’ve got some cross contamination happening.