

Learn how to dry fruit so that you can create natural candy from the bountiful fruit and berry harvest that your garden produces.
7 good reasons to learn how to dry fruit
Dried fruit and vegetables do not need refrigeration
Dried fruits and vegetables do not need refrigeration to keep them safe to eat. They are stored in jars with tight fitting lids for long-term storage, or mylar bags. You’ll save freezer space with dried fruit and vegetables. If the power goes out, no worries, your dried fruit will still be good to eat.

Dried fruits and vegetables are compact
Dried fruit and vegetables take up less space in storage. 5 pounds of dried fruit or vegetables will fill a one liter jar in storage but contain the same nutritional benefits as the fresh product with a minor loss of vitamin C. Even citrus fruits, and citrus peels, like oranges and lemons can be dehydrated. If you’re worried about over-consuming dried fruit, measure out however many pieces or slices would make one whole fruit. Then eat that with one or two glasses of water to help your body feel as full as if you’d just had the fresh fruit.
Dried fruit and vegetables are fast food
Dried fruits and vegetables are convenient to use. You can eat them dried right out of the jar, without cooking or you can reconstitute by soaking in water or juice to use like fresh. Dried fruit is high in sugars, fiber, and a great natural source of energy. Add veggies to soups and stews and allow them to cook for 20-30 minutes before serving.
Dried fruit and vegetables are shelf-stable for years
Dried fruits and vegetables will continue to be safe to eat if the power goes out. They are shelf stable for years. As long as they are kept dry, you can safely eat them. Just store them in mylar bags or glass jars.
Home dried fruit is convenient
They are convenient to take on long car trips or backpacking trips, being lightweight, and of small volume. We even keep a few Ziploc bags of dried fruit in the car in our winter emergency kit. You never know when you’ll need quick energy, or meet someone who needs a meal. They’re also a great addition to homemade trail mix, and fruit leathers also make awesome portable snacks.
Home dried fruit tastes better and retains its antioxidants longer
Grapes you dry yourself, without chemical additives, retain their delicious grape-ness. You won’t think they are raisins when you taste them. Apple chips taste like candy, and nothing’s sweeter than dried strawberries. Even cantaloupe and watermelon can be dried into deliciousness.
When you learn how to dry fruit you are self reliant
Self reliance increases your independence and ensures that you have the skills necessary to make it through hard times, emergencies, and everyday inconveniences. You can be proud that you can survive when you know how to dry food for the future.
Essential equipment for drying fruit and vegetables
You don’t need a dehydrator to dry fruit and vegetables. However, consider purchasing a fruit dehydrator if you plan to dry a lot of fruit or veggies at a time. After just a year or two, your fruit dehydrator will pay for itself. You’ll save its cost with the money you will save by preserving your own food in the summer when it’s less expensive. Other equipment to make it easier can be found here.
To dry without a dehydrator, use a baking sheet lined with a cotton tea towel in your oven, with the oven light on and to oven set at 140 degrees. Leave the door propped open slightly to allow for air circulation. You should be able to fit two baking sheets in your oven. You will need to move the sheets around to ensure even drying of your fruits or vegetables. About 3 pounds of fruit or veggies will fit on two baking sheets inside your oven.
If you have a wood cookstove you can place food on baking sheets in the warming cabinet, turning often to ensure even drying, just like your great grandmother used to do.
You can use a car to dry your fruits and vegetables, too. Fit a frame with a window screen to use as the dehydrating tray. Place it in your vehicle in full sun, windows rolled up. Prop the screen up on books or bricks in the back with a towel or newspaper under the screen to catch any moisture — allowing a 4 inch space between the seat and the bottom of the tray for air circulation. Place a second window screen over the first screen to keep out insects. Rotate fruit (or veggies) every couple of hours until the fruit is leathery and dry or vegetables are brittle-crisp. Pasteurize food before storage by placing it in a 120 C oven for 20 min. to kill any insect eggs. Cool completely before storing.
Should you buy an electric food dehydrator?
My electric dehydrator holds 20 pounds of fruit or vegetables at a time. You can dry different food on each tray. Some food is strong smelling — like broccoli, onions or garlic. The smells will transfer to other food, so if you are combining food in the dehydrator avoid the stronger smelling vegetables when drying milder flavours.
When you purchase a dehydrator, make sure that the dehydrator that you purchase is big enough for your family’s needs. A single person or couple can get by with the small countertop model but if you have 2 or more children you will need a dehydrator with at least 6 trays. My dehydrator has 12 racks and the top and bottom 2 are left empty when I fill it, to allow for air circulation. Using an electric dehydrator is the most consistent drying method.
How to dry fruit
Fruit is very easy to dry in an electric dehydrator like this one. Begin with organic fruit. Fruit is one of the most heavily sprayed crops. If you can only find non-organic fruit make sure you peel the fruit before drying. If your fruit is organic you can leave the peels on. If it’s not top quality, simply cut off any bad parts. You don’t need perfect fruit to get a good product from dehydrating it, that’s what a sharp knife is for.
But do remove mold, bruised parts, and any parts of the fruit that are brown and showing signs of rot.
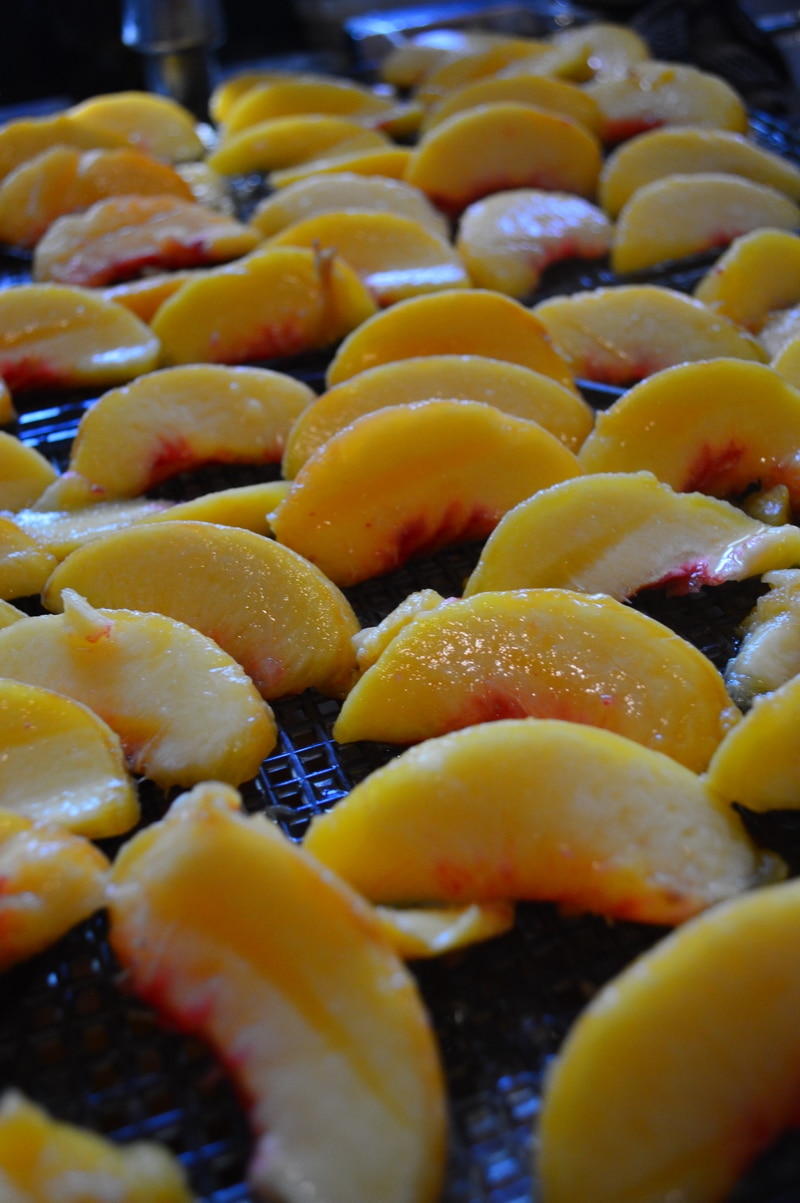
Cut the fruit into small portions. Slice apples, pears, peaches and larger fruits. For stone fruits or berries, halve cherries, apricots, plums, prunes, or grapes. Take out the core or pit. Turn soft fruits inside out with the moist side exposed and the skin side down. Try to lay the fruit on the tray so that each piece of fruit is not touching any other piece of fruit. Place fruit in a single layer on the dehydrator tray.
You do not need to use a pretreatment to keep fruit from browning. As soon as you place it in the dehydrator the forced dry air will cause the fruit to form a seal that stops browning. If you do want to use fruit pretreatments, keep it simple with a lemon juice and water rinse. No need for a honey dip.
Should you use an anti-browning agent?
Although some books on dehydrating tell you that you need to apply a chemical to stop browning — sulphur dioxide (a poison) or ascorbic acid (vitamin C) — these adjuncts are unnecessary if you are using an electric dehydrator. You might want to use vitamin C — use powdered Ascorbic Acid — 1 tbsp in 2 litres of water — if you are drying inside your car or in the oven, as the slower drying will allow oxidation, or use a citric acid solution. Vitamin C is an antioxidant and will prevent this. You can also dip the fruit in lemon juice to inhibit browning of light-colored fruits.
Getting Started:
When learning how to dry fruit for the first time start with an easy fruit. Apples are the easiest fruit to dry. In grandma’s day apples were sliced thinly in rounds and strung on twine and then hung behind the wood cookstove to dry in very airy houses. They will dry in 12 to 20 hours in an electric dehydrator, depending on the wattage. Dried apples can be eaten out of hand, reconstituted by soaking in hot water for an hour or two, and cooked into pies or apple sauce for winter desserts.
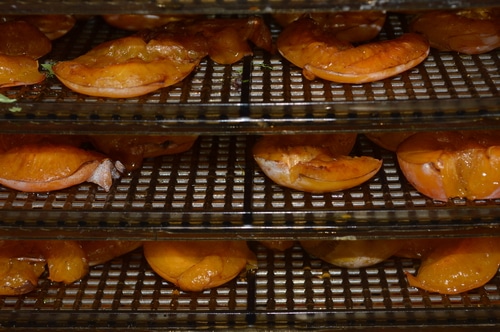
Fruit like apricots and plums just need to be washed, halved, pitted and then pushed inside out, before putting on the trays to dehydrate. These fruits are very moist and should be checked and turned in every 4 hours during the drying time to ensure even drying. They will be half done after 24 hours and can be crowded closer together on dryer trays so that you can add a new fruit to the dehydrator, while they finish their drying cycle.
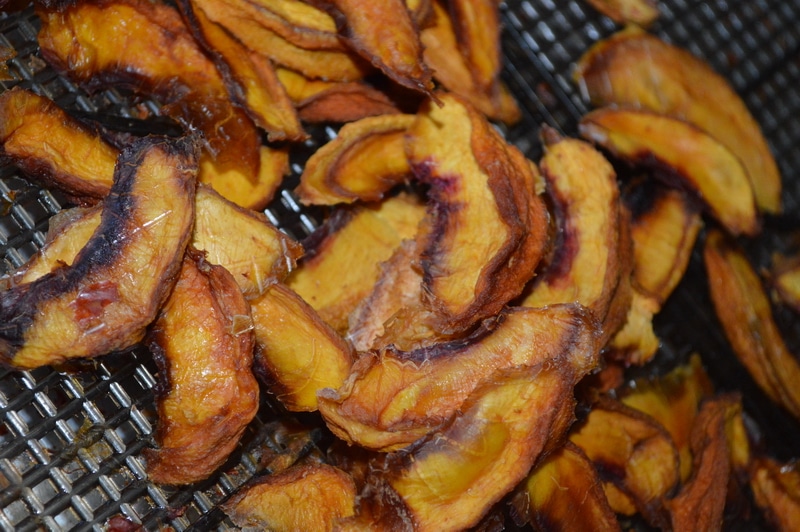
Peaches are high in water content. If you don’t have your own peach tree, they are better canned or frozen than dehydrated. The dried product is thin and without much substance compared to the whole fruit. But if you have only dehydrating as a choice for food preservation then by all means dry them. When fully dry, peaches are thin and leathery.
Cranberries and other small berries can be dehydrated safely. Simply dip them in boiling water, then directly into cold water to break the skins and dry as normal. Use about 4-6 cups water in a large pasta pot for it.
Although processed dried fruit is dried until it is leathery and pliable. It is difficult in a home situation to measure the moisture content of food. I dry until I feel no coolness in the fruit when I touch it and no soft spots. If in doubt dry it longer or keep the dried fruit in a bag in your freezer, or in freezer containers, to prevent spoilage. Always check dryness after the fruit has cooled completely, warm fruit may be flexible or soft due to the heat. Especially super sweet fruits like cherries. Improperly dried fruit will mold at room temperature.
How to store home dried fruit
Store your dried fruit in a glass jar with a tight fitting lid. This is a great use for all those glass mayonnaise or peanut butter jars that are sitting in people’s basements and attics. Remember to rotate your storage jars so that the oldest fruit is eaten first.
For longer storage, you should pack dried fruit in mylar bags with oxygen absorbers added. Home dried fruit can keep for years when properly sealed in mylar bags.
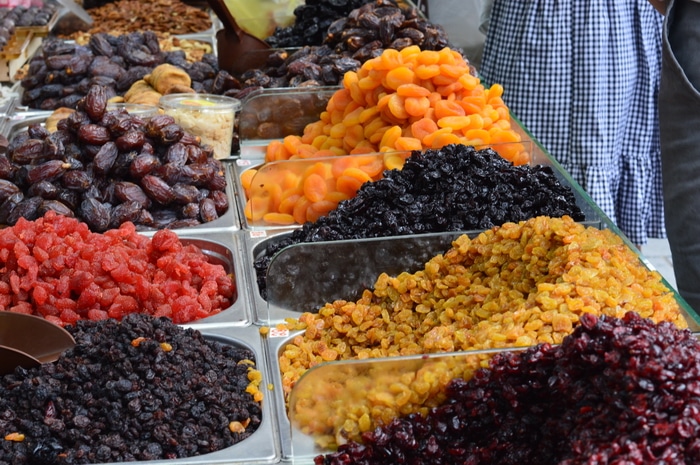
Some fruits to dehydrate
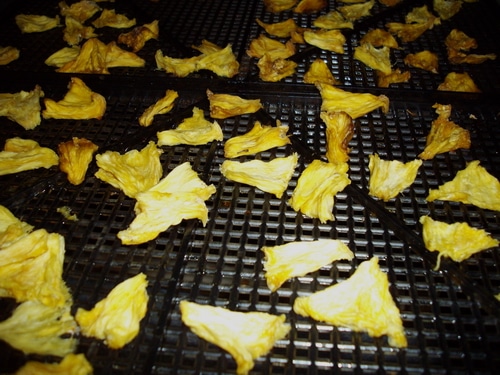
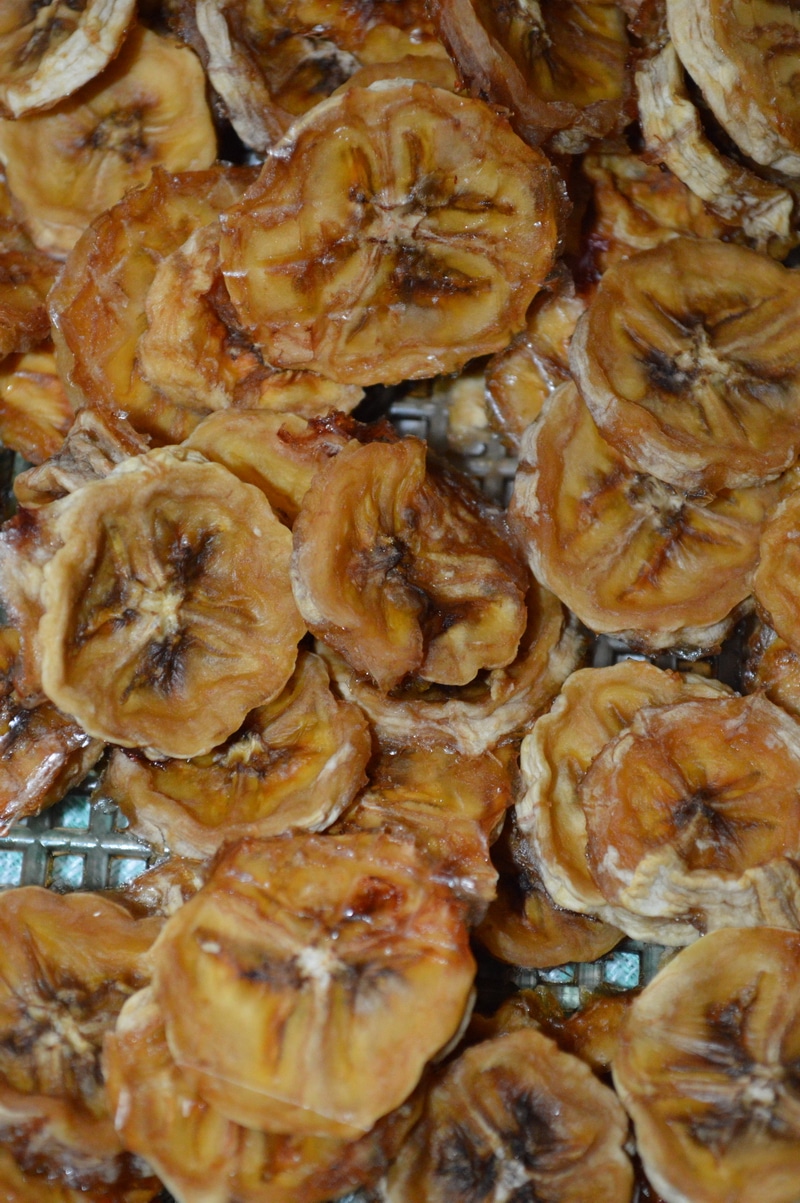
Apples, strawberries, blueberries, bananas, black currants, huckleberries, pears (my favourite), apricots, cherries, grapes, plums, pineapple. Choose firm fruits to dehydrate, as much as possible, but seconds can also be dried. Fruits do not need to be blanched, though if you want to you can try syrup-blanching.
Fruit leather is a great way to clear out last year’s frozen fruits to make way for this year’s fresh stone fruit, or berries. Add one cup sugar per liter of mixed fruit sauce, if it’s tart. Place parchment on a cookie sheet, for oven drying, or use reusable parchment on your dehydrator trays. You can add other herbs, like lavender, by the teaspoon to change and shift the fruit leather’s flavor if desired. Avoid using corn syrup when making fruit leather, sugar works perfect.
Some fruit that is very moist and would be better in another form for winter storage:
Blackberries, raspberries, red currants, peaches, nectarines, and other very moist fruit.
How to dry vegetables
Vegetables are low acid foods that are generally lower in sugar. The sugar in vegetables converts quickly into starch after picking. To halt this process, vegetables should be blanched before canning, freezing or drying. The exception to this rule is tomatoes, peppers and onion which can be dried, frozen or canned after washing and slicing.
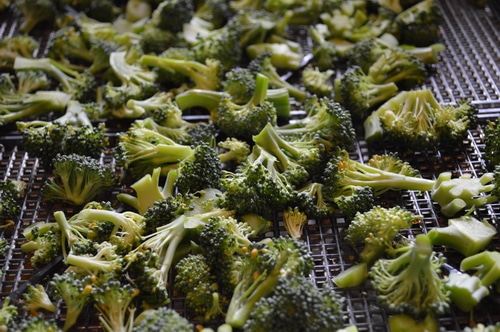
To blanch vegetables, boil a large pot of water, 3/4s full. Wash and slice your vegetables into bite size pieces. Blanch vegetables by placing them in boiling water for 1 minute. Some vegetables, like broccoli and green beans, will change to a bright, lively green when properly blanched. Strain the vegetables from the water and plunge immediately into cold water to quickly cool the vegetable. Drain and space on trays to dehydrate.
Don’t try to blanch your vegetables in the microwave. This harms the vitamins and proteins in the food and doesn’t halt the conversion of sugars to starch. Your finished project will lack the flavour and nutritional content of normally blanched foods.
Dry your vegetables until they are crisp, brittle and hard, with no sign of flexibility or moisture. Turn them often during the drying time. Once they are dry, cool dried vegetables completely. Store dried vegetables in glass jars with a snug fitting lid. For long term storage, home dried vegetables can be packaged in mylar bags with added oxygen absorbers to prevent oxidation and loss of quality.
Dehydrated vegetables can be added to soups, stews and sauces all winter long. They can be reconstituted and served as a vegetable side dish or added to salads. You can also grind them and use them as a spice to perk up winter potatoes or pasta and add nutrition.
Vegetables to dry
Broccoli, cauliflower, kale, cabbage, winter radish, carrots, beets, peas, string beans (called leather breeches in the old days), corn, tomatoes, onions, peppers, hot peppers, lettuce, chard, garlic, eggplant, asparagus, rhubarb, new potatoes. Older potatoes are more starchy and brown badly while drying. Store older potatoes in a cold storage room or root cellar and they will hold till spring.
Remember to keep in mind your family’s likes and dislikes when you are choosing which vegetables to preserve for winter.

More on Dehydrating:

Dive into Dehydrating Food:
If you’ve never dehydrated food before, you can start this year. Nearly any fruit or vegetable can be dehydrated. Dehydration is one of the most accessible methods of food preservation, and you don’t even need a dehydrator to get started. You can even dehydrate meat and full meals.
- What’s dehydrating, anyway?—Learn the basics of how dehydrating works, and the essential tips and tools you need to get started with your dehydrator.
- Dehydrating from A to Z—Discover how to properly dehydrate fruits and veggies, meat and fish, and even herbs and spices.
- Meals, snacks, and sides—Put your newfound knowledge to the test with recipes for classic dried foods like Kale Chips and Apple Leather, and full meals like Shepherd’s Pie and Curry Chicken with Rice.
- Pro-tips on food preparation, rehydration, and using your dehydrated food to boost flavor and nutrition.
Start drying your own food today with the Dehydrator Cookbook for Beginners.


Farenheit. Dry them on trays in your dehydrator.
Thanks for your advices. I have two questions on you. First, I want to know if you mean 140 degrees of celsius or farenheit.
I want to dry black currants. Should I put them right on the tea towel? Won’t they stick up?
Your link for the dehydrator is broken. I recommend the 3926TB which has a timer and auto shut off on it.