Growing potatoes is a great garden option for self-sustainability and food security. It’s also an awesome option if you’re concerned about preparedness, and being self-sustainable in case of supply chain disruptions.
September is National Preparedness Month!
But for people who are struggling right now, it can be difficult to think about preparing for emergencies when the grocery bill is climbing.
One vegetable that I grow in my garden, has been used for survival and emergency preparedness for centuries. It is one of the least expensive foods in the grocery store and it’s even less expensive if you buy it direct from the farmer. I’m talking about the Irish potato. Not the bag of chips or the frozen French fries. But the real food spud. If you live in a warm climate, sweet potatoes may be similar and can have some of the same principles applied to them.

The lowly potato can be grown from zone 2 to zone 8, with ease. It can be grown in the ground and in containers. And you can even grow more from the spuds you have, that are sprouting eyes in the spring. Though ideally you want disease free certified seed potatoes, you can even grow potatoes from the ones you get from the grocery store, in a pinch, or in a compost pile… I’ve had some surprise potato plants that produced really well in the compost.
Grocery store potatoes, or farmer’s market potatoes that are forgotten, can make decent seed potatoes in a pinch. Or, just to keep from wasting them. As long as there is no visible scab or diseased appearance, the potatoes should be safe for your ground. In a pinch, use these non-seed seed potatoes for container growing only, rather than in-ground.
A quick browse through YouTube and you’ll find a lot of gardeners are showing off their potato harvest right now. It takes about 100 days from planting to harvest — so if you planted your seed potatoes in May, they will be ready to harvest in August or September. And harvesting potatoes is a JOY and a delight — like digging for buried treasure.
If you’re in a warm climate like Texas or Florida, you may prefer to be growing sweet potatoes, as well as growing potatoes! Either can be grown in containers, and both are great options for wise use of space.
See this post about growing potatoes in Containers
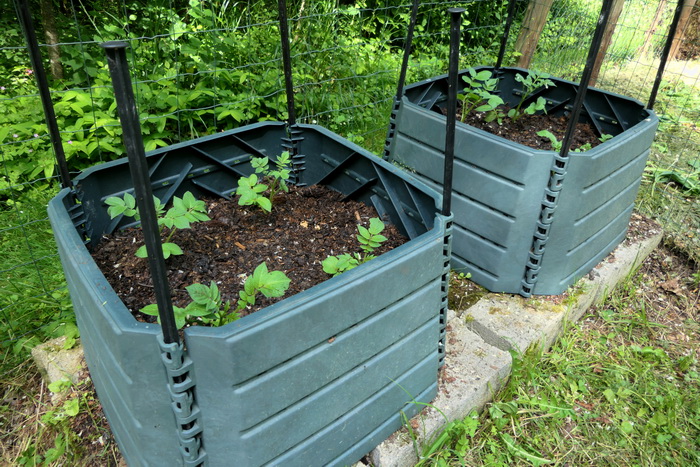
Container growing potatoes is a great option if you have limited space, or underground pests that may reduce your harvest. I have voles and pocket gophers in my garden, so my in-ground potatoes sometimes do not yield very well compared to my grow bags and containers of potatoes that are vole and gopher protected.

How many pounds of potatoes will your seed potatoes yield?
That depends on a lot of factors like, soil fertility, temperatures, length of growing season, and whether rodents helped themselves to your harvest first. So it can vary from as low as 1lb of potatoes per plant to 4lbs of potatoes per plant, on average a pound of seed potatoes equals eight plants.
Here in British Columbia (zone 3) I’m seeing about 7 pounds of harvest for one pound of seed potatoes (about 8 plants). Some folks see 10 to 15 pounds of yield from 1 pound of seed potatoes, or 1 1/2 to 2 pounds of potatoes per plant. Others only get 2 to 4 pounds of yield — so there is a wide variation. But any internet influencer that tells you that you’ll see 25 pounds of potatoes per plant has never grown potatoes before. (That would be a yield of 200 pounds of potatoes to 1 pound of seed). Now, if you have a long growing season and indeterminate potato plants, you will probably get more yield per plant than me.
Realistically, if you get less than 4 pounds of potatoes per pound of seed potatoes, there is something that isn’t ideal — too much heat, poor soil, lack of soil fertility, not a wide enough spacing to allow the plants to grow, for instance. 7 pounds per pound of seed potato is just an average yield. A yield of 10 to 15 pounds per pound of seed potatoes is awesome and a cause for celebration.
Potatoes double in size every week, so for main season potatoes you’ll get bigger potatoes if you can wait for the plants to fully mature (about 100 days) and then add 2 more weeks. Early potatoes will be ready sooner, about 85 to 90 days after planting, but the yield for early potatoes is less per pound, than the yield on main season potatoes. Fingerling potatoes and nugget potatoes are examples of early season potatoes.
Protip:
Those tiny potatoes that you harvest can be replanted immediately in the same bed. You may accidentally leave some anyway, but if you happen to plant some on purpose, they will come back, in most cases, next year. Here in zone 3, I get usually reliable snow covering so my ground doesn’t freeze. Those tiny quarter-size potatoes I replanted last Fall gave me many 8 ounce potatoes this Fall — a surprise harvest. They also produced earlier than the ones I planted deliberately in the spring.
Note: This winter has been strange and we don’t actually have much snow cover. So we’ll see how the over-wintering goes for potatoes and other tubers this year. I have mulched, so that should still give some ground protection, even without the snow.

The Voles are eating my spuds!
If you’ve got rodent pressure, you may need to harvest before your potatoes are fully grown. That can be disappointing — potatoes will be smaller and you’ll find half chewed potatoes along with large and tiny potatoes. Voles and pocket gophers love potatoes, so if you have them around your garden you might have better success growing in 10 gallon pots. The voles and pocket gophers leave the pots alone.
Voles will eat the potato from the top down, whereas pocket gophers feed from the bottom up. Both leave dirt piles where they burrow into the bed. If you have rodent pressure you’ll find tunnels burrowing right through the rows with partially eaten potatoes or no potatoes at all near the tunnels.
What can you do? Voles and pocket gopher populations are cyclical. There will be a year of population explosion and then their predators will move in — owls, eagles, hawks, coyotes, dogs, lynx, bobcat. Placing owl platforms around your garden, getting a garden cat, trapping, are options for control. Keeping the grass around your garden trimmed or putting down wood chip mulch or ramiel wood chip mulch can discourage them by removing their hiding spots.
Storing potatoes
Potatoes are the ideal preparedness food because they can be easily stored in a cool, dry area for many months, without refrigeration. Keep the storage area dark or cover them with a heavy blanket to block light. Light exposure causes the potato to turn green and become toxic. (Don’t eat green potatoes — they are still ok to plant though) If they sprout in February or March, you can cut off the sprouts and eat the potato or keep storing them, until you’re ready to plant them. (The sprouts and leaves of potatoes are toxic though, so don’t eat those)
For longer storage potatoes should be blanched by partially cooking them in steam or boiling water to stop them from turning black. Then they can be frozen, canned, dehydrated, or freeze dried. (My favorite way to store them long term is to freeze dry them along with sweet peppers and onions for O’Brien Potatoes — reconstitute with a small amount of hot water, then fry them as usual).

But they’re just carbs
Potatoes are rich in vitamins and minerals as well as protein, and carbs. The only mineral that they lack is calcium. Eating potatoes with milk products gives you a complete protein.
They are also calorie dense, making them a good choice for a survival food. Laura Ingalls in her Little House books talks about carrying a baked potato in her pocket to school to keep her hands warm in winter, then eating it at lunch time.
Potatoes are one of the easiest vegetables to both grow and store and ideal for anyone in zones 2 to 8. If you live in warmer areas, sweet potatoes may be a better choice.
If your new to growing potatoes and didn’t harvest any this year, its not too late to visit your local farmer’s market and source a 50 pound bag of spuds for winter and for emergency preparedness. There are different varieties for baking and boiling, so have a chat and learn which varieties will work best for what you love to make with them. Then store them in the dark, in a cool, dry place and try some of these recipes.
Growing Potatoes:
Now that you know what to expect, let’s look at a standard growing season. First you want to chose your seed potato variety. A personal favorite is Yukon Gold, they are a decent multip-purpose potato, though Russets are firmer if you want salad potatoes. I like the yellow flesh of the Yukon Golds though. I also like Purple Russian potatoes, they make amazing lavender colored mashed potatoes. Aim to source dedicated and tested seed potatoes, this reduces the chance of potato scab, some blights, and other soil born diseases.
Early and fingerling potatoes often have different skin color, including yellow, white, purple, and red-skinned potatoes in the mix. These new potatoes can be fun to grow with kids, or in containers for early and easily accessible harvesting. You can also harvest new potatoes from your fall-harvest sections, especially if you mulch and hill with straw.
Chose a place with direct sunlight for your potato patch, unless you live somewhere like Texas then use your own knowledge of your growing conditions. Root crops do like full sun, and having good sun exposure and air-flow helps avoid potato blight, and both early blight and late blight.
Potatoes are in the nightshade family, so avoid planting potatoes in areas where tomatoes, eggplants, and peppers were grown the previous year. Try to have a non-nightshade plant rotation in between tomatoes, peppers, and potatoes. Try to make sure your soil has a good level of organic matter, and that any manure amendments are well broken down. I prefer only lightly amending soil before potatoes, and heavily amending it in the years before and after my potato rotation.
If your seed potatoes are large and have multiple eyes, you may want to cut the potato before planting. If you do, cut them the night before and let the cut surface dry out a bit before planting. This reduces the chance of rot and increases your chances of healthy and vigorous plants.
Dig a trench to plant your potatoes in the ground, I usually dig a six inch wide trench, by about six inches deep. Plant the potatoes and back fill the trench, potatoes do fine planted 2 feet apart. If I have highly sprouted potatoes, from say last year’s Farmer’s Market that were forgotten, I’ll plant them about six inches apart, as not all those potatoes will make plants.
Potatoes like slightly acidic soil, but too much nitrogen and acidity can cause potato scabs.
I heavily mulch my potatoes with straw, though I’ve transitioned to wood chips and dirt hilling in the past few years due to voles. If you have low rodent populations, straw is a good mulch and makes early potato harvesting easy. I don’t weed my potatoes too much, mostly just letting the mulch take care of the worst weeds and pulling the large lamb’s quarters about once a month.
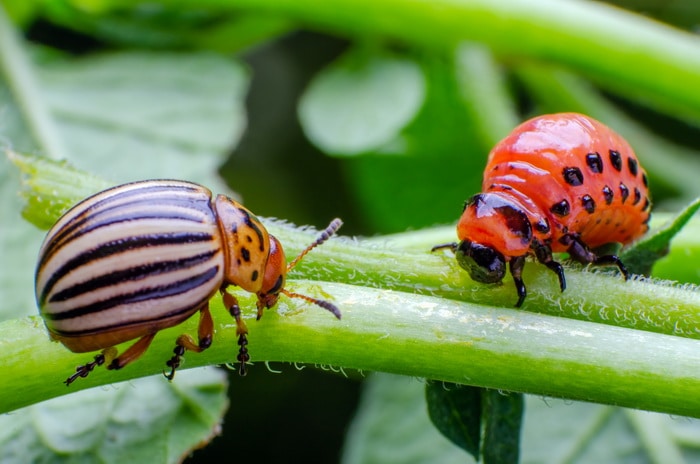
Pests: besides voles that eat the potatoes, you can get above ground pests and insects like the Colorado potato beetles. The best defense against these is hand picking and drowning the bugs in soapy water. Colorado potato beetles, and flea beetles, will also attack other nightshade family plants, so check your peppers, tomatoes, and eggplants too.

Let the potato plants grow throughout your growing season. Hill the plants with straw or dirt up the stems, the potatoes, if indeterminante, can grow roots and more potatoes along the stems. Keep an even moisture level around your potato plants, and water on your regular garden schedule. Try not to over-water when getting close to harvest, and let the ground dry out for the last week before digging and harvesting potatoes (if applicable).
Potatoes can be harvested after your first frost date, and after the tops of the potato plant have died back. Or, you can harvest them before and count based on the “days to maturity” of your seed potatoes.
When digging out the potatoes from your potato trench, use a garden fork rather than a spade or shovel. This helps avoid slicing potatoes in half, though sometimes potatoes will get stabbed by the fork. I usually have a helper, and one of us loosens the ground while the other one plays potato spotter and gatherer. This was also a very effective division of harvest labor when my kids were at home, and maybe I’ll be able to get my grandkids in on the potato harvest in coming years to. There is a joy in the harvest and treasure hunt for potatoes that spans generations.
After harvesting your potatoes, rinse the soil off them but don’t scrub them. Let them dry at room temperature, and lay them out for a few days to let the skins get used to air. After they are cured, you can store them in breathable opaque burlap sacks or similar containers. Make sure to protect your potatoes from light so that they don’t turn green.
If you had crop issues or failures this year, consider trying a new cultivation method next year. If you did in-ground and had voles, try containers. If you did containers and had water issues, try in-ground or semi-buried containers. Don’t be afraid to experiment with your potato growing methods.
What to do when growing potatoes and you have an abundant harvest?
This Mash potatoes recipe is just like Thanksgiving or Christmas all over again. Make to accompany your next roast beef, or chicken dinner. Or just because you want the deliciousness of these mashed potatoes.
This Potato pancakes recipe (Latkes) is a personal favorite for Hanukah celebrations, it’s also a breakfast staple when potatoes are in the house. If you’re concerned on all these potato-y carbs, sub in some dehydrated or freshly grated zucchini when zucchini are in season. You can use half zucchini and half potatoes to make a just-as-tasty version, with half the carbs.
A favorite left-over using dish, this Cottage Pie/ Shepherd’s Pie makes a great freezer casserole if you don’t want to bake it immediately. I usually make it with leftover mashed potatoes and leftover gravy and beef, or lamb, from a bigger dinner. Just add in a few more veggies, and maybe increase the gravy volume to match the size of pie I want to make. I can also make it gluten free, which is a great benefit.
Want to grow more?
New to growing food and vegetables?
Check out the Fill Your Salad Bowl workshop and learn how to use 3 different growing methods, at home, so you can fill your salad bowl with super food, nutrient dense, greens every single day. These are greens you can use in your salad bowl, greens you can add to soups, stews, and pasta dishes, and even greens you can use in a stir fry.
In this mini workshop you will learn how to fill a salad bowl every day with food you grow yourself.
- Even if you don’t have any land.
- Even if there is 3 feet of snow covering your garden
- Even if you’ve killed house plants in the past.
- Even if you think you have a black thumb.
Have a look at what’s covered in this workshop and see if its a good fit for you, by clicking/tapping the blue button below.


Leave a Reply