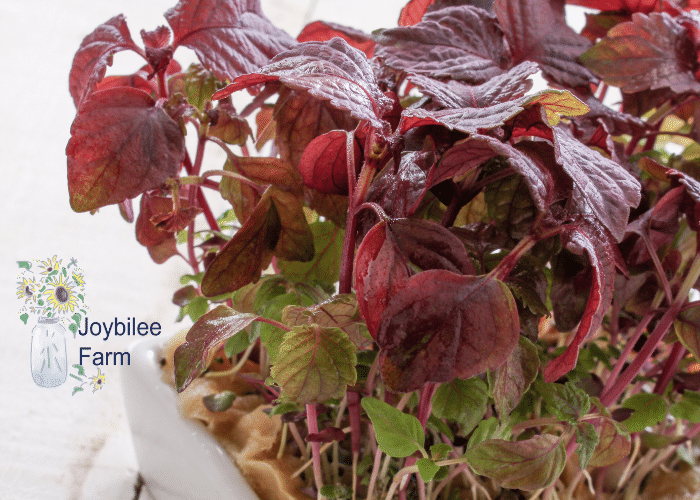
Micro herbs are a great and easy to grow addition to your kitchen garden. They can be grown year-round to have fresh herb flavor, without the hassle of spoilage from store bought fresh herbs, or the gradual reduction in flavor from home grown but dried herbs.
You’ve probably heard of microgreens before. These miniature versions of full-sized vegetables are easy to grow. Many people are growing them on their kitchen countertops year-round and they are even being served in high-end restaurants.
So you know what microgreens are but what about micro herbs? Micro herbs are basically the same thing as microgreens and are grown exactly the same way as microgreens. The only difference between them is that micro herbs are grown with herb seeds and microgreens are grown with vegetable seeds. Micro herbs take just a little longer to grow than microgreens about an extra week or two. Though a lot depends on your herb of choice, and the other growing factors.
 Benefits of Growing Micro Herbs
One of the great benefits of growing micro herbs is that you have access to fresh herbs year-round. While you can dry any excess herbs that you have throughout the gardening season to preserve them for use later on, sometimes you just need that fresh herb flavor. Micro herbs can provide that fresh flavor, though they tend to have a milder flavor compared to their mature counterparts. They also tend to have more concentrated nutrients than fully matured herbs, however, they have lower amounts of fiber. Micro herbs are incredibly tender and can provide unique texture and visual appeal to your cooking and food preparation.
Herbs that work
Technically you can grow any herb as a micro herb but you really want to stay away from woody herbs, such as rosemary, lavender, and sage. Woody herbs grow slow, and germinate slowly, so you get more herb for your effort by keeping a healthy plant. For this project, stick to tender and fast growing herbs. These herbs are good to use for microgreens because they germinate fast, can be harvested at first true leaf stage, and have strong flavor.
- Dill
- Cilantro
- Parsley
- Onions
- Chives
- Leeks
- Cress
- Fennel
- Basil
- Fenugreek
- Celery
- Chervil
- Nasturtium
- Borage
- Lemon balm
- Shiso
- Salad burnet
- Saltwort
- Anise hyssop
- Anise
- Sorrel
- Lovage
The first step to growing micro herbs is to decide which herbs you want to grow and get those seeds ordered. Choose one or two of your favorites and start with those. Learn the best places to buy microgreen seeds in the U.S. and Canada here. It’s very important to get good quality seed, with high germination rates, when growing microgreens or micro herbs.
Growing Your Micro Herbs
Once you have your seeds, you will need some kind of container to grow your micro herbs in. You can buy special trays made just for growing microgreens or you can just use whatever you have lying around the house. You just need a shallow container that is about 2 to 4 inches deep. You can try recycling the clamshell containers from strawberries or lettuce. They usually have drainage holes in them already and the clamshell design helps to retain the moisture so that the soil doesn’t dry out. This helps give new life to an item that might otherwise be thrown into the trash or the recycling bin. Wash the clamshell after each use, and when it’s too worn out to keep using, or it breaks and cracks, then recycle it.

The next item that you will need for growing micro herbs is soil or potting medium. You don’t need to have fertile soil for this. The tiny seeds already have all of the nutrients that they need to grow to the point of harvest for micro herbs. You can use seed starting medium, sterile potting soil, or even coco-coir. I used coco-coir this year to start my garden seeds, and I really like it better than traditional seed starting mix.
There are also hydroponic seed starting mats available if you don’t want to deal with the mess of soil.
You are going to want your soil to be moist before sowing your micro herb seeds. The easiest way to do this is to place your soil into another container and mix it with water. If you have ever messed with seed starter, you know how dry it is and it takes quite a bit of water to moisten it. I like to put mine in an old ice cream bucket, add warm water. Put on the lid and let it sit overnight. This is usually enough to get the soil evenly moist. Use about 5 cups of water per gallon of soil. Once the soil is moistened, you can then place it in your tray or growing container.
Once you have your soil prepared, you’re now ready for the seeds. Lightly scatter your seeds across the surface of the soil. You can gently press them into the surface of the soil or cover them with just a little bit of soil. You will want to have a spray bottle handy to mist the surface of the soil. Add a tablespoon of hydrogen peroxide to your misting bottle when you first fill it, it will help avoid mold and fungus growth while waiting for your seeds to sprout. You will continue to mist the soil twice each day until the micro herbs are ready for harvest. It’s very important to maintain even moisture and avoid letting the potting medium dry out. Most seeds germinate around 70 to 75 degrees Fahrenheit. If your house is a bit on the cool side, you may want to use a heated mat for seed starting. You can use a sunny window sill for light or use a grow light if you have one.
Harvesting:
Micro herbs can be harvested as early as 7 to 10 days of planting depending on the variety. Some varieties can take up 25 days. To harvest micro herbs, simply take scissors and cut them off at soil level. With a little bit of planning and strategy, you can actually have a continuous harvest of micro herbs. For more information on growing a continuous supply of microgreens, check out this post.
Once you have harvested your micro herbs, they can be used in the same way as full grown herbs. They can be used for garnishes on things like pizza, pasta, soup,sandwiches, salads, and wraps. Micro herbs can provide a great flavor punch to salsa, chimichurri, cocktails, potatoes, eggs, dips, marinades, sauces and meat dishes like chicken, steak, or fish. Some micro herbs bring an interesting twist to sweet dishes as well. Try lemon balm or basil micro herbs in a fruit salad.
New to growing microgreens?
Check out the Fill Your Salad Bowl workshop and learn how to use 3 different growing methods, at home, so you can fill your salad bowl with super food, nutrient dense, greens every single day. These are greens you can use in your salad bowl, greens you can add to soups, stews, and pasta dishes, and even greens you can use in a stir fry.
In this mini workshop you will learn how to fill a salad bowl every day with food you grow yourself.
- Even if you don’t have any land.
- Even if there is 3 feet of snow covering your garden
- Even if you’ve killed house plants in the past.
- Even if you think you have a black thumb.
Have a look at what’s covered in this workshop and see if its a good fit for you, by clicking/tapping the blue button below.
Meet Tracy
This post is a guest post by Tracy McGee
Tracy is the creator, mentor, and teacher at Treasured Creations Homestead. She is passionate about helping families use homesteading skills and natural living to improve their health, deepen their faith, strengthen the family and build community. When she isn’t working on the homestead, you can find her hanging out at the fire station, hiking in the Shawnee National Forest, sitting on the front porch, or taking a road trip with her hubby and kids. Tracy is a member of our DIY Herbal Fellowship, a membership that teaches you how to grow and use herbs for food and medicine.


 Benefits of Growing Micro Herbs


Leave a Reply