

Bolstering your immune system is your best defense against colds and flu, as well as other winter viruses. Homemade Fire Cider Your Way can help.
The flu shot is less than 50% effective in a good year. In 2014/15 the vaccine was only 23% effective – what? That’s not effective at all. In 2015/16 the flu shot was less than 45% effective – not even half! However side effects for the flu shot, according to the package insert in the Fluvarin package, include seizures, anaphylaxis, Guillain-Barre syndrome and flu symptoms. Further, the single dose vial contains 1 mcg of mercury, while the multi-dose vial contains 25 mcg of mercury. Mercury is heavy. Don’t think the 25 mcg of mercury is evenly distributed throughout the vial.
The flu vaccine is considered less effective in those over 60. (“What?” You say. “I thought that’s who they made it for!” Yep, I was surprised, too.) The safety of the flu vaccine in children under 4, pregnant women, and nursing mothers have not been tested. Those with egg allergies are likely to have an allergic reaction to the egg protein in the flu vaccine. (Reference: Fluvarin product insert)
But there are better safeguards against viruses than the shot. Bolstering your immune system is your best defense against colds and flu, as well as other winter viruses.
Herbal Wisdom Paid Off
My adult daughter Sarah is working as a volunteer with an aid organization in Jerusalem. She told me a couple of weeks ago that many of her co-workers were getting sick with colds and flu. When she first arrived in Jerusalem in May, a gardener at a home on her walking route to work, pruned their olive tree and tossed the branches over the fence. Sarah carried a branch home and stripped the olive leaves. She put the leaves in a mason jar and covered them with vodka. (Yes, she took mason jars from home in her suitcase.) A month later she strained the olive leaf tincture.
When she had a sore throat and swollen glands in her neck, a week ago, she straightaway started taking the olive leaf tincture she had made – 1 teaspoon in the morning and at night. She started to feel better immediately, while the sickness continued to spread through the office. It’s a little thing, I know, to have this knowledge of herbs.
Just one thing! Build your home apothecary
Little steps done regularly can build your herbal knowledge and your herbal apothecary. Each week I’m bringing you just one thing to help you build your herbal apothecary from your garden. These are quick wins.
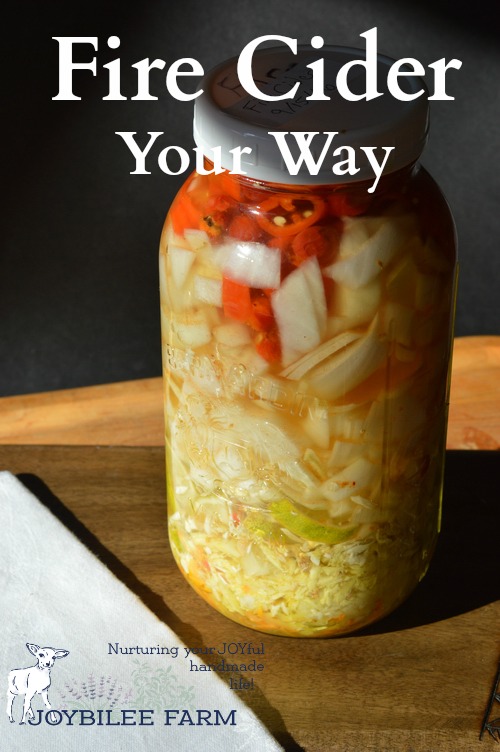
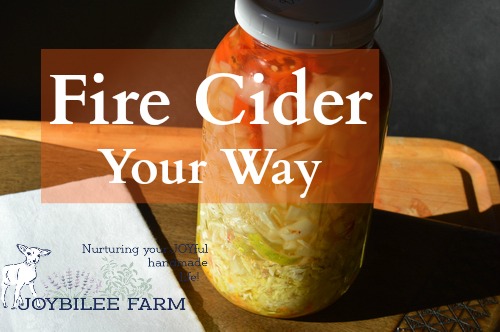
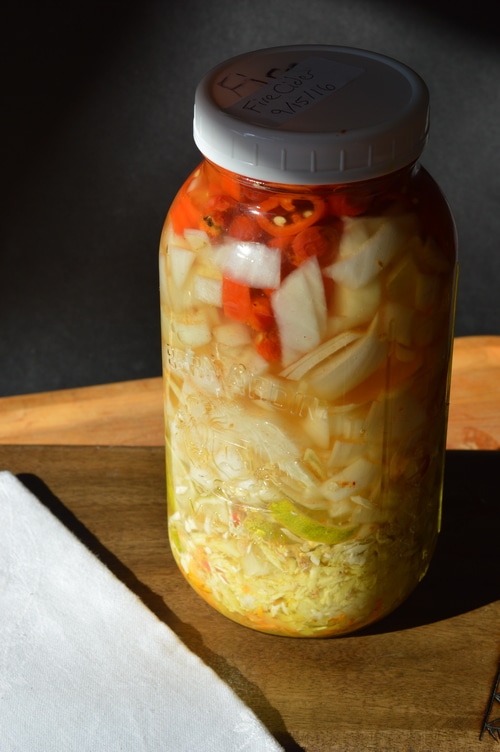
This week’s “just one thing” is Fire Cider. Fire cider is a mixture of spicy food that has a long history in folk medicine of combatting the seasonal flu, as well as bacterial infections. I learned about it from Rosemary Gladstar, the herbalist who made the recipe popular. It’s a treasure! Thank you, Rosemary!
Take fire cider at the first sign of an illness. Use it in salad dressing throughout the winter months. It is both immune boosting and nutritious. It’s a folk remedy so it can be adapted to what you have on hand. If you don’t have horseradish, for instance, add more hot peppers and garlic. If you don’t have rose hips growing near you, add more limes or lemons (vitamin C source). If you have oranges but not lemons or limes, use what you have. Isn’t that fun?
It takes about 15 minutes to chop the ingredients by hand and put them in a jar with cider vinegar. Then another 10 minutes in a month or so, to strain the concoction and stir in the honey.
Print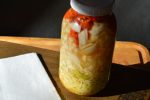
Fire Cider for Immunity
Description
A flexible fire cider recipe to help build your immunity, and your herbal apothecary.
Ingredients
- 2 lemons or limes, fresh, sliced including skin
- 2 heads of garlic, cloves peeled and minced
- 4-inch piece of ginger, peeled and grated
- 3 tbsp. grated fresh horseradish
- 6 to 8 roots of turmeric, grated
- 2 large onions, peeled and finely cubed
- 7 hot peppers, sliced, including seeds
- A ½ cup of rose hips, blossom end removed
- 1 quart of organic cider vinegar, with live mother
- 2 cup raw honey (added after 1 month)
Instructions
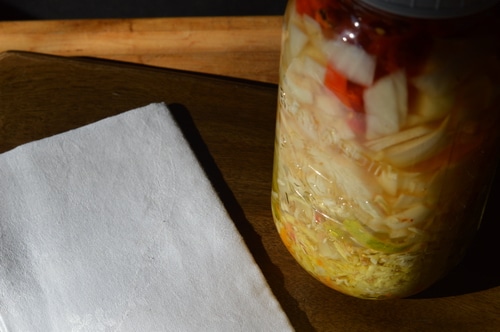
- Prepare the ingredients, excepting honey, and place in a 2-quart mason jar.
- Pour the cider vinegar over the ingredients in the jar.
- Insert a knife into the jar to dislodge any air bubbles.
- Top up with additional cider vinegar until all the ingredients are fully covered with vinegar and the vinegar comes to within an inch of the top of the jar.
- Cap tightly and put the jar away in a cool cupboard, away from light and heat.
- As you think about it shake the jar contents, at least several times a week.
- After a month, strain the fire cider, reserving the liquid. The solid ingredients should be pressed with a potato ricer to extract as much of the liquid as possible. Use the vegetable mixture in cooking or add it to your compost pile.
- The liquid is your “Fire Cider.” As it stands now it is an infused vinegar. The next step will turn it into an “oxymel” that is useful for respiratory ailments, colds, and flu.
- You should have 1 quart of infused vinegar. If you don’t have a full quart, top up the liquid with additional cider vinegar. Stir in 2 cups of honey. Continue stirring until the honey is fully dissolved. Pour into medicine bottles, then cap and label them with the date and ingredients. Store in a cool, dry place. The mixture should keep for 6 months to a year.
Fire Cider for Immunity
Hands-on time: 25-minutes total
Wait time: 1 month
Yield 1 quart
Ingredients:
- 2 lemons or limes, fresh, sliced including skin
- 2 heads of garlic, cloves peeled and minced
- 4-inch piece of ginger, peeled and grated
- 3 tbsp. grated fresh horseradish
- 6 to 8 roots of turmeric, grated
- 2 large onions, peeled and finely cubed
- 7 hot peppers, sliced, including seeds
- A ½ cup of rose hips, blossom end removed
- 1 quart of organic cider vinegar, with live mother
To add after a month:
- 2 cups of raw honey
Directions:
- Prepare the ingredients and place in a 2-quart mason jar.
- Pour the cider vinegar over the ingredients in the jar.
- Insert a knife into the jar to dislodge any air bubbles.
- Top up with additional cider vinegar until all the ingredients are fully covered with vinegar and the vinegar comes to within an inch of the top of the jar.
- Cap tightly and put the jar away in a cool cupboard, away from light and heat.
- As you think about it shake the jar contents, at least several times a week.
After a month, strain the fire cider, reserving the liquid. The solid ingredients should be pressed with a potato ricer to extract as much of the liquid as possible. Use the vegetable mixture in cooking or add it to your compost pile.
The liquid is your “Fire Cider.” As it stands now it is an infused vinegar. The next step will turn it into an “oxymel” that is useful for respiratory ailments, colds, and flu.
You should have 1 quart of infused vinegar. If you don’t have a full quart, top up the liquid with additional cider vinegar. Stir in 2 cups of honey. Continue stirring until the honey is fully dissolved. Pour into medicine bottles, then cap and label them with the date and ingredients. Store in a cool, dry place. The mixture should keep for 6 months to a year.

To Use Fire Cider Your Way:
Take 1 teaspoon at the first sign of a cold or flu. Fire Cider can be taken hourly if needed. If the spiciness upsets your stomach, dilute in a cup of water.
Children may take a ½ teaspoon every hour at the first sign of a cold or the flu. You can alternate with elderberry syrup if you need an extra boost.
How does fire cider help?
Fire cider helps by increasing circulation and encouraging the immune system to do its job.
However, there is a cycle to illness. If you start to feel better taking fire cider but then suddenly start to feel worse, stop using the fire cider. Your illness has moved to a different phase and needs a different approach. More about that in another post.
Other Cold and Flu Fighting Tips from Joybilee Farm
Mullein for colds and flu
5 Uses for Sage Herb and How to Make an Oxymel
Natural Cold and Flu Remedies to Beat the Winter Chill
Your Turn:
What are your most successful cold and flu remedies? Will you share your secret?

If you are using them whole you only need to remove the blossom end. If you plant to cut them so that the seeds are exposed you’ll want to remove the seeds. The tiny hair cover the seed can be irritating.