
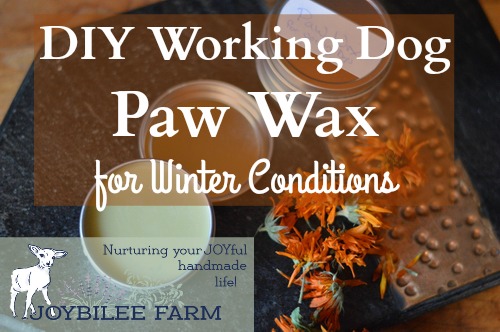
Winter is not the best time to be barefoot, even for dogs. These extreme conditions can be tough on your dog’s paws. DIY dog paw wax gives them the protection they need while they are out doing their homestead job.
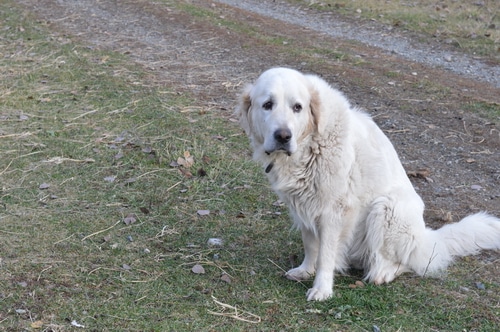
We have two working dogs, one is a purebred Great Pyrenees and her daughter is a Pyr crossed Maremma. They guard our sheep and goats and generally keep predators away from our farm. Every morning and several times a day they make a round of the perimeter of our property to check for signs of predators and chase any away that they find. In the summer they do their work under the cool forest canopy, but in winter they are often running through snow and ice sometimes as deep as their bellies.
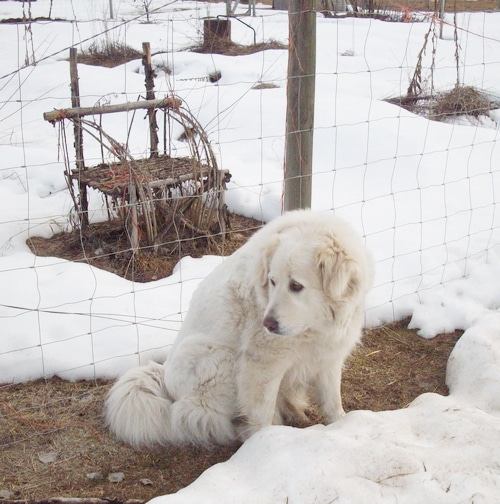
In winter, we bring them in at night but the heat of the woodstove can be too much for them, with their thick white coats. They lie by the door, panting and hoping to be let out into the snow. We sometimes call them snow-dogs and it makes us happy to see how happy they are rolling in the snow.
However, as much as they like the snow, winter is not the best time to be barefoot, even for dogs. The snow can cake between their toes, forming balls of ice that make walking difficult. When they bite their feet and lick them to get the ice balls off, they can make the problem worse. Sometimes the cold and dryness of winter can make their feet crack and bleed. Then the continued abuse of snow and dry weather can compound the injury.
Dog Paw Protection
There is something that you can do to help your working dog in winter. It’s the same product that the Mushers use when they are training their dogs.
When your dogs are walking on ice, snow, or frozen mud they can end up with cracked and sore paws. Get around this and begin early use of dog paw wax. Once paws are cracked, sore, and even bleeding, it is much much harder to treat the problem.
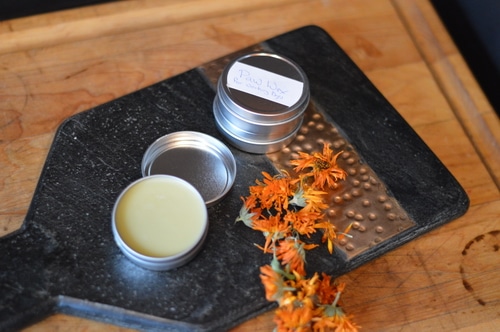
You can protect their paws in the same way that you protect your own heels from cracking with a moisturizer made with natural food-grade oils and beeswax. Calendula is safe for pets and helps to heal cracked skin quickly. Beeswax helps keep snow and ice from caking on the bottom of your dog’s paw, which makes walking difficult.
This Paw Wax Forms a Protective Barrier
The high wax content of this paw wax prevents ice from adhering to the bottom of the paws and with continued use, it forms a protective barrier against salt and chemicals that are often laid down to reduce slipping on sidewalks. Should your dog be exposed to salt or chemicals, wash off the dog’s feet as soon as you can. Use a bar of mild soap and water, dry completely, and reapply paw wax thickly to create a barrier.
Working dogs especially benefit from the added protection of beeswax and calendula. While adding scent is not generally recommended for dogs, the rosemary and lavender essential oils in this recipe offer anti-fungal, anti-microbial benefits. These oils are not harmful to dogs in the dilution used in this recipe.
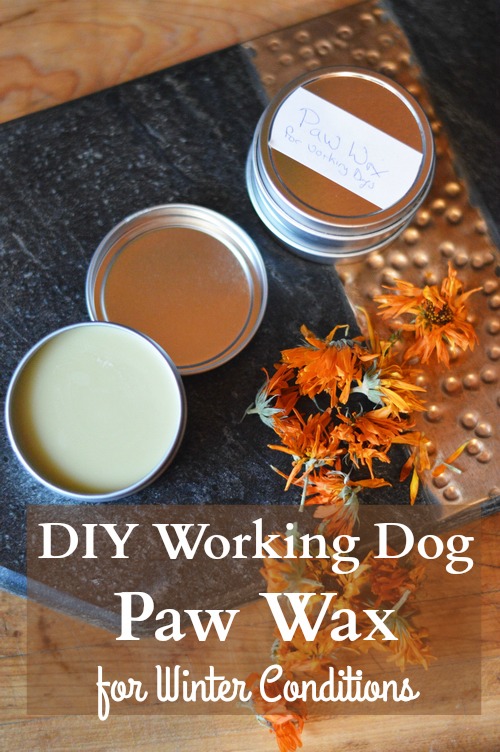
Commercial organic paw wax can cost as much as $20 for a 2-ounce tube. Make it at home with quality organic ingredients in 10 minutes, for just a few dollars. This recipe makes three 2 ounce tins.

DIY Dog Paw Protection Wax for Winter Conditions
- Prep Time: 10 mins
- Cook Time: 20 mins
- Total Time: 30 mins
- Yield: 6 ounces 1x
Ingredients
- 4 tbsp. calendula infused olive oil*
- 2 tbsp. shea butter
- 1 tsp. carnauba wax
- 2 tbsp. beeswax
- ¼ tsp. vitamin E
- 30 drops rosemary essential oil (optional)
- 15 drops lavender essential oil (optional)
Instructions
- Make a double boiler using a glass measuring cup and a saucepan. Fill the saucepan with water so it comes halfway up the side of the measuring cup.
- Place calendula infused olive oil, shea butter, carnauba wax, and beeswax into the measuring cup. Simmer the saucepan over medium heat until all the ingredients are melted.
- Remove the measuring cup from the saucepan. Stir in vitamin E, rosemary, and lavender essential oils.
- Pour into 3 – 2 oz. tins. Allow to cool completely before capping, to prevent condensation from forming on the inside of the lids.
- Label the tins and date. This paw wax will last a year without spoilage. If you notice any signs of spoilage, such as mold or an off-smell, discard and make a fresh batch.
Notes
- Apply to your dog’s paws before going outside, at least once a day. Be sure to rub it between the toe pads to prevent ice build-up. If the dog has cracked or broken skin, apply twice a day to encourage rapid healing.
- The wax dries quickly on the paws and created a protective barrier against injury.
DIY Working Dog Paw Wax
Yield 3 – 2 oz. tins
Ingredients:
- 4 tbsp. calendula infused olive oil*
- 2 tbsp. shea butter
- 1 tsp. carnauba wax
- 2 tbsp. beeswax
- ¼ tsp. vitamin E
- 30 drops rosemary essential oil (optional)
- 15 drops lavender essential oil (optional)
Method:
- Make a double boiler using a glass measuring cup and a saucepan. Fill the saucepan with water so it comes halfway up the side of the measuring cup.
- Place calendula infused olive oil, shea butter, carnauba wax, and beeswax into the measuring cup. Simmer the saucepan over medium heat until all the ingredients are melted.
- Remove the measuring cup from the saucepan. Stir in vitamin E, rosemary, and lavender essential oils.
- Pour into 3 – 2 oz. tins. Allow it to cool completely before capping, to prevent condensation from forming on the inside of the lids.
- Label the tins with the name of the recipe and the date.
- This paw wax will last a year without spoilage. If you notice any signs of spoilage, such as mold or an off-smell, discard and make a fresh batch.
To Use:
- Apply to your dog’s paws before going outside, at least once a day. Be sure to rub it between the toe pads to prevent ice build-up. If the dog has cracked or broken skin, apply twice a day to encourage rapid healing.
- The wax dries quickly on the paws and created a protective barrier against injury.
Learn to make herbal infused oils and 42 Things to Make with Beeswax in these articles on Joybilee Farm.
Allergies and substitutions
Dogs, like humans, can develop allergies to ingredients. If your dog has an allergic reaction to any of the ingredients in this recipe, substitute other ingredients for the ones your dog has a reaction to.
Mango butter can be substituted for shea butter, candelilla wax can be substituted for carnauba wax or beeswax, but with a loss of therapeutic value. Avoid using cocoa butter as a substitution in this recipe.
DIY Gifts
Paw wax makes a lovely gift for a friend and dog lover. Add a homemade dog biscuit just like this one, or chew toy and you’ll have a very appreciated gift for the holidays.
More Beeswax Recipes for DIY Gifts see my new book The Beeswax Workshop published by Ulysses Press.
I was wondering if there is a substitution for carnuaba wax that would work ?
This is such a great recipe! I made a “happy mistake” With a mixup at the soap ingredient store, and unknowingly came home with Camellia oil instead of some calendula infused oil, and after doing a bit of research, decided to just use the Camellia oil. And it works perfectly! I’ve also been using it as a lip balm, I love how it doesn’t seem to wear off easily.
Try adding a couple teaspoons of arrowroot starch or tapioca starch to the recipe. It will absorb some of the stickiness and feel drier.
Quick question, I made this recipe but it’s so smooth and sticky (which I figured it would be) but the dogs slip around and it leaves a lot of residue. Any options to avoid so much residue on floors?
For indoor dogs I found the beeswax alone is a little sticky. But go ahead and try it without the carnauba wax — don’t add more beeswax, just leave it out, and see if you like it. You can always remelt it and add more beeswax. But you can’t take too much beeswax away.