

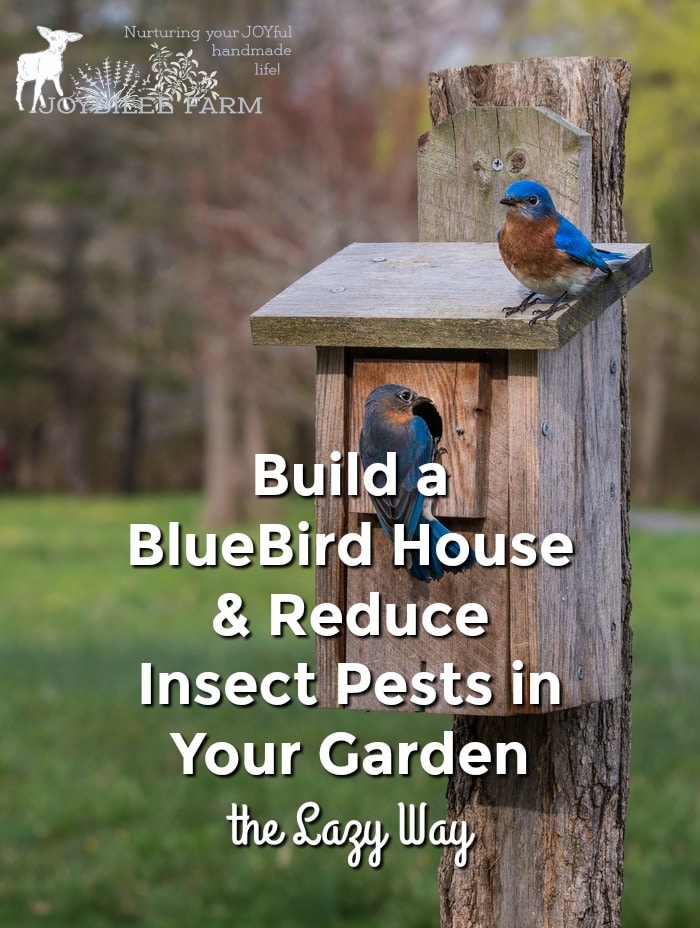
Build a Bluebird House and Reduce Insect Pests In Your Garden the Lazy Way
Homemade bluebird houses invite bluebirds and swallows to your yard, increasing the songbird population and helping to reduce garden pests. This article will show you how to make a birdhouse box from one 1x6x4 board.
Last year we made 4 new blue birdhouses to add to the 3 blue birdhouses that we already had at Joybilee Farm. By June every house was occupied either by bluebirds or by swallows. We had the pleasure of watching families of bluebirds and swallows flying over the pastures, eating grasshoppers and mosquitoes. We also had a big reduction in flies thanks to their huge appetites. It was a win-win with the only cost being some lumber and one afternoon in the shop. The key is getting the bluebird houses to build and in place before the bluebirds return in the spring, around the middle of April here in the mountains of BC, for bluebirds and a few weeks later for the swallows.
You can increase the songbird population around your garden by providing predator-proof nesting sites. Many songbirds eat the insects that plague you and your garden. Bluebirds and swallows both consume mosquitoes and other pests as well as providing entertainment as they swoop close to the ground in the evenings when these pests are active. Attracting birds and bees to your garden is a smart move!
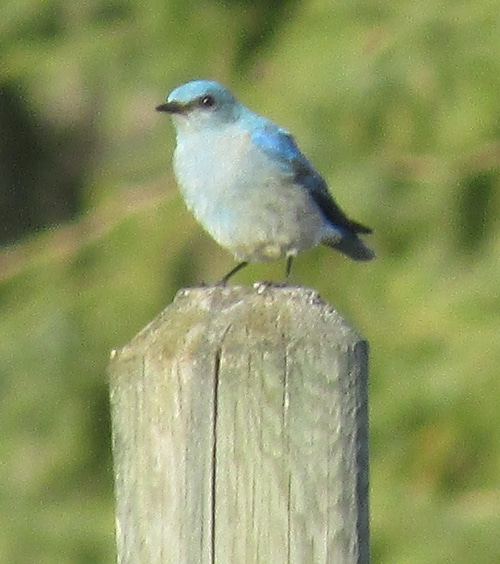
Bluebirds prefer open country, orchards, roadside trees and woodlands that have been harvested. They are not inclined to take up home in the forest. Do what you can to attract these beneficial birds to take up residence on your property. They are not free-loaders and will earn their keep as they help reduce the insect population.
Bluebird Facts:
- Males, females and young alike devour masses of insects, assisting in the control of these pests.
- Both males and females share parental duties and they raise their young with devotion.
- Bluebirds will form friendly, trusting, bonds with the people who monitor their nests or provide for their needs.
- Hosting bluebirds on your property offers you a unique opportunity —the ultimate hands-on, up-close-and-personal experience in wildlife conservation.
- Bluebird populations started to decline when metal fence posts were adopted, this left a scarcity of nesting cavities.
- Bluebirds are early migrators and may need help with food sources during a late spring cold snap that coats available food sources with ice.
Today Mr. Joybilee is guest posting at the Joybilee Farm blog.
He has his own blog at TurningForProfit.com where he helps woodturners turn their hobby into a productive and viable business. Woodturners, there are lots of free woodworking plans on TurningForProfit.com, to keep you and your lathe happy.
Bluebird Houses
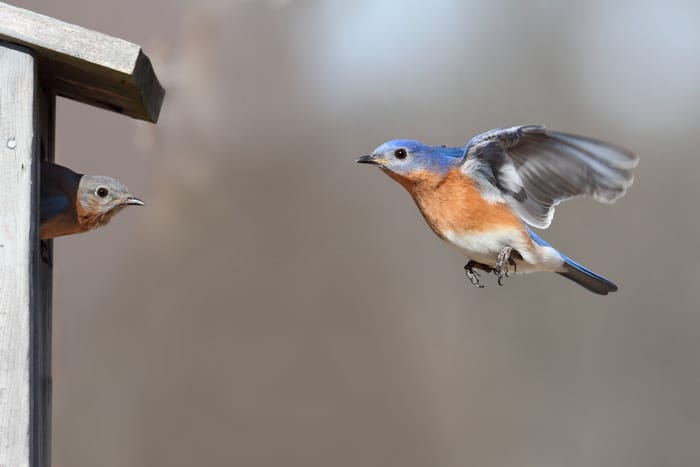
On our farm, we have bluebirds and tree swallows so we’ve made a bluebird house. One box is not enough, though, because both the bluebirds and the tree swallows want to use the nestbox. So far the tree swallows have won out and occupied the bluebird house.
When the little ones have just learned to fly they stay close to the house and when I do chores in the area, the mom and dad tree swallows try to convince me to work somewhere else. What fun being dive-bombed by mom, dad, and their 5 babies.
That lasts for only a few days, then after that, the babies can fly and they are off getting ready for their fall migration. For the bluebirds to have a nest too, I decided to make more nest boxes. Now the tree swallows and bluebirds will be happy neighbours.
Tree swallows, violet-green swallows, and bluebirds all use birdhouses with the same dimensions and hole size.
These three feathered species will tolerate being close to each other in the vicinity of their nest box, but they won’t tolerate another bird of their own species being within 180 to 200 feet. If you are putting up more than two birdhouses for the same species, the others need to be about 200’ away to allow enough territory for each set of bluebirds or swallows.
The original birdhouse plan came out of The Birdwatcher’s Companion, by Christopher Leahy, Hill and Wang, NY, 1982, and is a one-board pattern for making a bluebird box. I’ve made a few changes to the original.
Safety Considerations
Use all necessary safety precautions when you are working with woodworking tools. In the pictures below I have removed the guards from the table saw so you can see how I have set the cut up. For safety, use the guards on your own table saw. If you are not comfortable making a particular cut, then stop and don’t cut. Think about what you are doing and come up with a safe way.
When using your table saw use push sticks, and feather boards as appropriate. Keep your fingers away from the blade. Use extra caution if you are ripping thin strips.
A Bluebird House Made from one Board
You need a 1” x 6” x 4’ board for each birdhouse. The actual dimensions of a regular 1” x 6” planed board are 3/4″ x 5 1/2″. Check your dimensions before you start the project and adjust the measurements so that your birdhouse comes out of one board.
Materials Required:
- 3/4″ finishing nails (for the little strips)
- 1 1/2” finishing nails (for building the birdhouse)
- 1 1/2″ regular nail (for the door to rest on – this nail needs to have a head-on it)
- 1 1/4″ screws (to attach the birdhouse to the support wood)
- 1 1/2″ screws (to attach the support wood to the pole or post)
Tools Required:
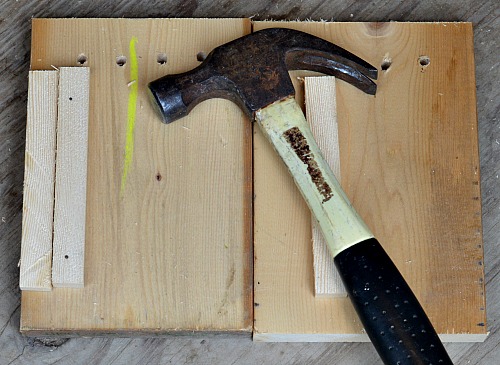
- Hammer
- Table Saw
- Circular Saw
- Portable drill
- 1/4″ twist drill bit
- 1 1/2″ Forstner bit
- Screw Driver
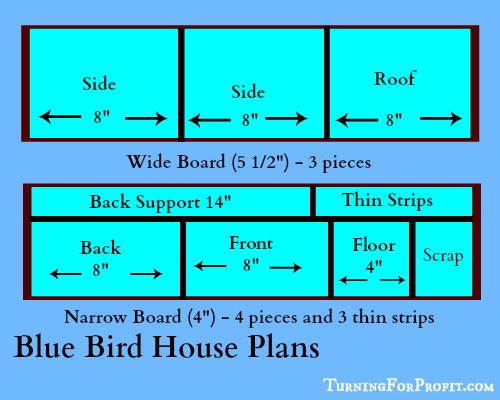
The pattern for the Bluebird house
This is the general pattern I followed for the pieces of the birdhouse.
General Instructions
Have fun and let’s make a birdhouse. A birdhouse is a basic box, with a wall that can be removed for cleaning, and a hole for the birds to enter. This post tells you how I made the birdhouse. There are many different ways to do the same thing. If you like screws rather than nails then you can use screws to build the box.
You do not have to use a table saw. A band saw mitre saw, circular saw and hand saw are all options. You can substitute other tools as you think appropriate.
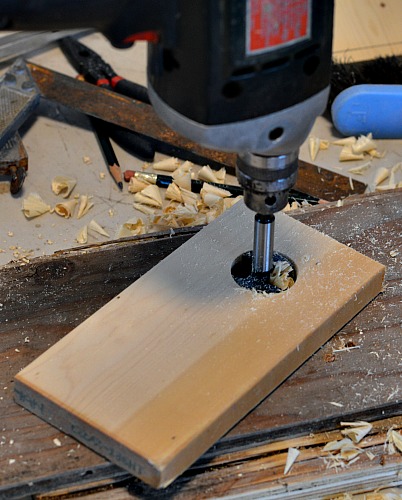
The bluebird house has a 1 1/2 inch hole. You may not be comfortable drilling the 1 1/2″ hole with a portable drill, if that’s the case, use your shop drill press.
Cutting out the parts of your Bluebird house
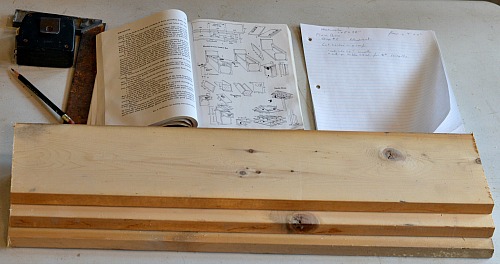
Cut a 25” length off of your board. I used a circular saw to do this. This board will give us two sides and the roof. This is the wide board.
The remaining board needs to be ripped to 4” on your table saw. The 4” narrow board will give us the floor and the front and back of the house. The remaining thin part will give us a support stick and some extra thin strips.
To rip on the table saw set your fence to the distance you want to rip the board to. Make sure your fence is parallel to the blade. To make sure the wood doesn’t bind. I move the far end of the fence just a little bit more away from the blade.
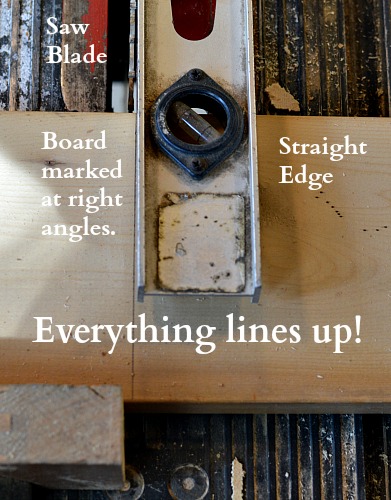
Check the alignment of your table saw blade. I marked a cut line with a square on the board. Placing a 2’ level alongside the blade matches the line on the board. Everything looks lined up and square.
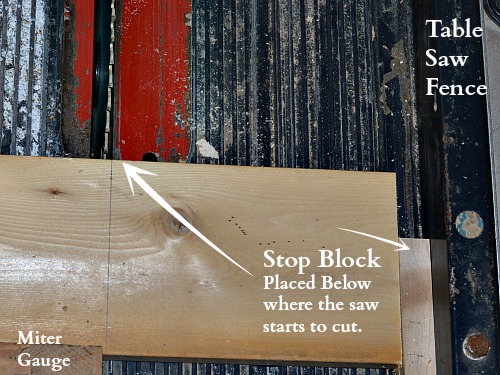
As 5 of the boards we are using will be 8” in length set your table saw up for this length. Clamp a stop block on your fence. Make sure this ends before your saw begins its cut, then the wood won’t bind.
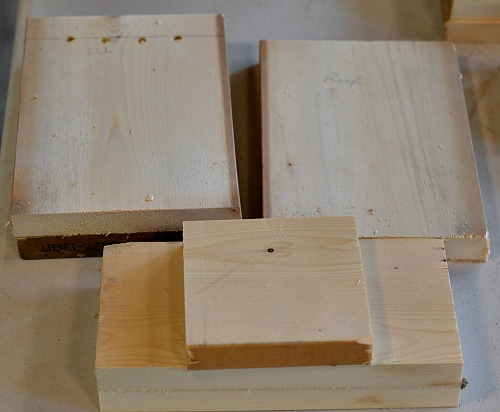
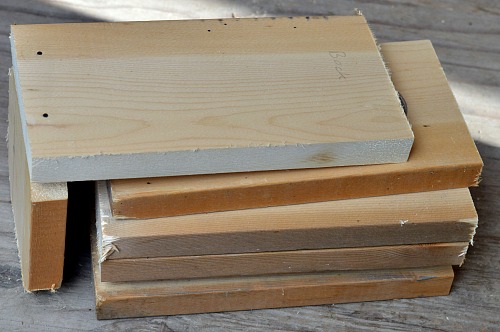
Carefully cut the two sides and roof from the wider board then cut two (back and front) from the narrow board. To make the front piece easier to insert into the birdhouse trim a little bit more off of its length so that it is just less than 8” in length.
On the narrow board cut out the 4” x 4” floor.
Cut the thin board 15” in length. This will be the support for the birdhouse.
From the remaining board cut narrow strips (3/8” thick and 5 1/2” long). You will need three of these.
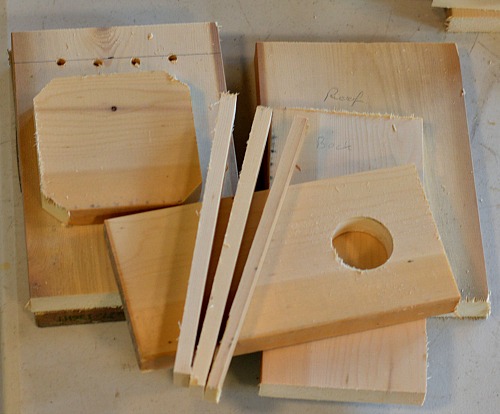
That completes cutting out all the wood you need for your house.
Adding specific birdhouse details
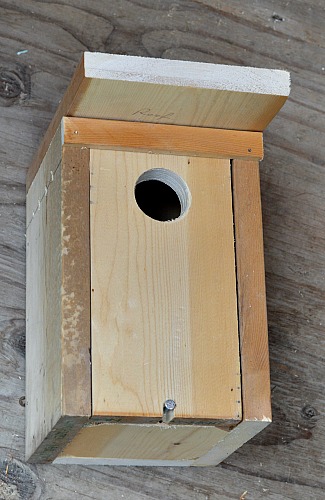
Your birdhouse will need drainage for any moisture that gets in. We cut the corners off of the floor to provide drainage. The nest shouldn’t get too hot so we need to drill 4 quarter-inch holes in the sidewalls for ventilation. The front section needs to be removable so that the nesting box can be checked and cleaned annually.
The front section is removable. It will be supported at the back by two strips placed on the sidewalls of the house. At the front, a strip at the roofline will keep the door in place. To hold it up a nail will be put on the floor (aligned with a groove in the front piece).
Trim the corners of the floor. Set up a jig on your table saw. (Use a clamp to hold a stop block on your mitre gauge. Don’t hit the blade with your metal clamp!) The floor piece is a bit small to handle on the table saw without a jig. 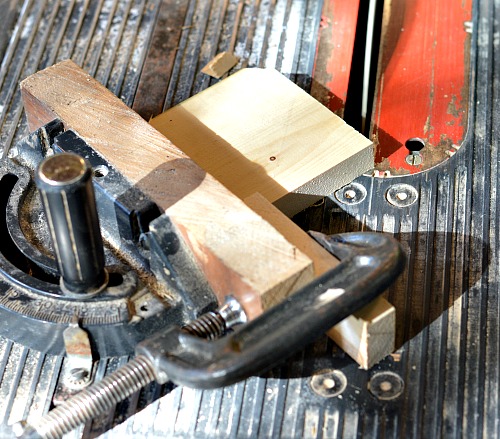
If you are making one birdhouse I would clamp the floor to your workbench and use a small hand saw to trim the corners.
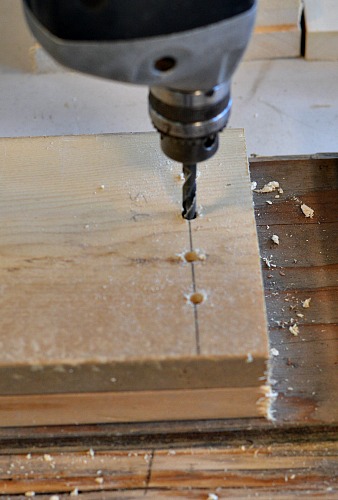
Drill ventilation holes in the sides. Draw a line down 1” from the top of the house on the sidewall. Measure out four holes about 1” apart. I put the two sides together and drilled both at the same time.
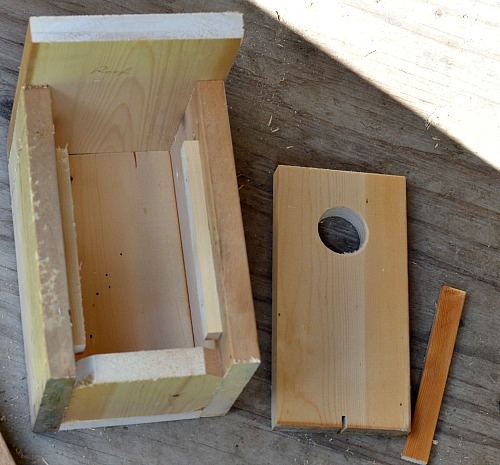
Drill the center hole on the front board. Measure up from the bottom 6” and 2” in from the side. This should be the center of the front part of your birdhouse.
Note that: bluebird / violet-green swallow/tree swallow requires a 1 1/2 inch hole.
Cut a notch in the center of your front wall of the birdhouse. I use my table saw set to cut 3/8” high. Make the notch large enough to slide the head of the regular nail through it.
Now you have all the parts cut and modified to make your birdhouse.
Assemble the birdhouse
When nailing wood together I put the nails in the first board and drive them almost through the wood. Then when you have them in position, your first tap will connect the two boards. The boards won’t slip around as much.
Attach strips of wood to the sides of the birdhouse. These are to hold the front of the birdhouse in place. Position the strip 1 strip width in from the front side of the wall. Use smaller finishing nails to attach. Repeat with the second wall.
Attach the back of the house to the floor. These two pieces of wood are the same width so I used a spare wall to align the two when I was nailing them together.
Attach a side to the back and floor. Make sure the holes are at the top and the strip of wood is towards the front.
Attach the other side to the birdhouse.
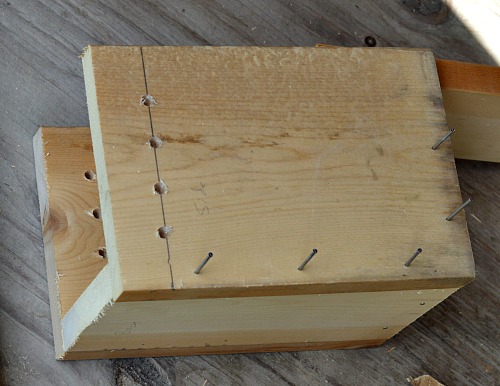
Take your last thin strip of wood and nail it on the two sides flush with the roof. The front section will slide under this, be supported by the strips on the wall, and rest on a nail put on the floor. (Experience is a great teacher. You can see from the image below that I attached the roof first then tacked on the small strip. It was awkward nailing the strip in place.)
Attach the roof to your birdhouse. Make sure it is flush at the back.
Insert the front panel into the birdhouse. With the front wall flush with the floor place a nail at the top of the groove and hammer the nail almost flush with the front piece. You should then be able to slide the front up a little bit to enable it to come out of the birdhouse.
If your door sticks along the side you can plane or trim the sides down a little bit to make insertion easier.
On the back of the birdhouse determine the centerline. Make sure you have three inches of overhang top and bottom of the support board. Screw the centred support board onto the birdhouse.
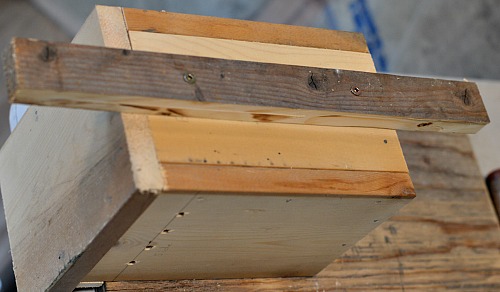
Flip the birdhouse over and start the screws to attach the support board to the pole. This will be above and below the birdhouse.
Congratulations you have built your first birdhouse.

I built three birdhouses in this project. Two were for bluebirds and the middle one is for a Chickadee, Nuthatch, or Downey Woodpecker. The hole for Chickadee, Nuthatch, and Downey woodpeckers is 1 1/4 inches. This hole should be slightly higher in the box, with the inside of the box roughed up to allow the babies to climb out, but prevent predators from reaching in to harm the babies.
I hope you enjoyed this DIY garden project. You might also like my birdfeeder project over on my own blog at Turning For Profit.
Your Turn:
I’d love to hear about your own bluebird houses and the difference it has made in your own garden. Leave a comment. I’ll read every one.
Swallow and Bluebird pictures copyrighted to Sarah Dalziel. Woodworking pictures copyrighted to Robin Dalziel. Used with permission.

Love it! The animal kingdom deserves our help after all of our abuses and simple things like this do make an impact….