Bring the beauty of your local dye plants and forests inside with this creative leaf print baby blanket. Use local leaves and flowers to create a completely one of a kind item. Even if you set up two blankets, identically and simultaneously, they can still turn out unique and different.
There are many creative baby blanket ideas floating around. This eco-friendly leaf print baby blanket brings the magic of natural dyes, natural fibers, and eco-printing into the nursery. With these leaf prints, you use what you have on hand to create fun designs that blossom during the dyeing process. Many of the leaves and blossoms used give more color than you might think.

Look around your garden or neighborhood for plants that can be included in the leaf print. Leaves from oak, walnut, butternut, willow, or any other high tannin tree is a great option. Flower options include yarrow species, chamomile and margarite species, black sunflowers or black hollyhocks, and roses (colors will fade in time). Other bright flowers can also be used, just be aware that the color they give may fade or dissipate over time.
What you need:
- 54 inch long heavy silk fabric (wide as the bolt)
- 54 inch long heavy cotton fabric (for iron blanket)
- Digital scale
- Alum
- Iron
- non-reactive dye pot
- heavy string
- freshly gathered dye materials (variety of leaves and flowers)
Additional materials:
- Light silk fabric in the same dimension as the heavy silk (for the back of the blanket).
- Light quilt batting
- Thread
- Sewing machine
- Pins
Making the Baby Blanket Top:
Weigh the dry silk fabric for both front and back pieces. Weigh top piece separately and note weight. Calculate 10% weight of fiber, this is the number of grams of alum you need to mordant with. Wash the silk with light detergent and rinse thoroughly. Fill the non-reactive pot with hot water and immerse the silk in it.
Calculate 2% weight of fiber for the top piece only. Scour the cotton fabric, and put the cotton fabric with the equivalent of 2% iron sulfate to weight of fiber of the silk in hot water in a non-reactive container. I used a large plastic pail. You may also desire to mordant the cotton with tannin, before adding the iron. I missed that part of the step of creating an iron blanket.
Let the fabrics sit and mordant for about 1 hour, keep the plastic pail in sunshine to keep it warm, and keep the non-reactive pot on a low heat (do not boil).
While the fabrics are mordanting, gather your fresh flowers and leaves for the leaf prints.

After you’ve gathered your flowers and leaves, pull the heavy silk out of the mordanting vat and lightly ring it out.
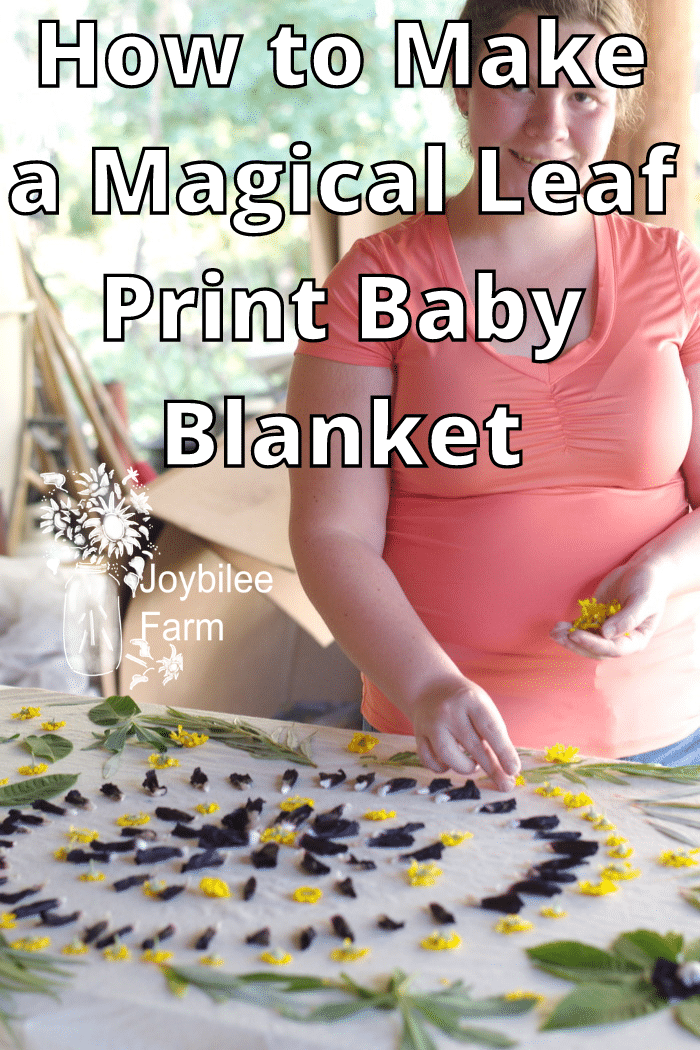
Find the center of the silk, and spread it out on a table or other flat, clean, work surface. Working from the center outward gives you the opportunity to create a balanced and centered leaf print design.
For mine, I started with a curcular pattern using mostly flowers and flower petals, to keep some of the brightest dye colors as the focal point. Around that, I put leaves, other petals, and other flowers. Each corner has it’s own mini design.
Lay out the leaves, petals, and flowers as you wish. Make sure to leave enough white space for the dye to bleed, particularly if working with something like black hollyhock that has a lot of dye potential in a small quantity of petals.
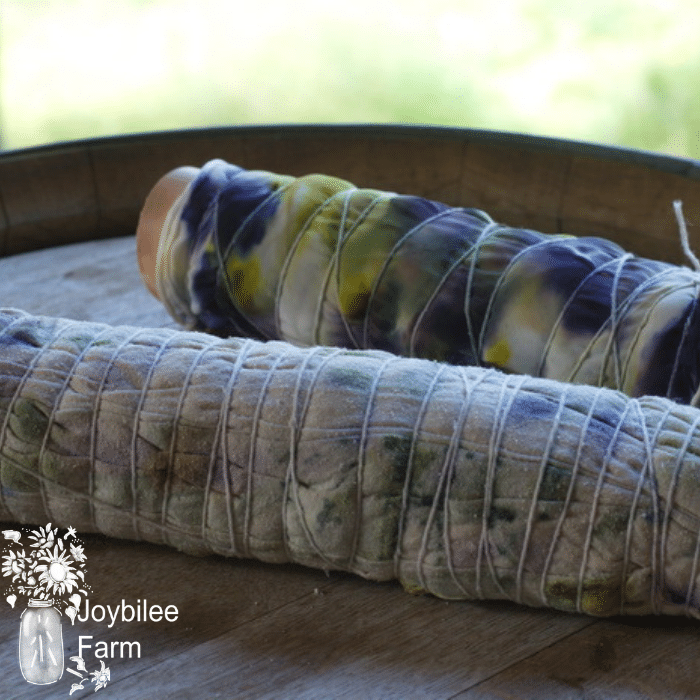
Once you are happy with your design, pull out and wring out the iron blanket. Lay the iron blanket over the leaf design of your silk. Starting at one edge, roll up the silk, leaf, and iron blanket bundle. Roll as tightly as you can.
Once the fabric and leaves are in a fairly tight bundle, fold the bundle in thirds or quarters. Check the size of your steamer at this time to see which fold option will work best (use a tape measure!). Get your sturdy string, and tightly wrap the wrapped up and folded bundle. Use at least two layers of string. Tie off securely and tightly.
Place the bundle in your steamer set-up, and steam for 15-30 minutes. Set aside to cool overnight, or for up to 24 hours. You can wrap the bundle up in a plastic bag if you wish.
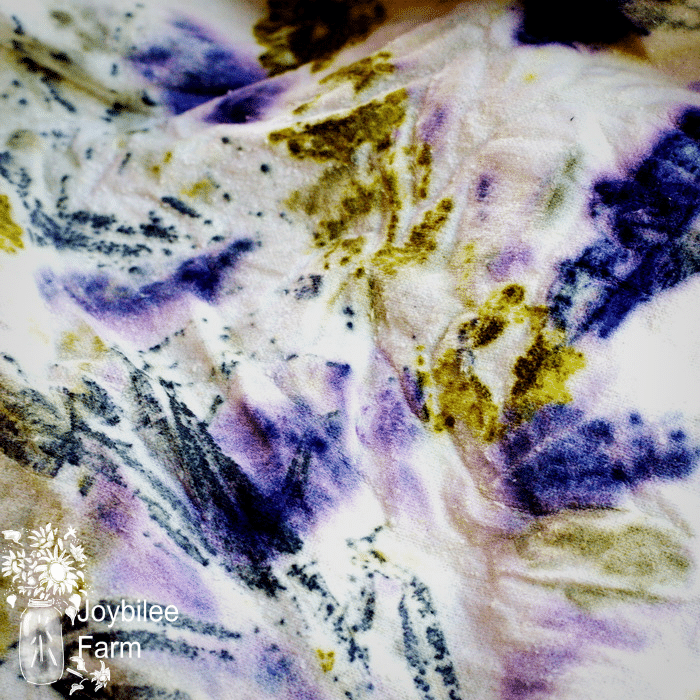
Open your bundle and enjoy the magic. The iron blanket may have picked up a fair bit of dye from the leaves and flowers, so you may have a mirror image on the iron blanket. Please not that when you re-use the iron blanket in the future, dye will not transfer to other fabric.
Rinse off, or pick off, the spent leaf and flower matter from your leaf print baby blanket top. Wash with mild soap, and hang to dry.

Part Two: Assembly
Start with ironing the blanket front, and the backing fabric. Make sure the backing fabric matches the size of your dyed front panel.
Place the backing fabric on the bed, pin flat in the four corners if needed.
Place the batting over top of the backing fabric. It can be smaller than the fabric, by up to ½ inch, or it can overlap. Either is fine, you will trim the overlap off later.
Place the dyed top over the batting and backing stack. Pin in place through all three layers.
Remove the pins that hold the blanket stack to the bed. Place ties through all three layers using yarn and the heavy needle. Stab all the way through the blanket, and back through with the yarn, knot securely on the front side of the blanket. This helps hold everything in place before you do the actual quilting.
Once you’ve added 8-16 ties, shift to the sewing machine. Set up your sewing machine for free hand quilting, if possible. Quilt the layers together in a manner that compliments your design. Use a 2.5-3 stitch length, or 8-10 stitches per inch.
Your quilting can be emphasizing points of the design, or you can quilt in a standard quilting pattern.
Once it is quilted, check and square your corners and edges. Trim any batting that is escaping.
Prepare binding
Calculate the outside of the quilt, mine was about 205 inches. If the fabric you’ll be using for the binding is standard width, it’ll be about ten inches wide.
Cut in two inch strips, you’ll need 21 strips (extra is for seam allowance on the binding).
Sew strips together with a ¼ inch seam, press open.
Pin the binding fabric even with the edge of your quilt. At each corner, place a pin on a 45 degree angle, and fold the fabric to make a triangle before continuing down the next edge. This will help make a mitered corner. When you get to the joining of the two ends, create a second ¼ inch seam to bind them together, press it flat as well. trim any excess over the 1/4 inch allowance. Pin securely.
Stitch around the entire outside of the quilt at a 1/4 inch allowance. A special walking foot can make this easier, but the standard presser foot will also work.
Once that side of the binding is secure. Fold the binding over the edge of the quilt, and fold the raw edge of the binding fabric into the interior center. Pin or clip.
Hand stitch this folded edge, using matching thread, to hide the stitching.
This should give you a crisp finished edge to the quilt, with no rough corners, binding sticking over the edge, or unnecessary bulk.
Wash your leaf print baby blanket with cool water, on gentle or delicate setting with mild soap and hang to dry. Pure hand washing is technically better, but since this is a baby blanket it can withstand some gentle machine washing.
Back to You:
Have you tried eco-printing before? if you haven’t, check out this eco-printed scarf, or this healing cloth turmeric dyed scarf for more inspiration.


Leave a Reply