Add mushrooms to your homestead or garden with this simple inoculation method. Grow shrooms at home and enjoy fresh and safe mushrooms with convenience. Mushrooms are surprisingly easy to grow, and can be started by anyone.
Mushrooms have always been a little mysterious. They are a lot like other kinds of fermentation like sourdough, kimchi, or kombucha. In fact, kombucha is called ‘mushroom tea.’ You already know how passionate I am about fermentation. But mushrooms are more mysterious than other kinds of fermentation. Other types of fermentation give you bread, or wine, or kimchi, or cheese – the finished product sticks around in its finished state and just gets better with aging. Mushrooms, on the otherhand, seem to magically appear overnight on the farm and then if you come back a few days later, they are gone.
And the growing conditions, humidity and temperature have to be just right, or they don’t appear at all. Then there are a few people with secret knowledge that know exactly how to find them, where they grow best, and how to correctly identify the choicest edible mushrooms and avoid the poisonous look-alikes. In fact, the threat of being poisoned by mysterious mushrooms has kept many people from enjoying this healthy food. If you take the jump and learn how to grow shrooms from store bought, you are guaranteed a safe mushroom and easy harvesting to enjoy this healthy food.
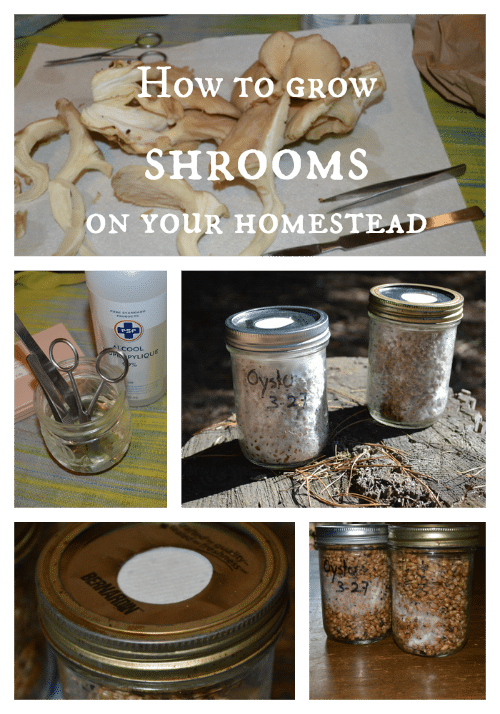
Have you ever wondered how to grow shrooms?
I watched an online workshop with Tradd Cotter on growing mushrooms for food and for bioremediation and I was enthralled. I was so enthralled that I bought his book, Organic Mushroom Farming and Mycoremediation. And so enthralled that once the book arrived from Amazon I couldn’t stop reading it. The book is full of facts and experience that you’d need to go to grad school to learn, and then spend years in a lab just to figure it all out. But Tradd Cotter is a microbiologist who has already done all the work for you and shares his knowledge freely.
Oyster mushrooms seem to be the easiest mushrooms to grow at home. On a difficulty scale of 1 to 5, Tradd gives them a 1 for outdoor growing and 1 for indoor growing, the easiest of all mushrooms that he rates. Oyster mushrooms can be grown on waste products like spent coffee grounds, waste straw, wood chips, or even cotton rags or ripped blue jeans. You can also grow them on logs and stumps like shiitake mushrooms. In this post I will focus on oyster mushrooms, but many of the benefits of oyster mushrooms are also found in other edible mushrooms. Oysters are simply the simplest mushroom to teach how to grow shrooms and to start with, so you have success immediately.
Oyster mushrooms are common worldwide and can be grown on many mediums. They can be trained to grow in harsh climates. They are one of the fastest growing fungi, making them idea for the home garden, or for bio-remediation, or even for community based agriculture and hunger alleviation. The spawn is aggressive and can out-compete mild bacterial infestations in the culture. Uniquely, oyster mushrooms predate soil nematodes, consuming them for their nitrogen metabolites.
Oyster mushrooms are 15 to 30 % protein by dry weight. They also are a rich source of beta glucan and studies have found that they can shrink tumors in mice (Cotter, p. 337, and source). Oyster mushrooms can regulate blood sugar and help you lose weight. They are also useful in bio-remediation because they can degrade hydrocarbons, pesticides, and other chemicals in the environment. Note that if you are using oyster mushrooms for bio-remediation you should NOT eat those mushrooms. Instead put them through earthworms. Once a ground has been through oyster mushrooms and worms the toxic chemicals are broken down into harmless carbon, hydrogen, and oxygen.
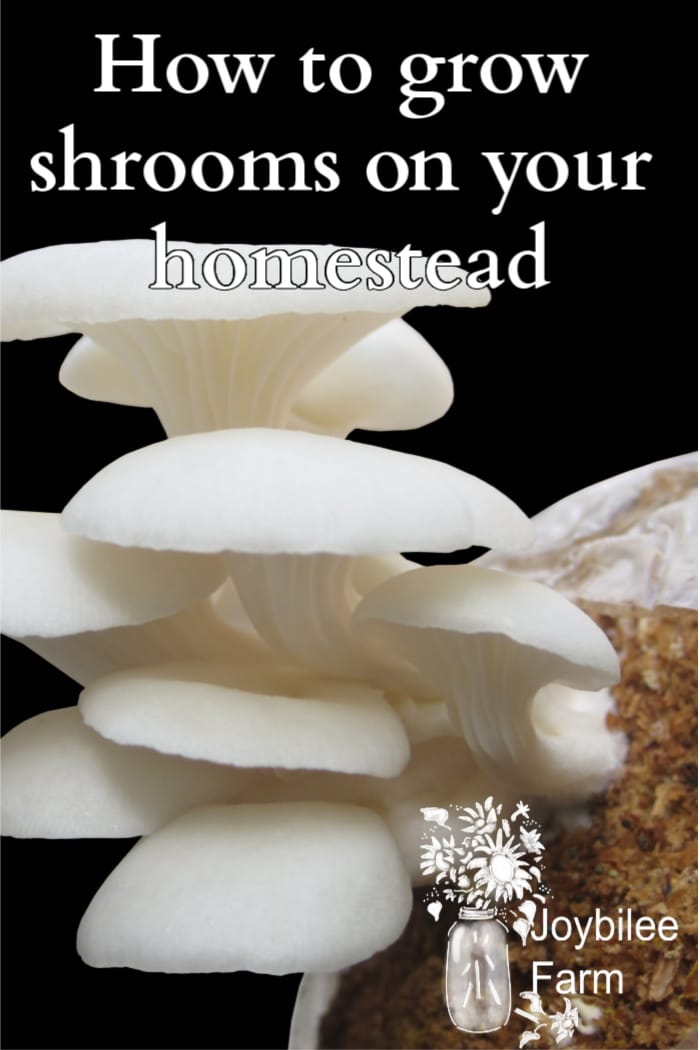
Here are the steps to growing oyster mushrooms
- Obtain starter spawn either by growing your own using a tissue culture or a spore print, or purchasing from a mushroom spawn producer. (2 weeks)
- Use the starter spawn to innoculate sawdust, hardwood dowel plugs, or grain and multiply your starter spawn. (3 weeks)
- Use the resulting spawn to innoculate hardwood logs, wood chip beds, waste straw or other growing substrate. (3 weeks)
- Wait for the mycelium (mushroom roots) to completely fill the substrate. (3 weeks to 1 year, depending on the density of the substrate)
- Prepare for fruiting by soaking the log, bin, or bag in cold water for 24 hours.
- Drain and wait for buttons to form. (4 to 9 days)
- Harvest mushrooms. (10 days.)
- Allow substrate or logs to rest. (3 to 5 weeks)
- Repeat steps 5 through 8.
To begin your own ‘shroom garden and grow shrooms, you’ll need oyster mushroom spawn. In this tutorial I will show you how to grow oyster mushroom spawn from a live mushroom. Ideally you’ll want to begin with native oyster mushrooms, so check with your local mushroom club and find some growing on a stump this summer.
If you don’t want to go through the step of growing you own mushroom spawn from scratch, you can order spawn from a mushroom spawn supplier or from Amazon. If you live outside the USA or in Hawaii, this may be more difficult for you. Mushroom spawn can be imported into Canada with a USDA phytosanitary certificate. At this writing you don’t need an import permit to import mushroom spawn into Canada. Once you have your spawn you will use it to innoculate the substrate that you want to use to grow your mushrooms.
If you prefer to purchase mushroom spawn, there are several commercially available varieties of oyster mushrooms. Each variety fruits in a different temperature window. Use the variety that is adapted to your local area for best results. For an extended harvest season consider matching your local temperatures throughout the year with the strains that thrive in those temperature ranges. Because we tend to be on the cool side during the summer, I picked tree oyster mushrooms to start to grow shrooms with.
Ideal Fruiting Temperatures for Oyster Mushrooms
| Oyster Mushroom Variety | Fruiting temperature |
| Golden Oyster Pleurotus citrinopileatus,P. cornucopiae | 70 to 85F (21 to 29 C) |
| Pink OysterP. djamor, P. eous, P. flabellatrus | 80 to 100°F (27 to 38°F) |
| King Oyster P. eryngii | 60-70 F (15-21C) |
| Florida OysterP. floridanus | 75 to 90°F |
| Tree Oyster (brown, white)P. ostreatus | 45 to 80°F |
| Blue Oyster P. ostreatus, P. columbinus | Cool: 45 to 65°F (7 to 18°F)Warm: 55 to 90°F (13 to 32°C) |
| Phoenix Oyster P. pumonarius | 75 to 85°F (24 to 29°C) |
| Pearl Oyster, White OysterP. ostreatus | 55 to 65°F (13 to 18°F) |
If you don’t have access to mushroom spawn through a dealer, you can also grow your own spawn from a store bought mushroom or a wild specimen via tissue culture.
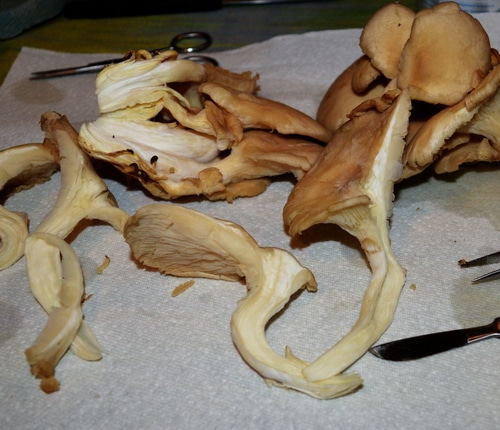
How to grow shroom mycelium from a store bought White Oyster Mushroom
I bought a small hand of brown oyster mushrooms from the local organic grocery store for $10 per lb. I didn’t need a whole pound, just one group. Oyster mushrooms, like bananas come as a connected cluster. I don’t know which variety of oyster mushrooms this particular cluster of mushrooms is. I won’t know at what temperature it fruits until I see how it behaves in my growing conditions. Ideally you should chose a mushroom you like to grow shrooms, and some stores will have species information you you’ll know more than I did when I started.
Choose a cluster that appears sound, without bruising, and in good condition. Bag it in a paper bag. Be careful not to damage it on the trip home. When you get it home refrigerate it and plan to use it within 48 hours. You’ll be able to fry your mushrooms in butter and cook with them, once you’ve isolated your tissue and started your tissue culture.
Print
How to start oyster mushrooms
Description
Start your own oyster mushroom culture with grain substrate, and successfully grow edible mushrooms at home.
Ingredients
- 1 ½ cups of organic rye berries
- 3 cups of non-chlorinated water
- 1 tbsp. spent coffee grounds
- ¼ tsp. agricultural lime or dolomite lime
- 1 bunch/hand of oyster mushrooms
Equipment:
- A 1 quart pot with a lid
- 2 wide mouth pint canning jars
- 2 wide mouth canning jar rings
- 2 metal wide mouth canning jar lids
- A 1 inch hole cutter
- A 10 x 10 inch piece of Tyvek house wrap
- Large stock pot
- 4 extra canning rings or a canning rack that fits your stock pot
- A dissection tool kit that includes a stainless steel scalpel, a teasing needle, and stainless steel forceps
Instructions
- Rinse the rye seed under warm water to remove dust and agricultural waste.
- Place the rinsed rye seed in the 1 quart pot. Add 3 cups of water. Stir in coffee and lime. Allow to sit at room temperature for an hour.
- Bring the pot to a boil. Reduce the heat and simmer the rye for 20 minutes, until the grain softens, but doesn’t burst.
- Remove the pot from the heat and pour the grain into a colander. Allow to cool till it can be handled.
- While waiting for the rye grain to cool, wash canning jars to sanitize them.
- Create two air filters by cutting two circles out of the Tyvek paper, the same size and shape as the canning jar lids. Wash these with warm soapy water and rinse well. Set aside on a sanitized counter top.
- Cut a 1 inch hole in each of the two canning jar lids, using a ¾ to 1 inch hole saw. Sand off any rough spots on the cut edge. Sanitize the lids by washing in hot, soapy water and rinsing. Place on the sanitized counter
- Fill the jars 3/4s full with the prepared rye seed mixture.
- Place the lid inside the canning jar ring. Place the filter inside that. Cap the jars.
- Place a jar rack or jar rings to serve as a jar rack, in the bottom of the stock pot. Put your prepared jars inside the stock pot. Fill the stock pot with water that comes up to the level of grain in the jars.
- Simmer the crock pot, holding the temperature at 185F for 2 hours. You are aiming to pasteurize the grain.
- Begin timing once the temperature of the water reaches 185F and hold it there for the full 120 minutes. Remove the jars from the pot and put them aside to cool. DO NOT OPEN THE JARS. Work in a clean to sterile environment from now on. Allow the jars to cool to room temperature before proceeding.
- Prepare a work surface by washing a counter with soap and water and wiping down with a generous amount of hydrogen peroxide. Allow to air dry.
- Clean your dissection tools and sanitize with hydrogen peroxide or rubbing alcohol.
- Lay down a clean, pressed tea towel on the counter. Put a clean paper towel on top of the tea towel if you wish. Place your sanitized tools on the tea towel, (Ironing will sanitize cloth) or on the paper towel.
- Wipe your hands and the outside of the jars with hydrogen peroxide. Be sure to wipe all surfaces.
- Remove the bag of mushrooms from the fridge and remove the mushrooms to your cleaned surface. Pick the best looking mushroom with a thick stem from the bunch.
- Slice this mushroom in half lengthwise. Take the tissue sample from the centre of the mushroom where it hasn’t been exposed to the air.
- Using your forceps, lift a sliver of tissue beginning halfway through the cap and moving down into the stem. The piece should be at least ½ inch long and no less than 1/8th inch wide. Open the ring from one jar and lift the lid quickly, drop in the mushroom tissue, and close the lid.
- Remove a second piece of tissue from the inside of the mushroom, and repeat with the second jar. Move fast to avoid introducing mold or bacteria into the jar when you introduce the mushroom tissue.
- Now gently roll the grain around inside the jar, moving the mushroom tissue into the center of the grain. Do this by tipping and rolling the jar in your hand till the grain slides around and buries the tissue.
- You now have two jars of grain spawn prepared. Put these away in a clean, dry, cool space where there is fresh air. A closet in an airy bedroom is ideal.
Notes
You should see some mycelium beginning to spread within 4 or 5 days. After a week there will be noticeable clumping and the white fungi will be colonizing rapidly. By day 10 to 14 the jar should be fully colonized. This is your grain spawn or master culture and you can now use it inoculate any other sterile substrate you wish. Enjoy the ability to grow shrooms, for food, at home.
Prepare the growth medium for your tissue culture
You’ll need:
1 ½ cups of organic rye berries
3 cups of non-chlorinated water
1 tbsp. spent coffee grounds
¼ tsp. agricultural lime or dolomite lime
1 bunch/hand of oyster mushrooms
Equipment:
A 1 quart pot with a lid
2 wide mouth pint canning jars
2 wide mouth canning jar rings
2 metal wide mouth canning jar lids
A 1 inch hole cutter
A 10 x 10 inch piece of Tyvek house wrap
Large stock pot
4 extra canning rings or a canning rack that fits your stock pot
A dissection tool kit that includes a stainless steel scalpel, a teasing needle, and stainless steel forceps
Method:
Rinse the rye seed under warm water to remove dust and agricultural waste.
Place the rinsed rye seed in the 1 quart pot. Add 3 cups of water. Stir in coffee and lime. Allow this to sit at room temperature for at least an hour. Overnight is all right.
Bring the pot to a boil over medium heat. Reduce the heat and simmer the rye for 20 minutes, until the grain softens, but doesn’t burst. The rye should remain firm and not mushy.
Remove the pot from the heat and pour the grain into a colander. Allow to cool till it can be handled without burning you, speeding the process by stirring the grain in the colander to release trapped steam.
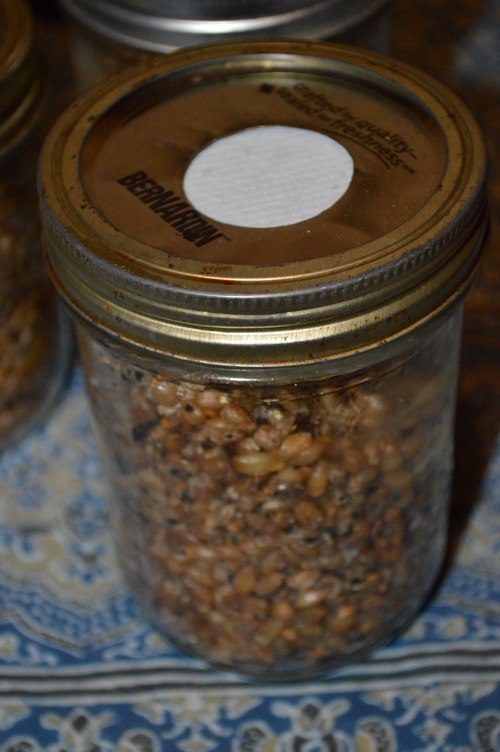
Preparing the filters and the lids
Meanwhile, wash canning jars to sanitize them.
Create two air filters by cutting two circles out of the Tyvek paper, the same size and shape as the canning jar lids. Wash these with warm soapy water and rinse well. Set aside on a sanitized counter top.
Cut a 1 inch hole in each of the two canning jar lids, using a ¾ to 1 inch hole saw. I found this easier to do when I anchored the lid inside a canning ring. Sand off any rough spots on the cut edge. Sanitize the lids by washing in hot, soapy water and rinsing. Place on the sanitized counter.
Fill the jars
Fill the jars 3/4s full with the prepared rye seed mixture.
Place the lid inside the canning jar ring. Place the filter inside that. Cap the jars.
Place a jar rack or jar rings to serve as a jar rack, in the bottom of the stock pot. Put your prepared jars inside the stock pot. Fill the stock pot with water that comes up to the level of grain in the jars.
Simmer the crock pot, holding the temperature at 185F for 2 hours. This is crucial to get the temperature on the inside of the jar high enough to kill any mold spores. You are aiming to pasteurize the grain not sterilize, though.
Begin timing once the temperature of the water reaches 185F and hold it there for the full 120 minutes. Remove the jars from the pot and put them aside to cool. DO NOT OPEN THE JARS. From this point forward you are going to work in as clean an environment as possible. Allow the jars to cool to room temperature before proceeding.
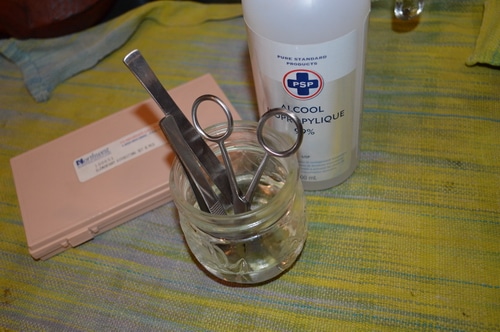
Prepare your work surface
Prepare a work surface by washing a counter with soap and water and wiping down with a generous amount of hydrogen peroxide. Allow to air dry.
Clean your dissection tools and sanitize with hydrogen peroxide or rubbing alcohol.
Lay down a clean, pressed tea towel on the counter. Put a clean paper towel on top of the tea towel if you wish. Place your sanitized tools on the tea towel, (Ironing will sanitize cloth) or on the paper towel.
How to dissect the mushroom to take the tissue culture
When the jars are cool, you are ready to dissect a small piece of tissue from the inside of the mushroom.
Wipe your hands and the outside of the jars with hydrogen peroxide. Be sure to wipe all surfaces.
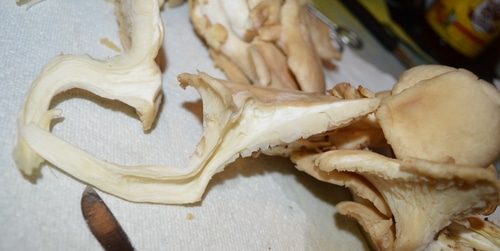
Remove the bag of mushrooms from the fridge and remove the mushrooms to your cleaned surface. Pick the best looking mushroom with a thick stem from the bunch of oyster mushrooms. This gives you the best start to grow shrooms yourself.
Slice this mushroom in half lengthwise. You will take the tissue sample from the center of the mushroom where it hasn’t been exposed to the air. This is where the mushroom will be the least contaminated with bacteria or alien fungal spores.
Using your forceps, lift a sliver of tissue beginning halfway through the cap and moving down into the stem. The piece should be at least ½ inch long and no less than 1/8th inch wide. Open the ring from one jar and lift the lid quickly, drop in the mushroom tissue, and close the lid.
Remove a second piece of tissue from the inside of the mushroom, and as quickly as possible open the second jar, drop in the mushroom tissue and replace the lid. You are avoiding introducing mold or bacteria into the jar when you introduce the mushroom tissue.
Now gently roll the grain around inside the jar, moving the mushroom tissue into the center of the grain. Do this by tipping and rolling the jar in your hand till the grain slides around and buries the oyster mushroom tissue.
Oyster mushrooms are very aggressive at colonizing a substrate and can often out compete foreign fungi. All the same, your technique should be as clean as possible. On the other hand, oyster mushroom mycelium doesn’t require sterile substrate.
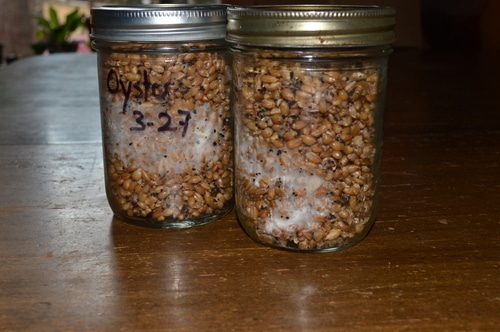
Oyster mushroom tissue culture after 7 days of spawn run in a cool closet. A window was open in the room where the closet was, to allow for fresh air exchange.
You now have two jars of grain spawn prepared. Put these away in a clean, dry, cool space where there is fresh air. A closet in an airy bedroom is ideal.
You should see some mycelium beginning to spread within 4 or 5 days. After a week there will be noticeable clumping and the white fungi will be colonizing rapidly. By day 10 to 14 the jar should be fully colonized. This is your grain spawn or master culture and the first step in how to grow shrooms at home.
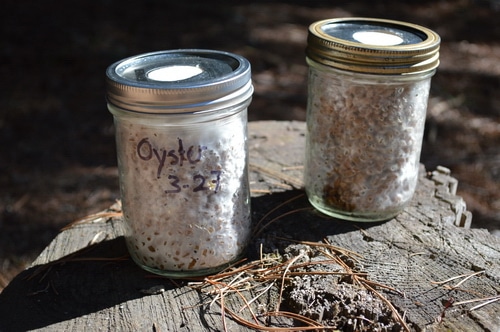
Oyster mushroom mycelium has colonized the rye grain in just 12 days. These jars are ready to expand into other media.
Perpetual Oyster Mushroom Mycelium
Now that you have a master culture of grain spawn you can perpetuate it by preparing the grain, coffee, lime mixture in the same way and pasteurizing the jars with the grain in them, as you did to make the original tissue sample. Instead of cloning using a tissue sample, you can use just a few grains of your master culture, placed in the pasteurized but cooled jar of grain, to clone a new batch.
You also now have oyster mushroom grain spawn. You’ll want to use it within a day or two, using it to innoculate dowel plugs, sawdust, or other growing substrate so that you can grow oyster mushrooms to eat. If you can’t use your grain spawn right away, you can store it in the unopened jar for 3 to 4 months, or for 1 week, once the jar is opened. Always clean the outside of the jar with alcohol or hydrogen peroxide, before you open it to minimize contamination of your spawn.
1 pint jar of grain spawn is about a pound of grain spawn. 1 pound of grain spawn is enough to innoculate 10 to 20 lbs of pasteurized substrate, or
What can you do with Oyster Mushroom Grain Spawn?
- Use it to innoculate a substrate of waste materials to grow out oyster mushrooms in bags or plastic bins.
- Use it to spawn sawdust for growing oyster mushrooms in stumps or totems.
- Use it to spawn dowel plugs for growing oyster mushrooms in logs.
Creating grain spawn is the first step in “How to Grow Shrooms”. Once you have your grain spawn you can keep it going as long as you want.
How to Grow shrooms in logs
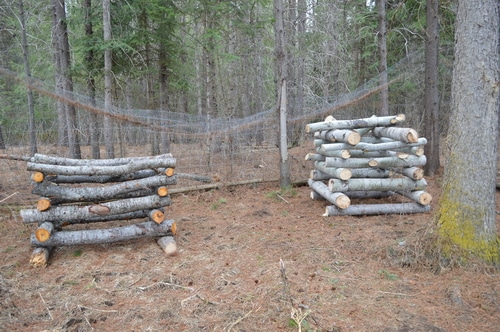
Consider putting a few pieces of mycelated grain in a bag of moistened sterilized dowel plugs. Grow out the mycelium over 2 to 3 weeks and use these spawned dowel plugs to inoculate fresh hardwood stumps and freshly downed hardwood trees from last winter. Just seal the plug holes with petroleum jelly to keep bacteria out and protect the plug from insects, while the logs complete their spawn run. Grow shrooms as a short lived perennial, logs can last up to four years, and will provide multiple flushes in a season.
The plugged logs and stumps will take a few months to finish their spawn run. In 8 months to a year, you’ll end up with a source of healthy oyster mushrooms without much work. Once the stump or felled tree is inoculated it will keep producing mushrooms for years, giving you several harvests each year, even the ground around the log may also grow oyster mushrooms.
I’ll talk about how to prepare a substrate and grow out some oyster mushrooms in a future post. In the meantime, if you are super eager to learn more about mushroom growing check out Tradd Cotter’s book, Organic Mushroom Farming and Mycoremediation. It truly is inspiring.
More on Mushrooms from Joybilee Farm:
How to grow Mushrooms in logs part one
How to grow Mushrooms in logs part two
Your Turn:
What adventures have you had when starting to grow shrooms? What mushrooms have you tried to grow, and succeeded with? Leave a comment, I would love to hear your story.


I haven’t done this with dried so I don’t know. I’ve only done it with fresh mushrooms.
Can spores be found in dried mushrooms as well as fresh?
Would your above recipe work by slicing a sliver of fried oyster mushroom instead of fresh?
Cheers.
Cindy, a great place in BC to find mushroom spore is https://growmushroomscanada.ca. I’ve bought shiitake, several oyster varieties, and lions mane sawdust kits and plugs from them. They’ve got good instructions on their site as well. (no affiliation)