Description
Start your own oyster mushroom culture with grain substrate, and successfully grow edible mushrooms at home.
Ingredients
Scale
- 1 ½ cups of organic rye berries
- 3 cups of non-chlorinated water
- 1 tbsp. spent coffee grounds
- ¼ tsp. agricultural lime or dolomite lime
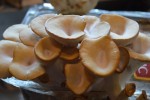
- 1 bunch/hand of oyster mushrooms
Equipment:
- A 1 quart pot with a lid
- 2 wide mouth pint canning jars
- 2 wide mouth canning jar rings
- 2 metal wide mouth canning jar lids
- A 1 inch hole cutter
- A 10 x 10 inch piece of Tyvek house wrap
- Large stock pot
- 4 extra canning rings or a canning rack that fits your stock pot
- A dissection tool kit that includes a stainless steel scalpel, a teasing needle, and stainless steel forceps
Instructions
- Rinse the rye seed under warm water to remove dust and agricultural waste.
- Place the rinsed rye seed in the 1 quart pot. Add 3 cups of water. Stir in coffee and lime. Allow to sit at room temperature for an hour.
- Bring the pot to a boil. Reduce the heat and simmer the rye for 20 minutes, until the grain softens, but doesn’t burst.
- Remove the pot from the heat and pour the grain into a colander. Allow to cool till it can be handled.
- While waiting for the rye grain to cool, wash canning jars to sanitize them.
- Create two air filters by cutting two circles out of the Tyvek paper, the same size and shape as the canning jar lids. Wash these with warm soapy water and rinse well. Set aside on a sanitized counter top.
- Cut a 1 inch hole in each of the two canning jar lids, using a ¾ to 1 inch hole saw. Sand off any rough spots on the cut edge. Sanitize the lids by washing in hot, soapy water and rinsing. Place on the sanitized counter
- Fill the jars 3/4s full with the prepared rye seed mixture.
- Place the lid inside the canning jar ring. Place the filter inside that. Cap the jars.
- Place a jar rack or jar rings to serve as a jar rack, in the bottom of the stock pot. Put your prepared jars inside the stock pot. Fill the stock pot with water that comes up to the level of grain in the jars.
- Simmer the crock pot, holding the temperature at 185F for 2 hours. You are aiming to pasteurize the grain.
- Begin timing once the temperature of the water reaches 185F and hold it there for the full 120 minutes. Remove the jars from the pot and put them aside to cool. DO NOT OPEN THE JARS. Work in a clean to sterile environment from now on. Allow the jars to cool to room temperature before proceeding.
- Prepare a work surface by washing a counter with soap and water and wiping down with a generous amount of hydrogen peroxide. Allow to air dry.
- Clean your dissection tools and sanitize with hydrogen peroxide or rubbing alcohol.
- Lay down a clean, pressed tea towel on the counter. Put a clean paper towel on top of the tea towel if you wish. Place your sanitized tools on the tea towel, (Ironing will sanitize cloth) or on the paper towel.
- Wipe your hands and the outside of the jars with hydrogen peroxide. Be sure to wipe all surfaces.
- Remove the bag of mushrooms from the fridge and remove the mushrooms to your cleaned surface. Pick the best looking mushroom with a thick stem from the bunch.
- Slice this mushroom in half lengthwise. Take the tissue sample from the centre of the mushroom where it hasn’t been exposed to the air.
- Using your forceps, lift a sliver of tissue beginning halfway through the cap and moving down into the stem. The piece should be at least ½ inch long and no less than 1/8th inch wide. Open the ring from one jar and lift the lid quickly, drop in the mushroom tissue, and close the lid.
- Remove a second piece of tissue from the inside of the mushroom, and repeat with the second jar. Move fast to avoid introducing mold or bacteria into the jar when you introduce the mushroom tissue.
- Now gently roll the grain around inside the jar, moving the mushroom tissue into the center of the grain. Do this by tipping and rolling the jar in your hand till the grain slides around and buries the tissue.
- You now have two jars of grain spawn prepared. Put these away in a clean, dry, cool space where there is fresh air. A closet in an airy bedroom is ideal.
Notes
You should see some mycelium beginning to spread within 4 or 5 days. After a week there will be noticeable clumping and the white fungi will be colonizing rapidly. By day 10 to 14 the jar should be fully colonized. This is your grain spawn or master culture and you can now use it inoculate any other sterile substrate you wish. Enjoy the ability to grow shrooms, for food, at home.