On July 20, my daughter was a cabin leader at Pines Bible Camp in Grand Forks, B.C. Canada. At 4:45 pm on July 20th, a whirl wind swept through the Bible Camp, snapping off Pine Trees, and littering every inch of ground with fallen trees and debris. The camp had 150 campers and leaders at the time of the disaster. One camper, 11 year old, Richard Fehr, was killed instantly, when a tree fell on the cabin he was in. The camp closed for the summer. My daughter came home from camp changed. Having led her 8 campers to safety, evacuated the camp to Gospel Chapel in Grand Forks, and then cleaned the church toilets, after the evacuation, on top of her camp responsibilities, she was exhausted, and traumatized. Her fellow leaders told stories of being fearful when the wind blew, and having flash backs of the event.
In order to remind the staff of God’s provision of safety during the storm and to help them process the memories in a healthy way, I planned an art therapy activity that used the Pine Needles from the fallen trees. The Bible tells of the Israelites building a pile of stones, from the rocks in the river Jordan, to remind them that God let them cross over on dry ground. Every time they looked at the symbol of God’s provision of safety they remembered that God was their Rock of Help or Ebenezer. I envisioned the staff creating baskets with the Pine Needles to remind them that God supplied their safety in the storm and He was their help.
Ironically, the Pines staff had an ongoing gag about “Underwater basket weaving” as an example of doing your best work no matter what the circumstance, “even if that was underwater basket weaving.” So when I made the suggestion to Richard Friesen, the camp director, that weaving pine needle baskets would help the staff heal from the trauma, he was enthusiastic.
First we had to gather Pine Needles. The camp was completely covered in Pine branches, after the disaster. No big deal to find an ample supply of long needles. The catch was that the camp was a disaster zone. No one could enter the campus except those authorized. It was just too dangerous. More trees could fall. And there was no safe place to step, as trees and branches littered every inch of ground. Mennonite Disaster Service took over supervision of the clean up. Heavy equipment was brought in to cut down another thousand trees, deemed unsafe. The pine needles for the baskets had to be collected before the heavy equipment rolled over them and broke them. But the camp staff were gone, trying to recover from the shock and devastation.
Finally, Sarah and I were permitted to go on the campus and collect pine needles for the basket weaving project. We found ponderosa pine branches around the chapel area, that had not yet been crushed and broken by the clean up crew. We made up 30 bundles of Pine Needles for the basket weaving. We had lunch at camp, and then stayed for the afternoon to volunteer in the kitchen.
Underwater Basket Weaving Workshop
Last Saturday was the big day. 14 Pines staff returned to the camp for a weekend of healing activities. One of those activities was a 3 hour Pine needle basket workshop. Sarah and I arrived at Pines early to set up. The campus was completely changed. Whereas before, the most dominant thing on the landscape was the huge pine trees. Now the buildings dominated the scene and the ground was strangely bare, and dusty. Huge piles of logs awaited the logging trucks that would transport them to the mills. There were no workers this weekend. The heavy machinery was quiet. Another mountain of debris, broken branches, and smaller logs, towered next to the orderly logs. The sun was bright around the still damaged buildings. No shadows cast by the trees. Nothing to hamper the vision.
To give the ambience of being underwater, and offer a bit of fun for the workshop, we put a blue tarp over the two corner windows of the staff lounge, on the outside. We set up two work tables in the staff lounge. My friend, Evelyn, came to help with the instruction. Evelyn made her first Pine Needle Basket at the Linen Festival at the beginning of the month, but she’s a professional teacher and was a huge help. We got 3 basins soaking with pine needles, while we waited for the start time.
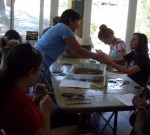
14 people joined us around the tables to stitch their baskets. There was conversation around the fateful day. There were similarities to the day the wind storm blew through the camp and this provoked a mild apprehension, and some memories. After the workshop the staff planned to go to the beach, and then prepare for a closing banquet — similiar events to Friday July 20th.
The baskets started a bit awkwardly. The needles were not pliable enough at first and the drier needles broke as they were bent. But with a longer soaking the needles were more cooperative. Both men/boys and women/girls participated. A few baskets were finished during the workshop. More were completed over the weekend.
It was a great project. In 3 hours, its reasonable to aim for a 3 to 4 inch basket — one big enough to sit on a nightside table and hold coins. Only a few of the 14 baskets were completed in the 3 hour time limit, but more were completed over the weekend.
Materials:
14 — 200 gram bundles of long Pine Needles
5 spools of cotton twine
3 packages of 12 tapestry needles
3 large basins to soak Pine Needles
A large blue tarp to go over the outside of a window to give the feeling of being underwater (optional)
Instructions:
In a previous post I gave some basic instructions for weaving pine needle baskets. Making a coil basket with pine needles and thread is much like making a coiled pot out of rolled snakes of clay. But you are using pine needles instead of clay, and you need to secure them with thread or raffia, instead of having them stick together naturally, as clay does.
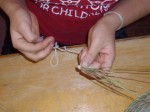
Each bunch of pine needles is secured by a black end. This can be removed with your fingers, once they have been soaking for a few minutes. Each bunch of Ponderosa Pine needles has 3 needles. Take 3 of these bunches and hold them together in your non-dominant hand. Begin by wrapping a bundle of three bunches of pine needles with the thread to about 1 inch in length, laying the thread parallel around the needles. Bend the needles and continue wrapping the needles, but this time catch the original wrapped part of the needles into the new wrapping. Its easier to show you than to explain this in words.
Now you have two layers of the coil and you are going to begin to stitch the needles into the coil by inserting the needle from the front of your work to the back. You are going to put your needle into the row below the new row, between the row of pine needles, so that each loop catches 2 rows of needles. Make every stitch from the front to the back, allowing the thread to loop over the bundle of needles, thereby securing them into place. Because you are looping over two rows you will make a very sturdy basket. While you stitch, let the pine needles coil around the ones you’ve already done. It will naturally make a circle. Since the pine needles are damp, you will be able to manipulate them and keep your coiling flat. This will become the bottom of you basket.
Continue in this manner but when you get to the third row of your stitch, insert your needle to the left of the stitch made in the previous row. By always stitching to the left you will make a line of stitching on the basket. The line of stitching becomes that right side of your basket.
To add a new bundle of pine needles, pull off the black end and discard. Insert the new needles under the intersection of the former needles and the stitched coil. Only add one bundle of needles (3 pine needles) at a time and secure with your next two stitches, before adding in another bundle. Always stagger the adding in of new needles to make a stronger basket. The longer your needles, the more stitches you can make between additions of fresh needles.
When you are ready to add more thread, simply leave the old thread handing on the wrong side of your work and make a stitch over the last stitch you made, leaving the end of the new thread, also hanging on the wrong side of your work. These will be cut off when you are done, or sooner if they seem to be getting in your way.
As you stitch your coil, your stitches will get further and further away, when they are about 3/4 s of an inch apart, add an extra stitch between every stitch for one row only, and then continue stitching as usual on the next row. Ultimately you want to keep your stitches no more than 1/2 inch apart, to make your basket sturdy and extend its life.
Once your coil is three to four inches in diameter, you can begin the sides. The sides are laid on top of the last row of coils and you continue stitching as you have been doing. You can choose at this point to flare the sides outward as you stitch or to make them straight and perpendicular to your base — by where you lay your coil down over the last row that you stitched. Continue in this manner until the basket sides are as tall as you want them. Continue to add in needles, as necessary.
For your final row, you want to lean the bundles toward the inside of the basket to create a strong rim that won’t easily break with use. This will make a natural curve to the rim. Stitch two rows like this and when you get to the end of the last row, don’t add any more pine needles. Simply continue with the needles that you have until you run out of needles. I like to secure the very tip of the last bundle of needles with several parallel stitches. This strengthens the rim and ensures that no one gets pricked with the exposed tips, which are very sharp when thoroughly dry.
Trim off excess thread. Finish baskets with the finish of your choice. (More on that in another post).
Pictures from our wonderful day of Underwater Basket Weaving at the Pines:
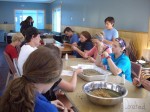
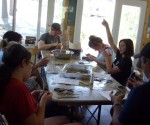
- Starting the baskets. Both the male and female staff participated.
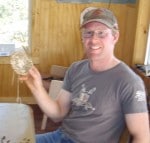
- Dan, maintenance boss, shows his basket in process.
- 3 baskets nearing completion.
- How to start your basket.
- A blue tarp over the corner windows gives the atmosphere of being underwater.
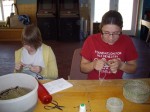
- Busy weaving and stitching Pine needle baskets, made from the needles of the fallen pine trees.
- Evelyn helps instruct the participants on how to begin their baskets.
- Trinda, Serf Director at Pines Bible Camp, shows her basket.





I never would have thought of weaving with pine needles! Great suggestion 🙂