Grandma Alert!
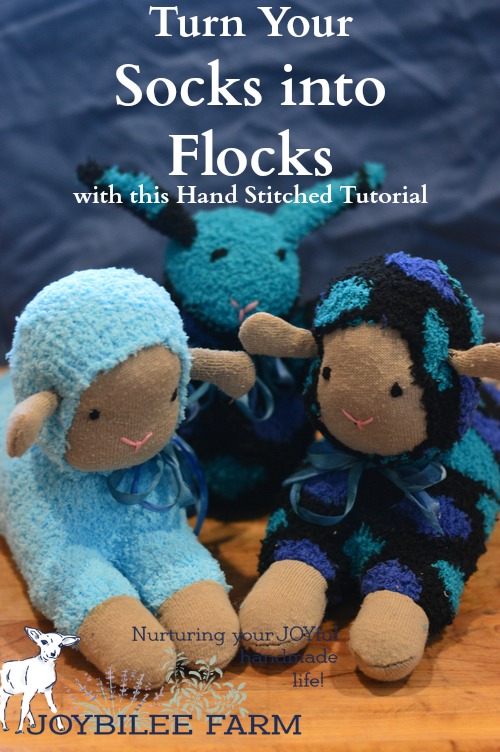
Make a sock lamb! No sewing machine necessary!
While browsing the internet recently, I (Sarah) stumbled across a super cute pattern for making a sock lamb. The sock lamb is made using one regular sock, and one soft, fuzzy microfibre sock. The lambs were just too cute, and I thought you might like to make a few for spring.
The original pattern can be found here, and includes instructions for a stand up sheep, and a lying down sock lamb. The original instructions use a sewing machine. I will be explaining the hand-sewing techniques necessary to make a secure and happy sock lamb with just a needle and thread.
Materials for your sock lamb:
One beige, white, grey, or brown ladies crew sock. A single from your miss-matched sock bag works well. A grey or brown worn sock, if the wear spot is on the ball of the foot, can also be utilized.
One soft-and-fuzzy sock. I bought new crew socks for this. Don’t worry about splitting up a pair, I’ve got a bunny pattern for you to make using the other sock. The rabbit requires one fuzzy sock, so you can make a matching sheep and rabbit pair! I bought 3 pairs of socks for just $5, at our local Bargain Store, which works out to less than $1 per sheep or rabbit.
Fiber fill stuffing. I managed to get an unopened 1lb bag from Value Village for less than $5. I only used a tiny amount of fiber fill for each sheep.
Pink and Black embroidery thread for the eyes and nose. You can use buttons for eyes, or proper stuffed animal eyes. I used embroidery thread, as there is no swallowing hazard for young children with embroidered eyes.
Ribbon: Your preferred color and weight to use for the neck decoration.
Tapestry or embroidery needle
Regular hand sewing needle
Thread in a matching or contrasting color
How to make a Sock Lamb
Suggested time: 2 1/2 hours.
The size of the lamb is determined by the size of your socks. I used ladies size socks. My lambs are 14 inches long. If you use a child’s sock you’ll get a smaller lamb. The directions are the same regardless of the size of the sock. However, you’ll want to change the size of ears and tail to compensate for the smaller sock. Let’s make a lamb!
The Head
Step One: Grab your smooth crew sock. Stuff a few handfuls of fiber-fill into the toe. Shape the toe into a rough oval that is roughly the size of your fist. Stitch a running stitch around the base of your fiber fill to form a neck. Pull tight on the thread to gather the neck. Stitch so that the neck is secure and knot the thread. Now cut the sock about a quarter inch below your stitch line and tuck the cut end into the gathered circle, to tidy your rough edge.
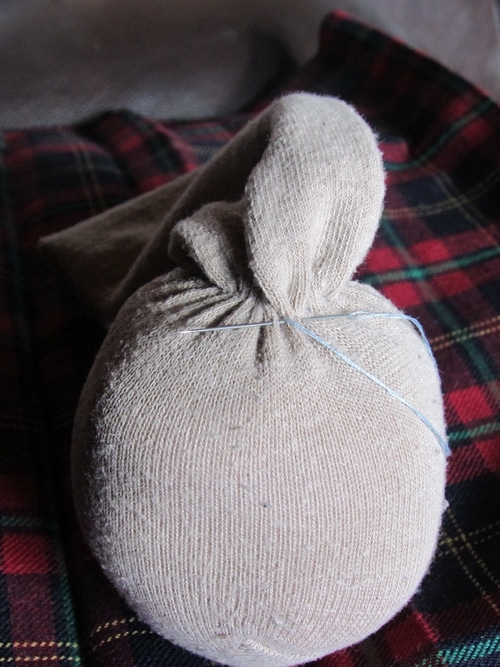
Step Two: Grab your fuzzy microfiber sock and shove the smooth sock ball into the toe of the fuzzy sock. Stretch the fuzzy sock around the smooth sock. To form the face, cut the toe of the fuzzy sock so that it covers the widest point of the smooth sock ball. It should cover at least 2/3rds of the smooth sock. See the photograph.
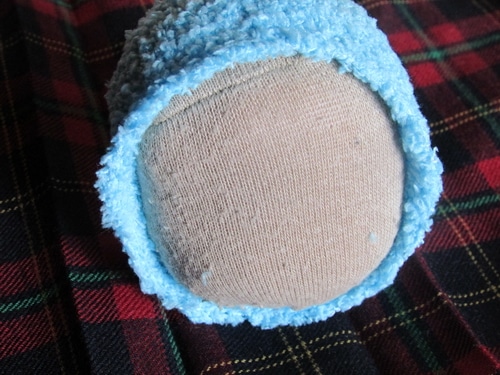
Step Three: With your needle and thread, secure the fuzzy sock onto the smooth sock ball. Using an over-cast stitch, stitch around the raw edge of the fuzzy sock. This will shape your lamb’s “hair do” around its face. Make sure the entire raw edge is stitched down securely. You do not have to fold under the raw edge, just do fine over-cast stitches.
Step Four: To shape the lamb’s head, take a larger tapestry needle and thread up. You are making an indentation that marks the ear placement, to shape the face of the lamb. Select a point about 1/3rd from the top of the sock head. Run the thread through the head to form an indent where the ears will be placed. Go back and forth through the head to either side. Three or four stitches should do the trick. Don’t pull too tight.
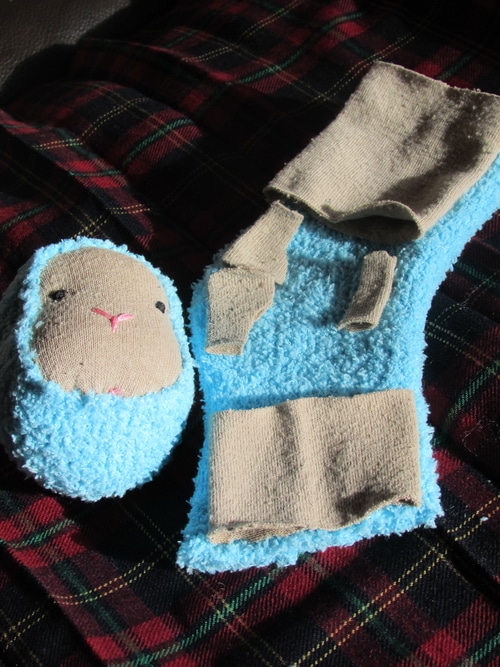
This is how the smooth sock is cut for the various lamb parts.
Step Five: The remaining foot on the smooth sock will make the front legs of the lamb. Cut on the foot-side of the heel section, through both layers. This piece will be used for your front legs. Cut on the other side of the heel, on the leg of the sock, through both layers. Trim the cuff from the leg of the sock, this long piece will form your sheep’s hind legs. Both front and hind leg pieces are cut from the smooth sock. A heel flap and instep remains.
Step Six: From the heel of your sock, cut two ears. Start your cut at the heel, on the folded edge, as close as possible to the heel’s center line. To shape the ears, you will cut on a curve, then around and down to one edge – never going past the center line. You should have a lop-sided tear drop shaped piece, with a fold on one side. Don’t cut through the fold line. Cut the second ear from the other side of the heel, to match the first ear. Using the remaining folded part of the instep, cut a tail as well. The tail should be an inch long and about 1/3rd of an inch wide. One side of the tail should be on your fold. Don’t cut through the fold.
Step Seven: Fold your ears, right-sides together and stitch around the curved side of the ears. Leave the narrow end opening unstitched, so you can turn the ear right side out. For hand-sewing on knit fabric, I like using an “outline” stitch. This embroidery stitch, when done in regular thread as a seam, does not gather, or shift. This makes it one of the best stitch choices for working with sock fabric.
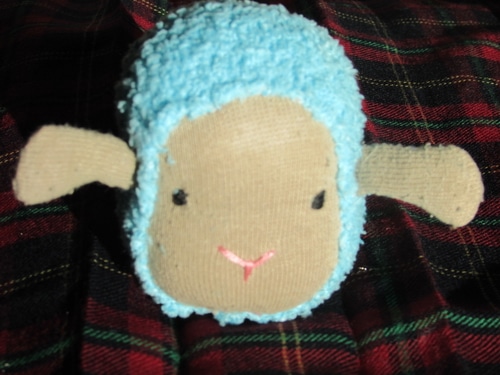
Step Eight: Stuff your ears, use a blunt knitting needle or chop stick to work the fiber-fill into the curves and make it neat. Then using a whip stitch, sew your sheep’s ears, with the curved line down, to your sheep’s head, in the center of the indented spot you created earlier. Once your ears are secure, you can embroider the eyes and nose. Eyes should be done in satin stitch, the nose can be embroidered with just a few regular stitches. Do two stitches on each side to delineate the nose, and two up and down to tidy up the join and finish the face. See picture.
Making the Sock Sheep’s Body:
Step One: If your fuzzy sock has elastic in the cuff, remove that now. Turn your smooth sock parts inside out. Take the shorter smooth sock piece, and pair it with the shortest side of the fuzzy sock. This should be on the foot part. Put right-sides together, and stitch them together with the same stitch you used on the ears. Do the same on the long side of the fuzzy sock, with the longer portion of the crew-sock, for the back legs.
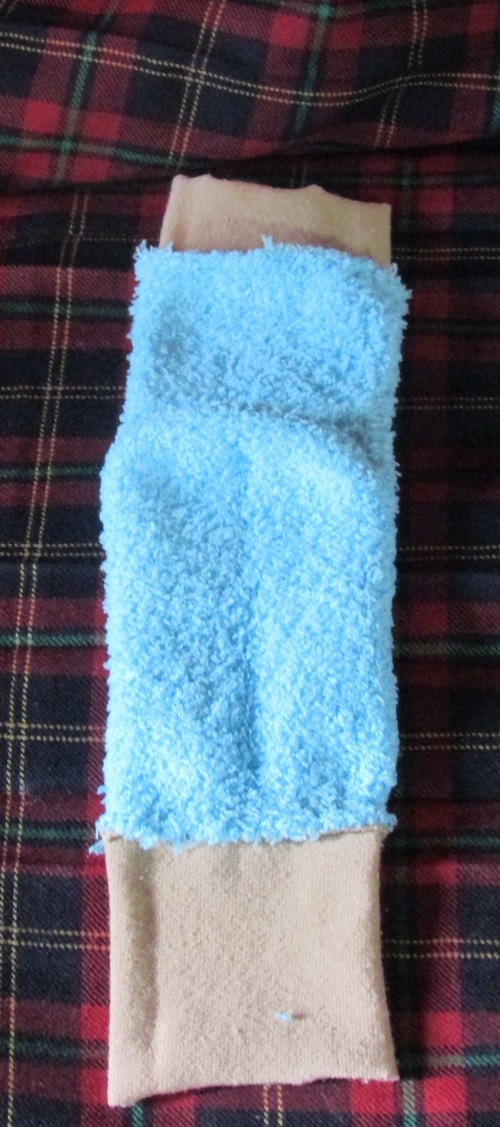
Step Two: Turn your entire fuzzy sock inside out. Adjust your sock so that the heel of the fuzzy sock is uppermost. Determine the center of your sock. Cut up the front leg portion, into the fuzzy portion of the sock. Also cut the back-leg portion, and slightly into the fuzzy sock with this one. At the same time, trim the corners from the front and back legs so that they become curvy.
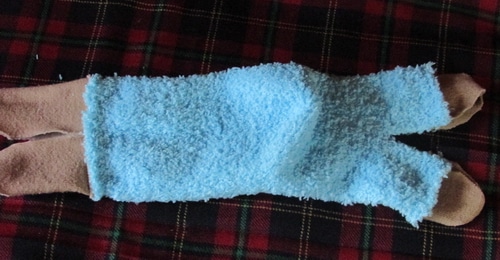
Step Three: With right sides together, using an outline stitch, sew around all newly created raw edges. At the end of this stitch-fest, you should have no openings on your sock, and four nicely defined legs. Make sure you add a few extra stitches over the spots where you cut your previous seam, to secure the seam.
Step Four: Make a small 1.5 inch incision in only the heel of the fuzzy sock. You are cutting through a single layer of sock. Turn your sock lamb’s body, right side out.
Step Five: Time to stuff it! Make sure the legs are firmly stuffed, and the body is stuffed to your satisfaction. I like a firmer stuffing, you may prefer something that’s slightly more squishy. Stuff the heel firmly, where your incision is, to form the shoulder and neck of the lamb.
Step Six: Once your sheep body is fully stuffed, stitch the heel opening closed.
Step Seven: Position your lamb’s head, over the now-closed opening on the heel, and stitch in place. I use three lines of whip-stitching, one in the middle, and one all the way around to frame it. This will make the head as secure as possible. If this sheep will be a toy for a toddler, you might want to use un-waxed dental floss for the thread, to make it even more secure.
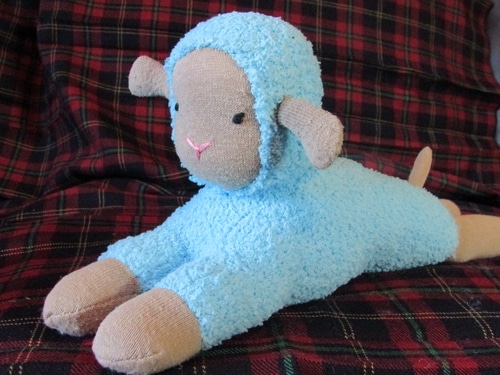
Step Eight: Make your tail. Fold the tail right-sides together. Stitch the curved tip and the straight side, leaving the shortest side open to turn right side out. Use a knitting needle to help you turn it right-side out. Stuff it. Sew your tail to your lamb, using a whip-stitch.
Step Nine: Put your ribbon on your lamb’s neck, and tie in a bow. Step back and admire (or cuddle) your sock lamb.
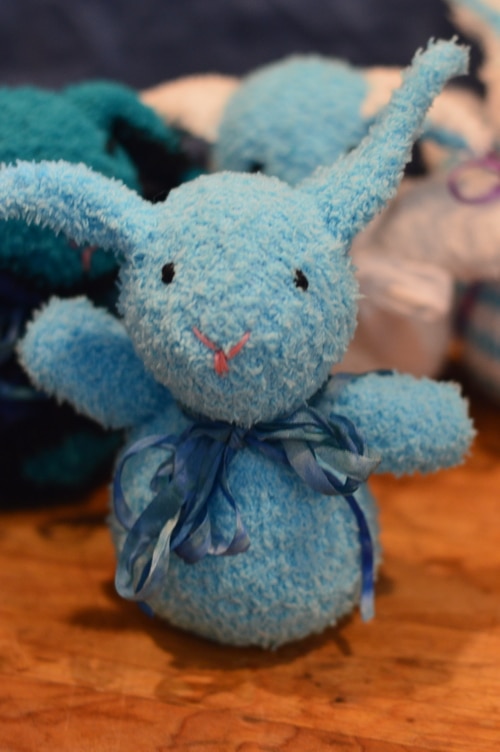
Step Ten: Now using the other fuzzy sock that you have left over, make a fuzzy bunny using these directions at Wearing Woad (that’s MY blog!).
I’d love to see the awesome fuzzy lambs that you sew. They aren’t too expensive, so you can make an entire flock for just a few dollars. Sock lambs make awesome baby gifts, grandchild gifts, neice and nephew gifts or even roommate gifts.
Even with hand-sewing, the sock lamb should take under 3 hours of hands-on time.
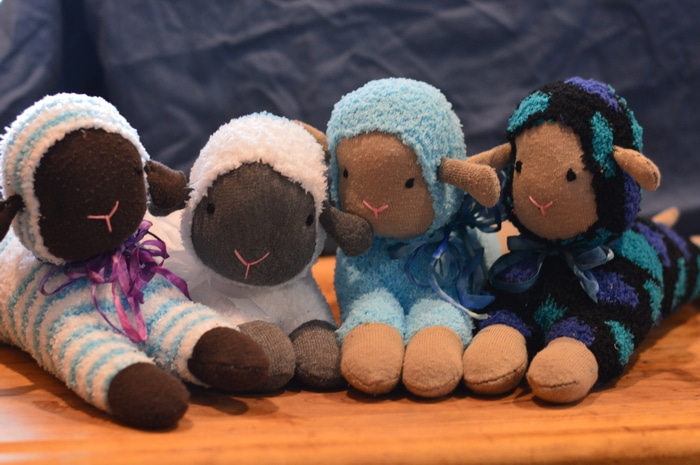
Make a flock!
Improve your hand stitching technique
To learn more about the hand sewing stitches used in this project and gain confidence in hand sewing, Eco-designer Natalie Chanin of Alabama Chanin has a stimulating class at (Affiliate) Creative Bug, “The Physics of Sewing.”
(I love Natalie Chanin and her ethical clothing design! And I love the fact that she shows you how she makes her clothing line, so if you can’t afford her prices, you can invest sweat equity and still wear clothing like hers. — Chris)
This class talks about the physics of hand sewing and how the way your grandma taught you to sew actually has it’s basis in science. And if your grandma forgot to teach you how to sew, you can learn from this class.
You’ll learn:
- How cotton grows and how thread and yarn are made
- How to needle your thread.
- When to cut the thread
- Which hand sewing stitches to use when
- How long to make your stitches for the best results
Take this class for free with your 14 day free trial from Creative Bug. Even if you don’t continue with a monthly membership, you get to keep one class for free. Find out more here.


Leave a Reply