You’ve spent a few months preparing, planting, and weeding your organic garden and now you are ready to harvest your reward. But how do you know when to harvest each vegetable to catch it at its peak of freshness? This handy organic gardening harvest guide will help you get the most from each vegetable.
1. Asparagus
Harvest asparagus in the 4th year of planting, when the stalks are thumb thick and at least 6 inches high.
In spring, harvest it by cutting the thumb thick stalks, just below ground level, when they are about 8 to 12 inches tall. They grow fast so check the asparagus bed twice a day, in spring, to make sure you get them at their peak.
2. Beans
Beans are ready when the pods are fully formed and the bean seeds inside the pods are just beginning to bulge in the pod. They will snap crisply when you try to bend them in half. Yellow bean pods will be fully yellow, with no green on the tips. Purple podded beans will be fully purple with no green streaks.
About 60 to 90 days after planting, harvest individual beans by pinching them off at the stem. On bush beans, be careful not to pull up the plant by the roots as you tug on the bean. Instead pinch it off at the stem.
What about dried beans
If you are growing dried beans, they are ready to harvest when the pods are full and bulging with individual bean seeds, and the pods are dry and brittle. If you are threatened with frost before the beans are ready to harvest, pull up bush beans by the roots and hang them under cover in an airy place to finish drying. The beans will continue to mature and dry down after harvesting.
3. Beets
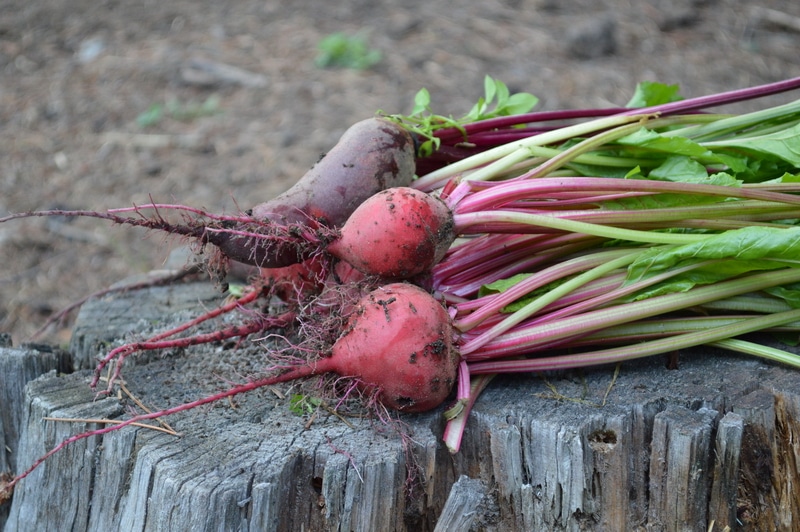
Beets are ready to harvest when the tops of the beets are poking out of the soil and the shoulders are at least an inch around, with cylindrical beets, or up to 3 inches with globular beets. The leaves will be glossy green with younger leaves forming in the centre of the top of the beet.
Harvest beet greens from the outside of the beet at any time during the growing season to enjoy fresh or cooked. About 50 to 70 days after planting, harvest the beets by pulling up from the soil. Brush off excess soil back into the garden before bringing the beet indoors. If you harvest the largest beets, being careful to disturb as little of the soil as possible, smaller beets in the row will continue to grow. You’ll get an extended harvest this way.
4. Broccoli/Cauliflower
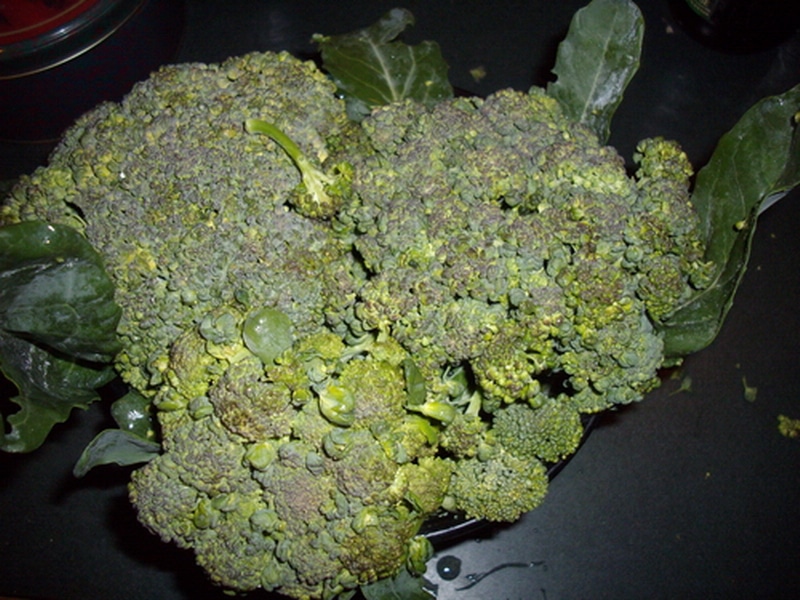
Broccoli and Cauliflower are ready to harvest when the main head is fully formed and the flowers remain tight. Broccoli flavour sweetens after a light frost.
Harvest by cutting the main head from the stalk about 3 inches below the base of the head. In broccoli, side shoots will develop after the main head is harvested. These side shoots can be harvested when they are 2 inches across, before the flowers open and there is no yellow on the florets.
5. Cabbage
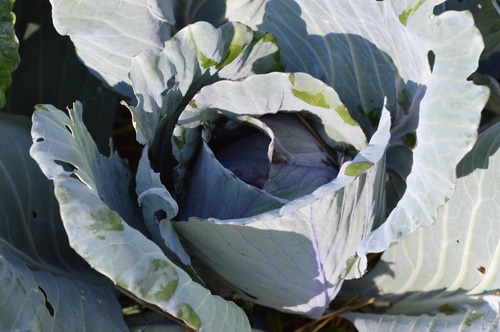
Cabbage is ready to harvest when the heads are developed to the size you expect, based on the variety you are growing. Check the seed package or the seed catalogue for guidance. The head will be firm and not loose.
The flavour of cabbage, like other cole plants, improves after a light frost. If you expect frost, cover the plants with a fabric row cover, and let the frost do its job.
To harvest cabbage, using a sharp knife, cut the head off at the stalk where the head of cabbage joins the stalk. Remove the outer leaves and feed to livestock. The outer leaves are generally fibrous and unappetizing.
6. Cantaloupe and Honey Dew Melons
When cantaloupe and honey dew melons are ripe the tendril closest to the fruit dries down, the stem curls and the ripe fruit slips from the vine. Gather them each morning and evening or you may lose them to skunks, racoons, or ravens. A vine ripened, locally grown, cantaloupe is ambrosia. No store bought cantaloupe can come close.
7. Carrots
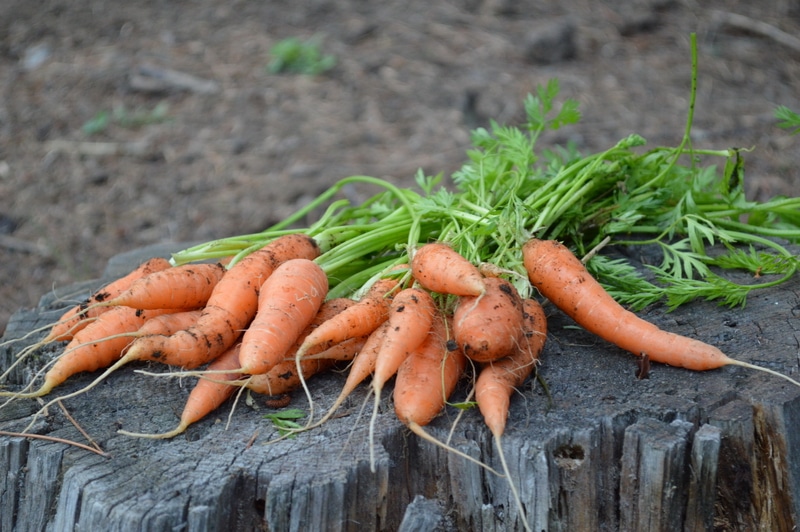
Carrots are ready to harvest when the stalks are 10 to 12 inches tall with a thick stem, and the carrot is 1 to 1 ½ inches in diameter at the top of the soil. Depending on the variety, the carrot may be 2 to 9 inches long.
Harvest the carrot by pulling up at the top. The whole carrot should come out of the ground. Smaller carrots, growing beside the carrot you harvested may continue to grow bigger, with the new room they are given. So leave those ones for a few more weeks.
8. Chard
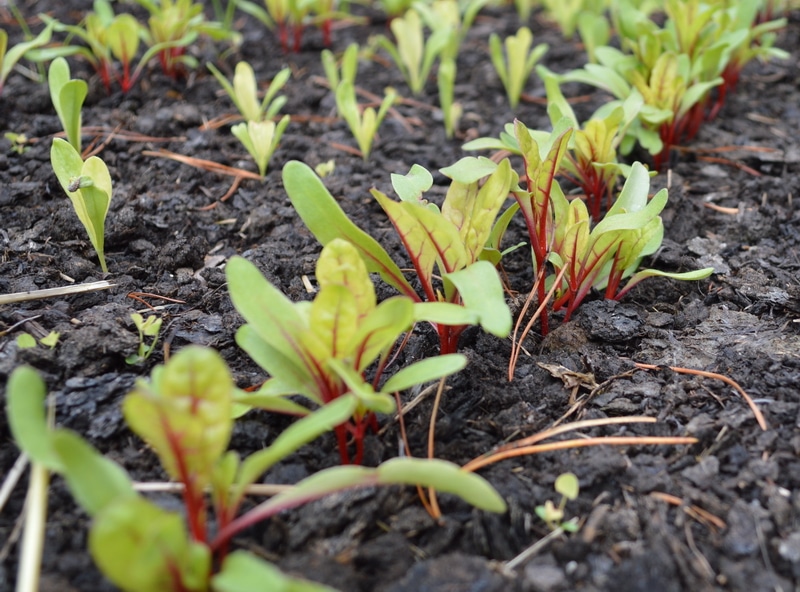
Chard is related to the beet family, but is harvested for its shiny green leaves, which are used like spinach or cabbage. Chard leaves can be harvested anytime during the growing season when the leaves are over 3 inches or as big as 24 inches. Small leaves can be eaten raw in salads, while larger leaves are a good substitute for cabbage in cabbage rolls (Uncabbage rolls) Or just chop them and serve them as you would spinach in lasagna or spanakopita.
To harvest chard, remove the outer leaves by breaking them off, with a twist, from the base, being careful not to pull the plant out of the ground. The plant will continue to produce new leaves from the centre of the base, throughout the growing season, until killed by a killing frost.
9. Corn
Corn is ready to harvest when the tassels have turned brown and the seed kernels are plump. When a seed kernel is popped with the thumb nail, the milky sweet juice will squirt with energy. This is the optimal time for picking.
Eat corn as close to picking as possible for the sweetest taste. Modern varieties of super sweet corn will retard their conversion from sugar to starches, allowing the corn to be transported from the field to the store over several days. Home grown corn on the other hand can be preserved the day it is picked. Fresh sweet corn is a highlight of summer feasting.
10. Cucumbers
Cucumbers are planted directly into the soil as soon as all threat of frost is over. Cucumber seeds need some warmth to germinate.
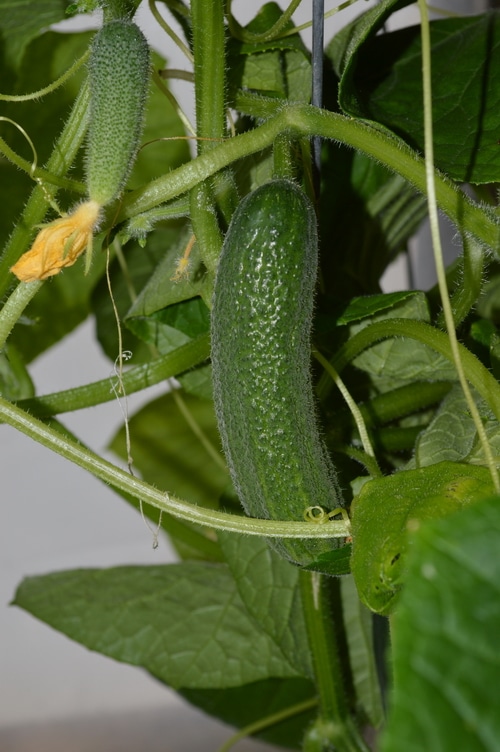
Cucumbers will be ready to harvest about 2 weeks after flowering, when the cucumber fills out the full length of its budding fruit. In some varieties the side of the cucumber will begin to yellow as the seeds start to mature. You will want to harvest the cucumbers from the vines before the seeds develop.
If you are saving for seeds, allow the cucumber to turn 3/4s yellow before harvesting, to ensure ripe seed.
11. Garlic
Garlic is planted in the fall but it isn’t ready until about 100 days after the green tops emerge from the soil in the Spring. It needs a long, weedfree growing season. But it doesn’t need a lot of heat. Garlic is a reliable producer even in a cooler growing season.
Garlic is ready to harvest when the tops have started to turn yellow and 50 to 70% of the tops are yellowed while the remainder of the stalks is still green. During this time the bulb begins to split in preparation for the next growing season, so pull it up before the bulb splits.
How to store garlic for winter
Cut off the root end close to the bulb. Braid the tops together and hang the garlic to dry in a cool, dry, and airy spot away from livestock.
12. Kale
Kale is planted in early spring and is usually spaced at 3 feet apart. However, Kale can also be grown close together, if adequate moisture is available.
Tender, young kale leaves can be harvest for fresh eating in salads anytime they are at least 3 inches long. Later in the growing season, harvest Kale leaves by removing the outer leaves from the plant and leaving the inner leaves to continue growing. Kale is a vigorous producer and will produce more leaves in response to harvesting.
Kale leaves sweeten with frost, so plan to harvest your main kale crop after the plants have had a light frost. They preserve well by drying. But you can also leave them on the plant and harvest them fresh, right through a snowfall, if you keep them covered with a ground cover.
13. Lettuce
Lettuce can be harvested anytime during the growing season once the leaves are 3 inches tall, until the plant starts to stretch and elongate, getting ready to produce flowers. Once the plant stretches out the leaves become bitter. But there may be time to plant lettuce again in the same spot for a second harvest.
To harvest lettuce leaves as you need them, just take the outside leaves from the plant leaving the centre intact. The centre of the lettuce plant will continue to produce new leaves until it gets the signal from the day length and the temperature that it is time to send up a seed stalk.
Lettuce is frost hardy, but if you have a young planting of lettuce, cover it with a cloche or a fabric row cover to protect it from hard frost and extend the season. Managed well you should be able to have fresh lettuce from the garden from May till October in cooler areas, or all winter long in warmer areas.
14. Onions
Onions are planted in early spring and are dried down after midsummer. When they are mature and ready for harvest the bulb will be round and firm, sitting at least half above the soil. The onion bulb will be covered with a brown papery skin. And the tops will be bent over to the ground. Allow the tops to dry down in the August heat. Harvest the onions by pulling them up from the ground, roots and all, when the tops are ¾ yellow to beige.
Braid the tops right away, as you would garlic braids. And hang the braids to complete the curing before storage. This will ensure that storage onions last through the winter in storage.
15. Parsley
Parsley is a biennial plant that is grown for its first year leaves and its second year seeds. In the first year of growth, parsley will send up several shoots from the base. In the second year, all the first year growth will die back, and a fresh seed stalk will emerge from the root.
To harvest the parsley greens, remove the thicker outer stalks by pinching off at the stem, just below the leaves, leaving a few finer stems to grow on each root. Parsley can be harvested repeatedly during the growing season for fresh herbs.
In the second year, allow the plant to send up its seed stalk and dry down the seed. The seed can be harvested as a spice or it can be saved for growing more parsley. The seed is ready to harvest when it is dry and brittle.
Remove the chaff by winnowing in an airy spot, with little wind, out of doors. (Winnowing is pouring the seed from one bowl or basket to another, allowing the chaff to be moved in the air away from the seed. The heavier seed drops into the basket. The chaff is blown away.)
16. Peas
Snow peas are harvested when the pod is still flat and the tiny immature peas can be seen bulging along the top edge of the pod.
Shelling peas and Snap peas are harvested when the pod is filled out with the round, firm peas.
Peas are harvested by pinching off the stem from the main vine, between thumb nail and forefinger. Shell or prepare peas as close to harvest as possible. Peas are sweet when picked but the sugars turn to starch, like corn, the longer the time between harvest and preservation.
17. Peppers
Peppers are in the same family as tomatoes and grow from blossoms on upright plants. The peppers are ready to harvest when the fruit has changed from green to the colour of mature peppers. If the peppers have begun to blush, they will continue to colour up even after picking. Peppers can be harvested easily by twisting the fruit upright from the plant. The stem will snap where it joins the plant.
18. Pumpkins
Pumpkins, like winter squash are ready to harvest about 100 to 120 days after planting. The pumpkins will be fully coloured, with no green shoulders. The vine will begin to fade, The skin on the pumpkin will be hard, and you won’t be able to dent it with a fingernail.
Harvest pumpkins by cutting them off at the place where the stem meets the vine. Leave the stem intact to prevent spoilage while in storage. Allow the skin of the pumpkin to fully harden before putting it away for the winter in cold storage. Wipe the skin with an antibacterial solution like Homemade Thieves Cleaner, or lemon peel cleaner and allow it to air-dry fully before storing.
19. Radishes
Radishes are fast growers that can be replanted several times during the growing season. Radishes are ready to harvest when their bulb pokes up from the soil revealing the shoulders of the radish. Spring radishes should be half an inch to one inch in diameter, when they are ready to harvest.
Winter radishes are larger and can be treated like turnips, and should be grown in proper spacing. They are ready to harvest when they are poking up from the soil and the radishes are completely filled out along the root.
20. Spinach
Spinach is an early spring green and will be ready to harvest about 28 days after planting. Harvest spinach by taking the outside leaves and leaving the inner leaves to continue growing. Once the plant has bolted and gone to seed, remove the plants by pulling up by the root. You can harvest the smaller leaves for salad greens. Replant with another vegetable or put in transplants of longer season plants that you started indoors.
Spinach can be replanted again, in early August for a Fall harvest.
21. Summer Squash
Summer squash like yellow zucchini, zucchini, patty pan, and crookneck squash grows quickly from fertilized female flowers. Harvest the young squash when the skin is still tender, anytime from 3 days after the flower fades to 2 weeks later.
Harvest the young squash by cutting off at the stem end, close to the stalk. Store uncovered at room temperature until you are ready to use them. If stored in plastic bags or in the fridge they tend to get moldy on the blossom end.
22. Tomatoes
Tomatoes ripen over a long season. Pick the well coloured tomatoes from the vines as they ripen. You may need to harvest several times a week, to get them all. Over-ripe tomatoes will fall off the vines onto the ground. Do save a few over-ripe tomatoes for next year’s seed.
Here’s how to save tomato seeds.
23. Watermelons
Watermelons are warm season plants. They mature during the warmer part of the summer. Watermelons don’t slip from the plant the same way that cantaloupe do, so you’ll need to do some detective work. A watermelon is ripe for picking when the tendril closest to the maturing melon has dried and the stem holding the melon on the plant curls. The underside of the watermelon will be golden rather than white on a ripe melon. A firm thump will sound hollow and resounding, on a ripe melon. Watermelons do not continue to sweeten after they are picked so ensure that they are ripe before you pick them.
For more information on when to harvest your watermelons check out Common Sense Homesteading.
24. Winter Squash
Winter squash needs 100 days to 120 days to fully mature before harvesting. When it is ready to harvest the colour will be fully developed on the squash. The skin will be firm and you will not be able to dent the skin with a finger nail.
The vines of the winter squash plant will start to die back and fade when the fruit is ready to be harvested.
Harvest by cutting off the squash at the place where the stem meets the vine. Leave the stem intact to prevent spoilage while in storage. Allow the skin of the squash to fully harden before putting it away in cold storage for the winter. Wipe the skin with an antibacterial solution like Homemade Thieves Cleaner, or lemon peel cleaner and allow it to air-dry fully before storing.
25. Zucchini
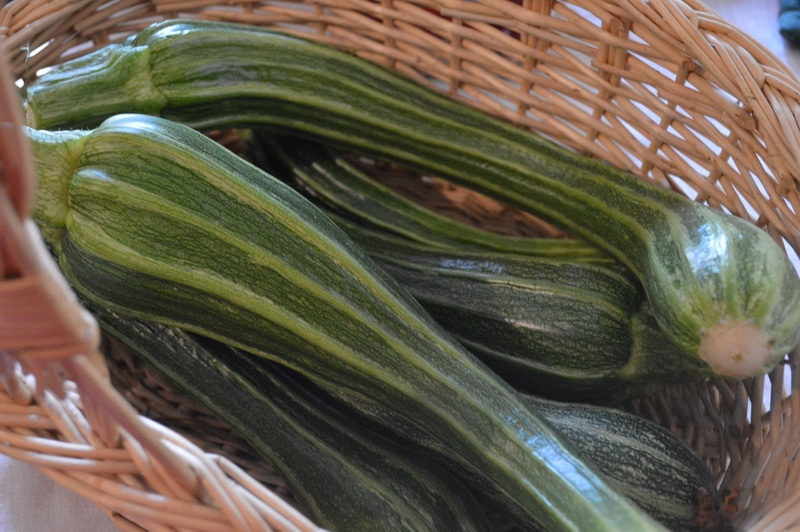
Zucchini fruit grows from the female flowers, like other squash plants. Zucchini can be harvested at 3 stages. About 3 to 5 days after flowering the smallish zucchini are ready to harvest, and use in stir fries, zucchini noodles, and zucchini fries. Zucchini that is 12 – 14 inches long and 2 inches in diameter is good for baked zucchini, and stir fried zucchini, but the inside may be soft with small seeds beginning to form. These can be chopped up or scooped out. Larger torpedo size zucchini will have some fully formed seed and the seed will be hard, surrounded by a spongey, fibrous centre. This will need to be removed before the zucchini can be used. These zucchini have a hardening skin and should be peeled before eating, depending on how hard the skin is. These are good for using grated in zucchini cake, zucchini latkes, and other zucchini dishes.
During the harvest window, timing is important. Your organic gardening project will give you the best fruits and vegetables at their peak of freshness when you apply these tips for harvesting each one at the right time.
Remember to keep track of this year’s hravest in a notebook so that you can compare your results year after year. Every garden is different, and while other gardeners can offer advice and share their experience with you, your own garden is your best teacher. The Gardening Notebook is an excellent resource both inexpensive and printable. It contains advice for your organic garden by plant species, as well as places to put our own experiences, allowing you to become a better gardener every season. I highly recommend it.
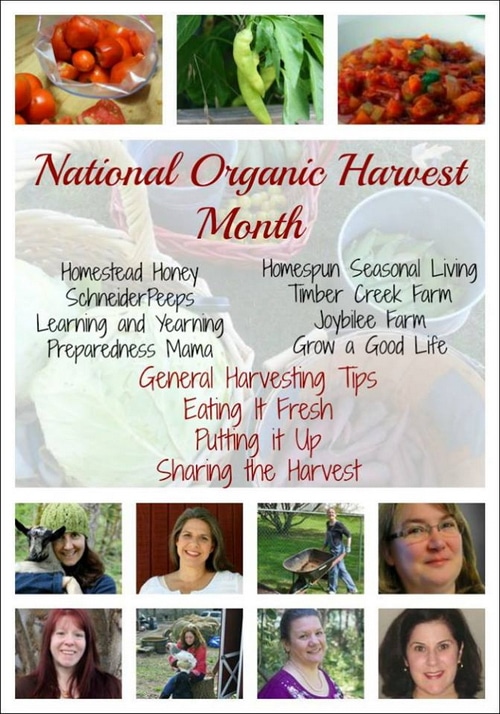
National Organic Harvest Month
September is National Organic Harvest Month and to help you make the most of your harvests, I’ve teamed up with these other amazing bloggers. Please be sure to check out their tips and more: Rachel from Grow a Good Life – Kathie from Homespun Seasonal Living – Teri from Homestead Honey – Chris from Joybilee Farm – Susan from Learning and Yearning – Shelle from Preparedness Mama – Angi from SchneiderPeeps – Janet from Timber Creek Farm



What a wonderful list! I’m also an organic gardening blogger and discovered you on Pinterest. Really great information. I’ll be following you on Pinterest so I can pin more of your content.
You’re so blessed to be able to grow them. Our nights are too cold here to properly ripen them.
What a wealth of information! Thanks so much for sharing your knowledge. I always have a hard time knowing when to harvest melons.