After a stress-filled day, a hot bath can be just the thing to help you relax. Make de-stressing DIY bath bombs and enjoy the escape and relaxation. These bath bombs are simple enough for anyone to make, and make great gifts too.
You’re at the end of a stress-filled day. You need an inexpensive escape. Lock the bathroom door, turn on some quiet music, put a beeswax candle or two in a flameproof dish at the side of the bathtub, and turn on the bath water.
But before you step into your luxury escape, toss in a DIY Bath Bomb.

Bath bombs are a fizzy parcel of hydrotherapy in a joyful single serving portion. The dry bath bomb enters the bathtub and immediately erupts in fizzy, foaming delight that is reminiscent of the volcano demonstrations at grade one science fairs.
However, the bath bomb is even more wonderful because it explodes with fragrance and herbal goodness, moving a mundane bath into the realm of therapeutic delight. But even though they are wonderful, soothing, and fragrant, the technique necessary to make them at home is difficult to master.
DIY Bath bombs make inexpensive gifts. Make up a batch for your friends and some for yourself.
Here’s how to make your bath bombs successful
Choose a day to make bath bombs when the humidity is under 40%. If you have a high humidity day, with a chance of showers, the salt in the bath bombs may absorb moisture out of the air and fizz up prematurely. It’s not a good day to make bath bombs if it’s raining.
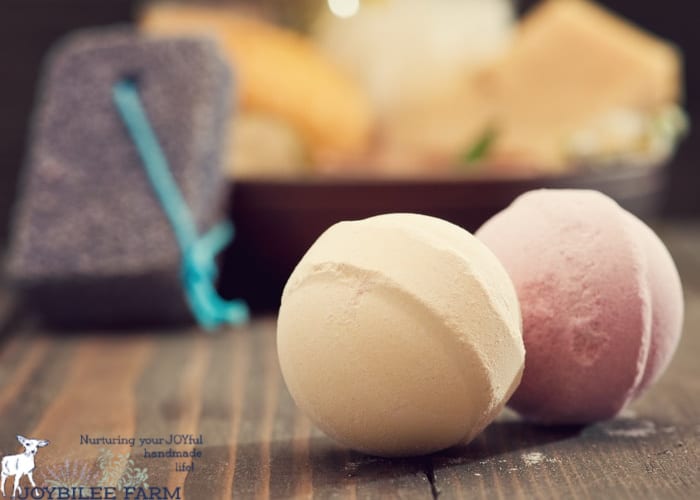
This bath bomb gets its pink shade from rosehip extract, which is a water-soluble colouring, rich in vitamin C as well as 32 other vitamins and minerals. Rosehip extract is astringent, anti-inflammatory and helps with joint and muscle pain. It improves the elasticity of the skin, as well.
Doesn’t that sound perfect for YOUR luxurious bathtime?


Luxuriate and Relax with De-stressing DIY Bath Bombs
Description
Simple and luxurious bath bombs you can make at home.
Ingredients
- 3 cups baking soda.
- 1 cups citric acid.
- 10 drops lavender essential oil (or essential oil blend of your choice).
- Dried lavender blossom (optional – you’ll need to clean them out of the tub afterward).
- 2 tbsp. jojoba oil or olive oil (optional, will make the bathtub slippery. Use with caution.
- Water or Isopropyl alcohol in a spritz bottle.
- Finely ground oats or dried milk may be added for a different spa experience.
Equipment needed:
- Wire Whisk
- Glass mixing bowl
- Spray bottle for isopropyl alcohol or water
- Bath bomb molds like this or this
Instructions
- Place baking soda, and any herbal additions into the mixing bowl. Whisk the mixture to blend in the color and remove any clumps of baking soda. Whisk until it is of uniform fine consistency and pale pink in colour.
- Using the whisk, stir in the essential oils. Mix well so that the mixture has a uniform consistency.
- Whisk the citric acid into the mixture. There is no water in this mixture so there should be no foaming up. Mix fully with the whisk.
- There is no need to treat the molds. The mixture will drop out of the molds without issue.
- Working in a well-ventilated area, spritz the mixture lightly with the alcohol, while whisking to prevent a fizzing reaction. Avoid breathing in the alcohol. Add only enough alcohol to allow the mixture to clump together when squeezed in your hand. It should have the moisture content of barely damp sand. Try three spritzes and then check the consistency. Test it to see if it will hold together. It should be fluffy after spritzing, not dense and wet.
- Only add more alcohol if the mixture won’t hold together easily. How much alcohol you need depends on the relative humidity in your air.
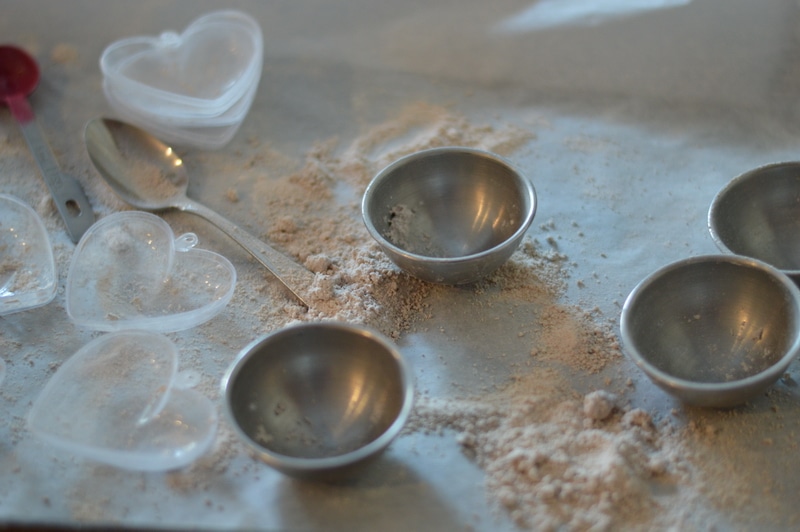
- Using the bath bomb mold, scoop up enough of the mixture into each half of the bath bomb, so that both sides are over-full. Really pack it in. Press the two halves of the mold together tightly, to compress the bath bomb mixture into a tight package. Brush off any excess mixture.
- Allow the mold to sit undisturbed for 10 to 15 minutes. Tap the outside of the mold on both sides with the back of a spoon to loosen the bath bomb. Open the mold and pop out the bath bomb onto a piece of parchment paper-lined baking sheet. Be gentle. The bath bomb will solidify as it dries.
- Allow the bath bombs to dry overnight. Turn it over and dry for an additional 12 hours. Wrap the bath bombs in plastic wrap or a shrink wrap, if desired, to make them more secure if you are gifting them.
De-stressing Bath Bombs Recipe
Ingredients:
- 3 cups baking soda.
- 1 cups citric acid.
- 10 drops lavender essential oil (or essential oil blend of your choice).
- Dried lavender blossom (optional – you’ll need to clean them out of the tub afterward).
- 2 tbsp. jojoba oil or olive oil (optional, will make the bathtub slippery. Use with caution.
- Water or Isopropyl alcohol in a spritz bottle.
- Finely ground oats or dried milk may be added for a different spa experience.
Equipment needed:
- Wire Whisk
- Glass mixing bowl
- Spray bottle for isopropyl alcohol or water
- Bath bomb molds like this or this
Directions:
- Place baking soda, and any herbal additions into the mixing bowl. Whisk the mixture to blend in the color and remove any clumps of baking soda. Whisk until it is of uniform fine consistency and pale pink in colour.
- Using the whisk, stir in the essential oils. Mix well so that the mixture has a uniform consistency.
- Whisk the citric acid into the mixture. There is no water in this mixture so there should be no foaming up. Mix fully with the whisk.
- There is no need to treat the molds. The mixture will drop out of the molds without issue.
- Working in a well-ventilated area, spritz the mixture lightly with the alcohol, while whisking to prevent a fizzing reaction. Avoid breathing in the alcohol. Add only enough alcohol to allow the mixture to clump together when squeezed in your hand. It should have the moisture content of barely damp sand. Try three spritzes and then check the consistency. Test it to see if it will hold together. It should be fluffy after spritzing, not dense and wet.
- Only add more alcohol if the mixture won’t hold together easily. How much alcohol you need depends on the relative humidity in your air.
- Using the bath bomb mold, scoop up enough of the mixture into each half of the bath bomb, so that both sides are over-full. Really pack it in. Press the two halves of the mold together tightly, to compress the bath bomb mixture into a tight package. Brush off any excess mixture.
- Allow the mold to sit undisturbed for 10 to 15 minutes. Tap the outside of the mold on both sides with the back of a spoon to loosen the bath bomb. Open the mold and pop out the bath bomb onto a piece of parchment paper-lined baking sheet. Be gentle. The bath bomb will solidify as it dries.
- Allow the bath bombs to dry overnight. Turn it over and dry for an additional 12 hours. Wrap the bath bombs in plastic wrap or a shrink wrap, if desired, to make them more secure if you are gifting them.
This recipe makes 6 to 8 bath bombs.
Digging deeper – Bath Bomb Secrets the Professionals Don’t Want You to Know

To Use:
To use add one bath bomb to an already filled bath tub. Light your bees wax candle(s) (observing fire safety measures, please) and hop in the tub. The bath bomb will fizz and foam while releasing its essential oil. Other bath bomb options include lavender and oatmeal to soothe inflamed skin, an an amazing gold, frankincense, and myrrh version.
Breath deeply and enjoy.
Both citric acid and bulk baking soda are available at most bulk food and health food stores.
More Healing Bath Recipes
Dandelion Bath Bombs are great against achy joints and muscle pain, spring is the perfect time to harvest dandelion petals to include in these fun and bright bath bombs. For it’s skin soothing properties, try these Colloidal Oatmeal and Lavender Bath Bombs and enjoy the relaxing benefit of lavender. Learn how to make your own homemade bath bombs from scratch with this multiple method recipe too. For enjoying sheer luxury in the bath, these Gold, Frankincense and Myrrh bath bombs are an exception option, and are even simple and easy to make too.
When the bath bombs are just too complex, take a break and try making herbal bath salts. This is a Foraged Fir Needle Detox Bath Salts Recipe to Help You Feel Better Faster, and is a great quick-make option to enjoy herbal benefits in the bath. Bonus, fir needles can be wild-crafted and harvested at any time of year.
If you are sensitive to salts, a nice DIY Herbal Bath Tea for Cooling Summer Rashes may be a good option. Herbal bath teas are just as simple to make as regular herbal teas, and just as sweet to enjoy as a diy bath bomb, or bath salts.


In awe of that anwser! Really cool!