Growing hydroponic tomatoes indoors is a great way to grow tomatoes all year long, and enjoy that garden-fresh tomato flavor in December and January. It’s a fun way to test different micro and dwarf tomato varieties, and a good way to increase one’s indoor garden growing abilities. Tomatoes are also simply fun to grow, and fun to watch grow.
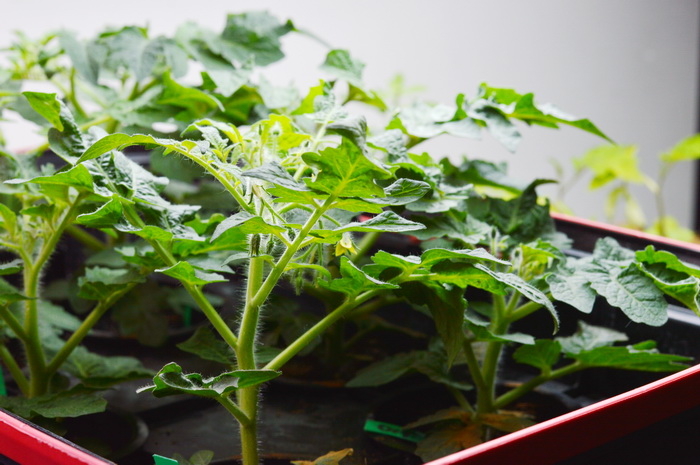
Tomatoes are a good starter plant for hydroponic gardening, and indoor growing. While the majority of tomato varieties are indeterminate, meaning that they never stop growing and flower and fruit throughout the growing season. Now, there’s a growing number of micro tomato varieties. Now, a “micro tomato” is a determinate tomato that will only grow 6-12 inches tall, at most. A determinate tomato is one that stops growing at a certain height, often 2 or 3 feet, and flowers and fruits in a single wave. Normally, with outdoor grown tomatoes this single wave is their full harvest for the season.
Now, it’s the micro tomatoes that you want for hydroponic tomatoes.

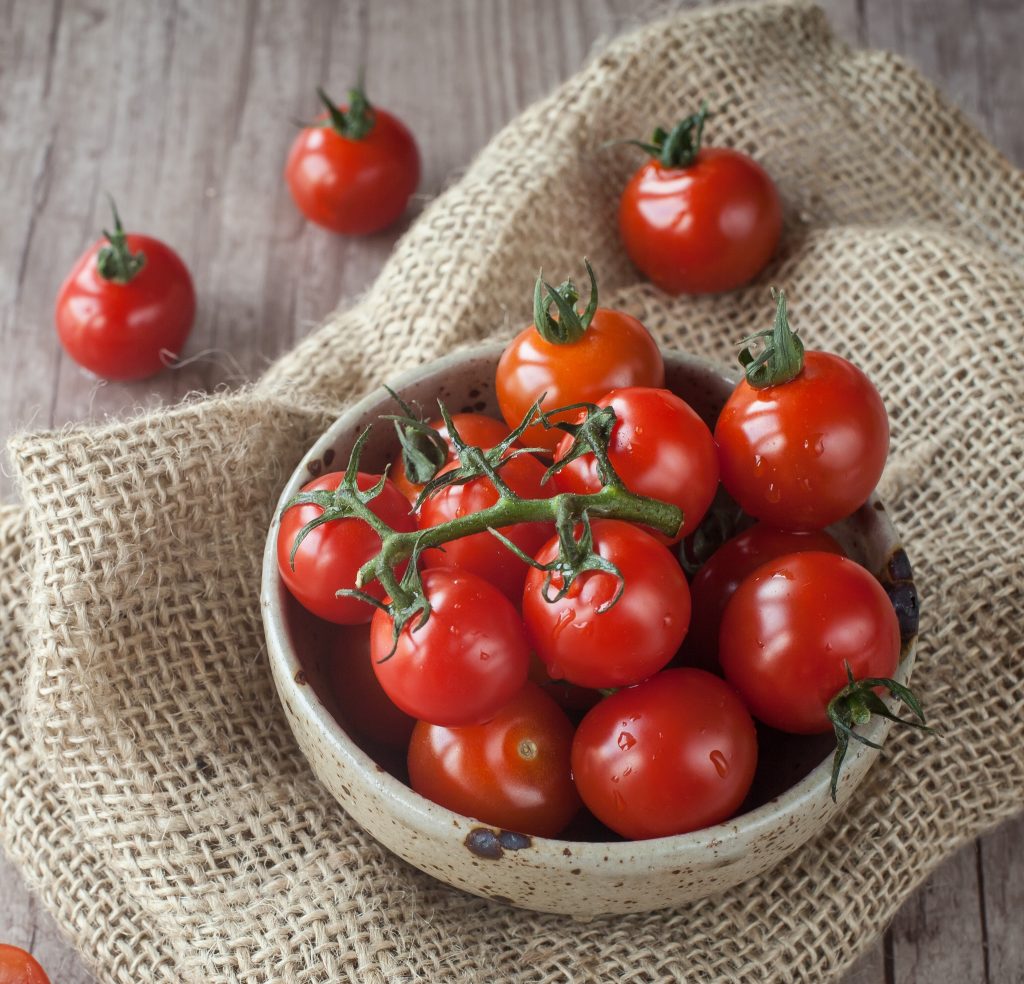
There are yellow, orange, black, and red varieties, and all micro-toms are cherry tomato type. A cherry tomato is the type of small tomato you get whole in salads, as a snacking tomato, or maybe just because they look cool on veggie trays. Most micro toms will produce 8-16 small cherry tomatoes in their first flowering phase. Now, if instead of replacing your micro tomato plants after their first harvest, you feed them and wait, you will get a second flowering and fruiting phase (or more) because tomatoes are actually short-lived perennials! The plant will get a bit bigger and bulkier, and will flower and fruit in single standing waves as long as it doesn’t get too cold, run out of hydroponic solution or nutrients, or you decide to remove it from your growing system. Peppers are also perennial and will continue to grow if you keep them warm.
My Favorite Micro Tomato Varieties
Pinnochio
An orange tomato that grows only 7 to 10 inches tall. Its a prolific producer that will give you more than one harvest.
Little Red Riding Hood
A red tomato that produces sweet cherry tomatoes on a 8 to 10 inch plant in about 65 days. Its a prolific producer.
Yellow Canary
A yellow cherry with 8 to 10 inch plants, that is another prolific producer with great tasting tomatoes.
Vilma
A red cherry tomato with 8 to 10 inch plants that make a lot of branches. Its a prolific producer with balanced tart-sweet fruit. 65 days after transplanting.
Red Robin
Produces red cherry tomatoes on 8 inch plants that bloom early. You’ll have fruit to pick after 70 days.
Orange Hat
This one isn’t as prolific as the tomatoes above but it is available from Bakercreek seeds and is a reliable early producer of orange tomatoes. It is more upright with not as many suckers and so has fewer fruit. The flavor is less tart and more sweet. This is the first micro dwarf tomato that I grew and was my favorite until I discovered the others
Where to find seed
Another fantastic source for a wide variety of micro and dwarf tomato varieties is Renaissance Farm. This small farm specializes in hard to find tomato varieties and they ship to Canada, too. I’ve ordered most of my micro dwarf tomato varieties from them.
Growing Hydroponic Tomatoes
You can grow hydroponic tomatoes in an active hydroponic system (aeroponics), like an Aerogarden. Or, you can grow your hydroponic tomatoes in a passive hydroponic system like the kratky method. Hydroponics requires some of the same pieces, no matter which method you use.
The active systems usually come with fitted net pots, sponges, some nutrient solution, and have a built in electric pump for their reservoir, and a built in grow light. With the Kratky method of hydroponic growing, it’s a deep water culture method, you’ll need to create your reservoir, usually with a glass jar or a plastic tote, and net pots that fit in those jars. (A 3 inch net pot fits perfectly in a wide mouth mason jar) You’ll have the option of choosing your own nutrient solution, that fits with your hydroponic and gardening philosophies and goals. I use the 3 part Masterblend nutrients, which I explain below.
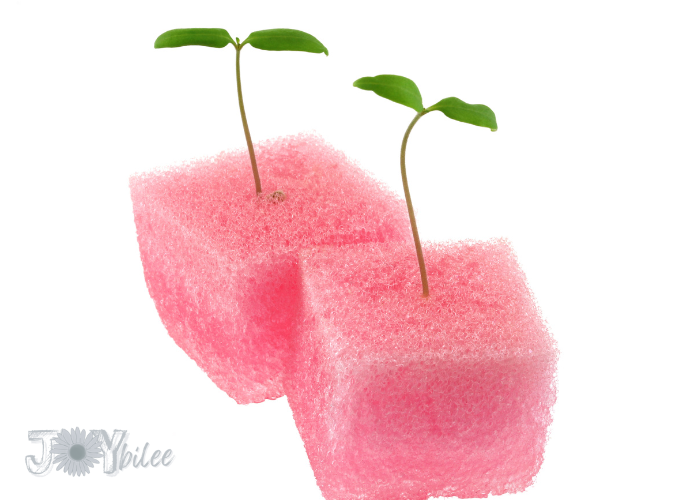
And lastly, you’ll need a growing medium, which can be hydroponic pellets, stones, coconut coir, or even a cut pool noodle as a sponge. This filling layer gives the seedlings something to hold onto with their roots and keeps them upright in your container.
Of course, you can grow a Kratky tomato jar on your windowsill, but a grow light helps keep plants compact, and reduces the need to prune your indoor micro tomatoes. Plants without grow lights will stretch toward the sunlight, especially in the north in winter. And the leaves may end up growing larger to compensate, or the plant will stretch into the window glass and try to grow more than a micro-tom should, weakening the plant. Rotating the plant, daily, or using a grow light both help to reduce the amount of legginess, keeping the plant compact, strong, and happy.
Make a Net Pot:
Hydroponic net pots are available to purchase via online realtors. A 3 inch net pot fit perfectly into the top of a wide mouth Mason jar. However, you can make your own net pots for hydroponic growing using a 3D printer, or by putting holes in a small plastic cup and fitting it into the mouth of your preferred jar.
You can also put a hole into a jar lid, and use the smaller net pots that come with the aero garden system, or from the aero garden pre-made plant kits, or replacement part kits. Simply cut a hole in a widemouthed mason jar lid, and securely fit the net pot into that lid. Then use the jar and lid combo for your Kratky hydroponics.
Seed or Seedlings?
If you’re starting your micro tomatoes from seed, you’ll want to use a different net-pot filling medium than if you’re starting from seedlings. I like using coconut coir. It holds the nutrient solution well, and let’s the plants roots breathe and go down into the nutrient solution. Other growers use rockwool cubes instead of sponges or coconut coir. I prefer the coconut coir since it is fully biodegradable. When I’m finished growing tomatoes I just pull the grow medium from the net pot and compost it, along with the plant roots.
Clay pellets can be used with seeds, or with seedlings. You simply have to settle the seedlings into the clay pebbles, and make sure that a few root tips can touch the nutrient solution. The plant will grow and take care of the rest.
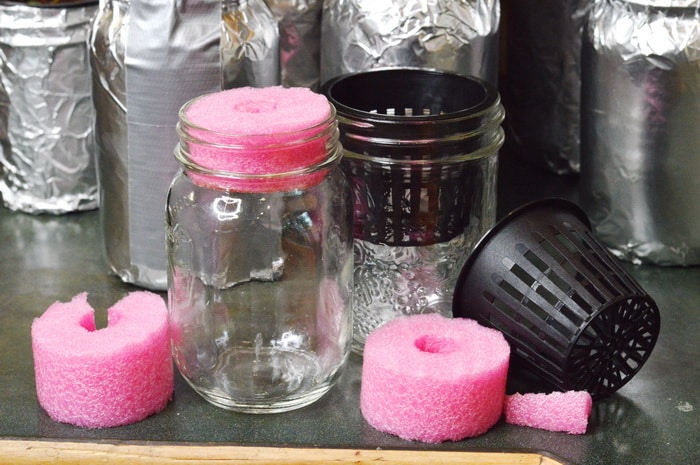
You can also fit the top of your jar with a cut slice of pool noodle, about 1/2 inch thick. Then place a healthy, seedling into the center slot of the pool noodle. You’ll need to wash any soil off of the seedling’s roots first, before transferring it to the hydroponic solution. The pool sponge will hold the seedling in place and let it’s roots reach the nutrients, so it can grow well. When you first transplant your seedling into the pool noodle ensure that the roots reach the solution until the roots begin to grow down.
This is also a good way to propagate tomatoes via your prunings and stems. Tomatoes will root along the stem, so any trimmed branch can be used to start a new tomato plant by rooting it in water, or soil, or just transferring it to hydroponics.
I find seeds are the easiest way to start hydroponic herbs, hydroponic lettuce, and tomatoes. Seeds give me access to a wide range of varieties, whereas buying seedlings only gives a limited number of options. However, if you start your own garden seeds, from your garden planning, and you have extra plants. Transferring those extras to hydroponic growing can be an amazing way of increasing your plant space, yield, and local food resources.
Hydroponic Tomatoes To Harvest:
After you have your chosen hydroponic method, whether that’s an Aerogarden or a deep water culture, or Kratky jar set up, you’ll want to grow out your tomatoes.
Make sure your jars are set up, with their net baskets and coconut coir. If using coconut coir you can add in some perlite or vermiculite to add more breath-ability to the growing medium, but it isn’t necessary. Your tomato seeds can sprout and grow just fine in plain coconut coir.
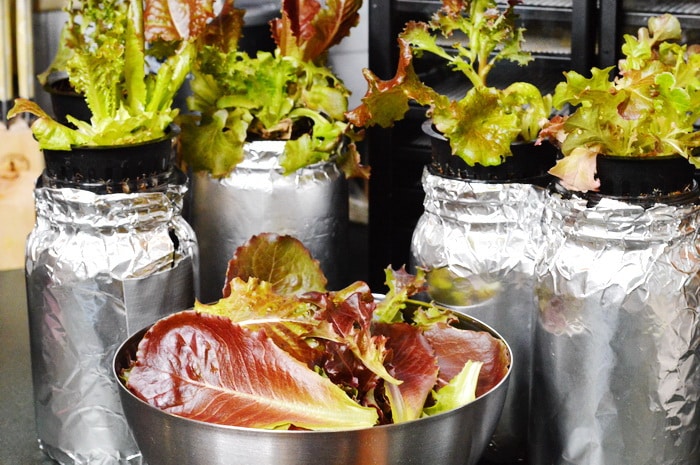
Wrap Kratky jars in aluminum foil, black fabric, a spare sock, or black paper to cut out light to the nutrient solution reservoir. This helps protect the roots of your hydroponic tomatoes, as well as prevents algae growth in the nutrient solution.
If you’re using an Aerogarden, make sure the water pump sponge filter is clean and that the reservoir and all surfaces are cleaned between your different plant grows. The algae can choke roots if it gets too vigorous, particularly the roots of seedlings.
Set up your lights on a timer, if possible. Tomatoes like 12-16 hours of light to grow and fruit well. An Aerogarden is a smart set up, and has a fully programmable light. Your Kratky grow light will need either a timer, or manual turning on and off.
The Kratky method can be done on your kitchen counter, especially with micro-toms. These tomatoes don’t form vines, and rarely reach too far beyond the edges of the jar. They stay small and compact, and are fun to watch grow. However, for larger-scale deep water culture hydroponics, you can grow the kratky method in a greenhouse too.
Feeding your Hydroponic Tomatoes:
The nutrient solution is your plant fertilizer. It contains nitrogen, potassium, calcium, magnesium, phosphorus, manganese and zinc, and everything else your plants need to grow. The calcium is to help prevent blossom end rot. Making sure your plants stay a relatively even temperature during flowering and fruiting, especially if indoors in winter, will also help their roots take up the nutrients they need and prevent blossom end rot.
Follow your package directions for mixing fresh nutrient solution. The Aerogarden recommends feeding the reservoir about every 14 days. With the Kratky method, you only need to make new nutrient solution about once a month.
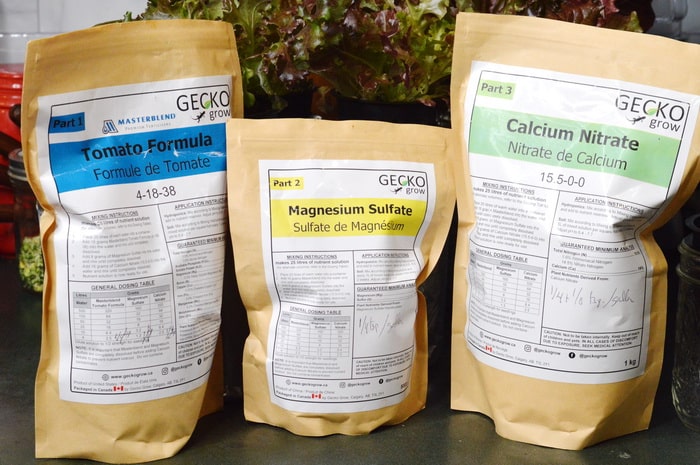
I use the Masterblend Formula specifically for tomatoes. It is a three part system that is mixed one part at a time into the water. For 1 gallon of solution I use 1/4 teaspoon of each nutrient. It is an economical nutrient solution. The key is to ensure that each part is fully dissolved in the water before you add the next part. So 1/4 teaspoon of tomato formula 4-18-38 fully dissolved in one gallon of water, 1/4 teaspoon of Magnesium Sulphate (Epsom Salts) fully dissolved in the same water/nutrient solution. Then finally add 1/4 teaspoon calcium nitrate and fully dissolve it in the nutrient solution before adding it to the jar or container. This should be at room temperature.
Don’t let the nutrient become too saturated
Occasionally top up the Kratky jars with plain water, when the solution in the container gets low. As the nutrient solution drops in the jar, the solution becomes more concentrated. This concentrated solution might burn plant roots. Plain water helps to keep the pH level of the jars even, and prevents fertilizer burn on the plants. Too much nutrient solution will curl the leaves of your plants and might kill the main stem of your tomatoes, and generally make the grow fail.
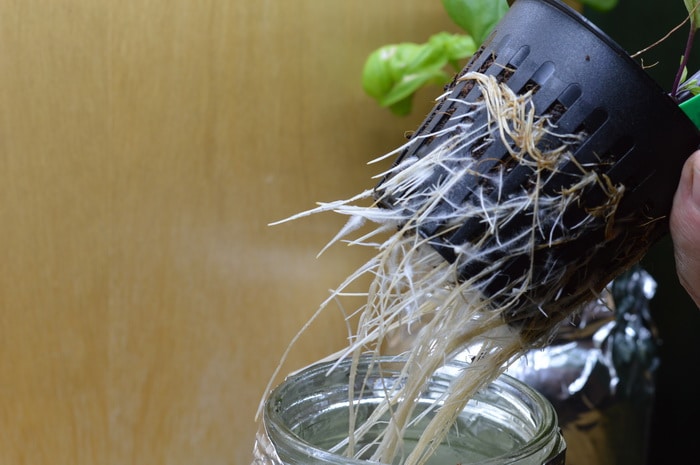
Air roots are feather-like roots that develop above the water level in Kratky Hydroponic grown plants. They feed oxygen to the plant while the longer water roots feed the plant the nutrient solution. Air roots need to stay out of the nutrient solution so that the plant can maximize its growth.
With the Kratky system the plant develops two types of roots — air roots and water roots. The air roots look feathery and should remain above the fluid level in the jar. The water roots need to remain covered with nutrient solution. I generally fill a Mason jar to the bottom of the net basket when I start tomato seedlings in the Kratky jars. But as the roots develop and I see air roots forming, I keep the solution at the half way mark in the container. This allows for both types of roots to maximize the growth of the plant.
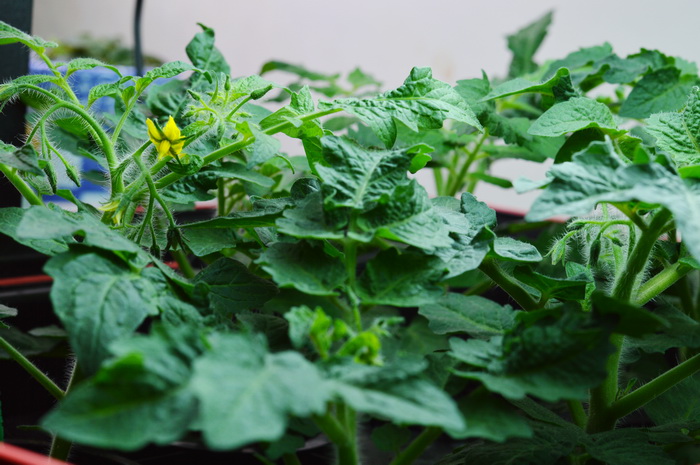
Most micro tomatoes will begin to flower around 30 days after germination. Tap on the flower stems, or shake the plant a bit, to encourage the blossoms to pollinate and to set fruit. Fruit ripening to harvest takes between 2 weeks and a month. Watching tomatoes slowly ripen is part of the fascination of indoor hydroponic growing.
If you keep your hydroponic tomatoes growing after their first harvest of tomatoes, they will produce a few suckers that you can cut, root, and start new plants with. They will also flower, and set fruit again, once they’ve had a chance to re-charge.
Tomatoes are a perennial if they’re kept in a frost-free environment. So don’t be afraid to experiment and keep your hydroponic tomatoes growing for more than just one harvest. Each subsequent harvest will be larger, and the plant, denser and stronger, too.
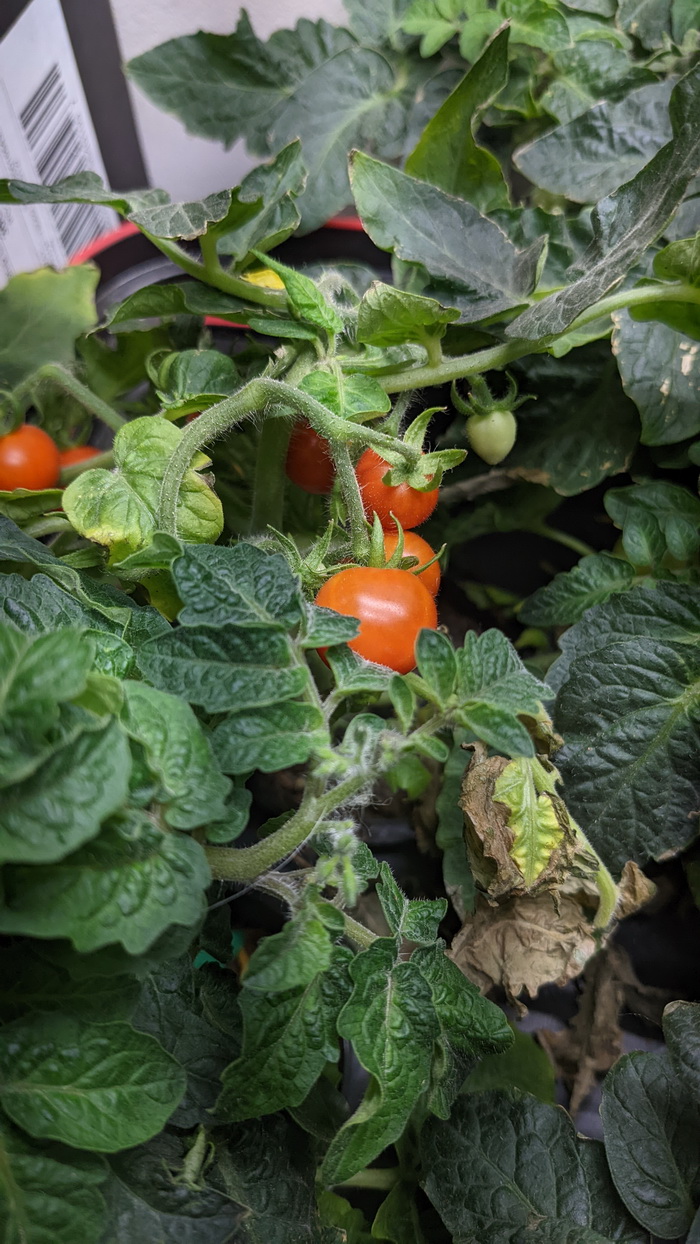
Micro tomatoes affected by spider mites.
Hydroponic Pests:
Even indoors, there are a few pests that can affect you growing hydroponic tomatoes. Spider mites are a particularly annoying pest that can get into nearly any indoor seedling, or hydroponic situation. A simple solution is washing the plants off with clean water, and thus removing the mites from their hold. It can take a few repetitions to get rid of all the mites.
I’ve normally had challenges with spider mites when I bring plants from outdoors to the inside, even if they’ve always been in hydroponics. Trimming back plants that are coming in from outdoors, or the greenhouse, and washing them off, can help reduce the chance of bringing in spider mites, or transferring them to other indoor plants.
If you see spider mite evidence, remove the affected leaves and spray the plant with water, being sure to get both the top and bottom of the leaves. This may be enough to arrest the infestation.
You may be concerned about mold in your hydroponic growing system. After all, it’s sitting wet all the time. The main danger in hydroponics is actually algae growth, rather than mold. If mold does show up, it will be white or gray rather than the deep green of algae. Mold can be fought with cinnamon powder, and a hydrogen peroxide spray to kill it’s mycelium.
White fly is a frequent challenge for indoor gardeners, even if you’re just starting seedlings. Yellow whitefly and thrip traps can help keep their populations under control. There is less danger of white flies with the hydroponic method, as there’s less soil available for them to nest and breed in. However, if you have soil-based indoor plants they can still attack and affect your hydroponic ones, even if they’re not actively breeding around the hydroponics.
Keeping on top of pests, especially indoors where there’s no natural predators for the pests, is important when growing indoor vegetables.
Other Uses for Hydroponics:
A small Kratky water jar can be used for many other uses too. It’s a great option for rooting herbs and keeping a basil or parsley plant going on your kitchen counter.
You can use the Kratky jar to start new garden tomato plants by rooting suckers from your outdoor tomatoes, or root them from your indoor ones and have more mico-toms.
Some plants can be re-grown in just water, without the nutrient solution. These include salad plants like lettuce, celery, and some root vegetables will grow new greens if left in water.
You can grow some root vegetables in hydroponics. The developer of the Kratky method grew ginger and sweet potatoes in huge clay pots, using the simplicity of the Kratky deep water culture and nutrient system. They were grown in a greenhouse.
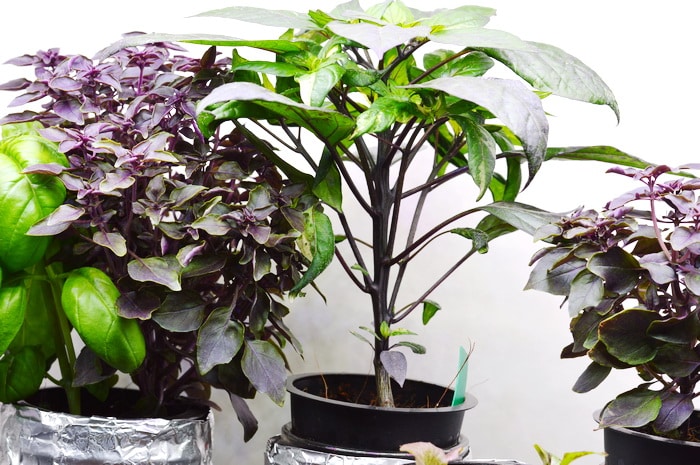
You can grow other vegetables, other than tomatoes, in hydroponics. Lettuce is easy to grow all winter using the Kratky method. Sweet and hot peppers grow very well and produce ample fruit using hydroponic growing, both indoors and outside. Bush type cucumbers, beans, peas, eggplant, and many others can be grown hydroponically. Choose varieties that either don’t need cross pollination, or that can set fruit without pollination for cucumbers and eggplant, if possible. Peppers can self-fertilize like tomatoes, as long as the plant is shaken so that the pollen within the flowers are released. You can also use a paint brush or cotton tip to mimic a bee, and move pollen between flowers yourself.
Also, you can grow flowers in hydroponics. Edible flowers like pansies and violas, medicinal herb flowers like calendula, and fun flowers like petunia can be grown in hydroponics. Chose smaller flower plants, ones that stay below a foot tall, for the best result. Don’t be afraid to experiment and have fun with your hydroponic gardening adventures.
New to growing food and vegetables indoors?
Check out the Fill Your Salad Bowl workshop and learn how to use 3 different growing methods, at home, so you can fill your salad bowl with super food, nutrient dense, greens every single day. These are greens you can use in your salad bowl, greens you can add to soups, stews, and pasta dishes, and even greens you can use in a stir fry.
In this mini workshop you will learn how to fill a salad bowl every day with food you grow yourself.
- Even if you don’t have any land.
- Even if there is 3 feet of snow covering your garden
- Even if you’ve killed house plants in the past.
- Even if you think you have a black thumb.
Have a look at what’s covered in this workshop and see if its a good fit for you, by clicking/tapping the blue button below.






Leave a Reply