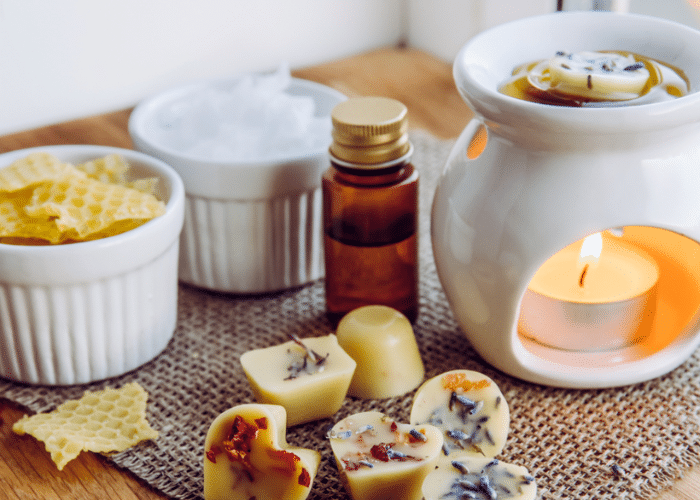
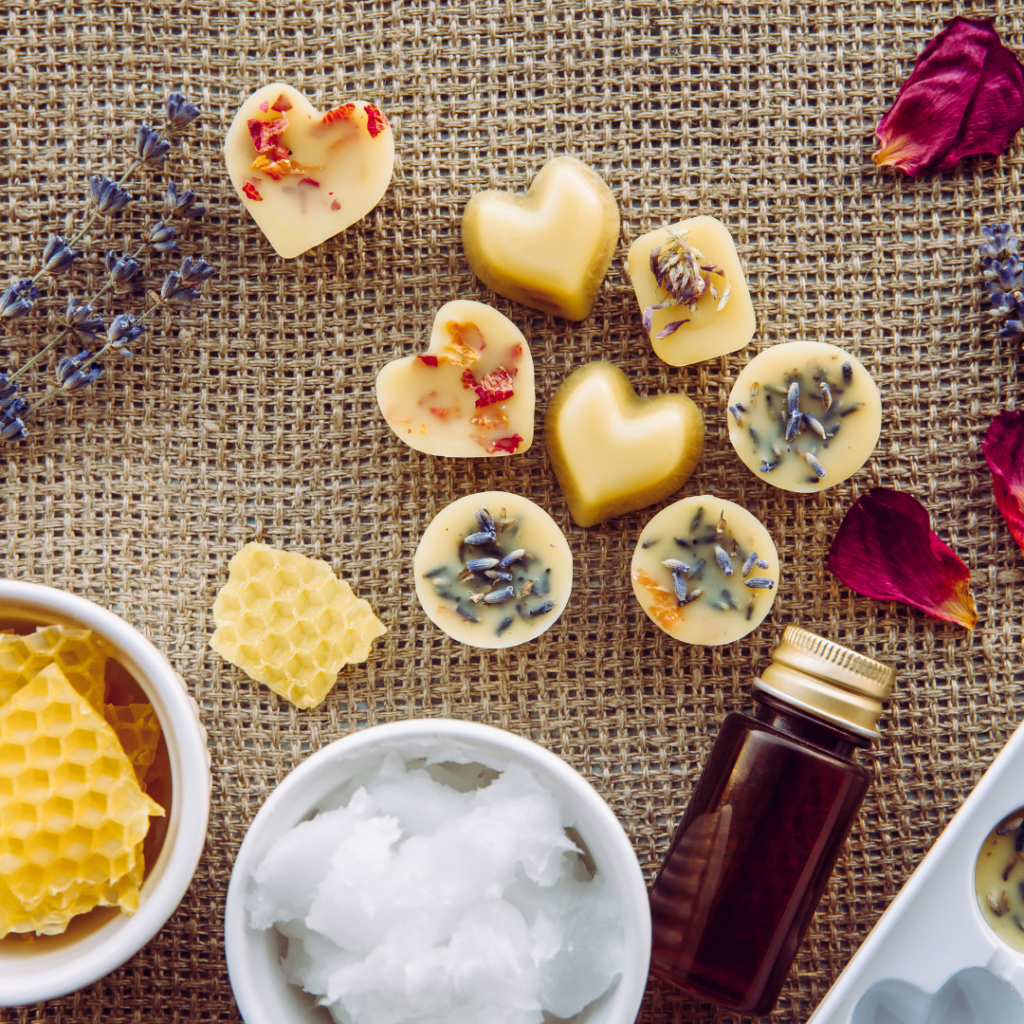
Wax melts are a simple way to add fresh scents to your home’s scent print. There are many commercial options for wax melts and wax burners, but this simple tutorial on how to make wax melts at home lets you completely customize your wax melts. Even better, you can use your favorite essential oils, and natural beeswax too!

Wax melts and wax burners have become more common for aromatherapy, and just bringing nice scents into your home. There are many wax burners on the market, and many, many, different types and brands of wax melts. Most commercial melts are made with paraffin or soy wax, with fragrance oils and sometimes shimmers, glitters, or mica added to make it look more interesting. The good news is that wax melts are simple to make. And you can make your own in just an hour, or less.
Wax melts are a fun way to freshen up the home with good smells. Creating your own is so easy. Follow our easy instructions, and then try new scents and experiment to make your own, new favorite wax melt! An additional benefit of making your own wax melts is that they can literally be made with just three ingredients, beeswax, coconut oil, and essential oils. Learn how to make wax melts and enjoy the sweet scent of beeswax and your favorite essential oils whenever you want.
Melts are a good alternative to candles and open flames. Most burners are simply plugged in to warm the tray and melt the wax. There are a few wax warmers that use candles, but you can find ones that are candle free as well.

How to Make Wax Melts:
The addition of coconut oil gives the wax melts a lower melting point, compared to pure beeswax. You can tweak the amount of coconut oil you add to give an even lower melt point, or omit it to keep just the natural melt point of the beeswax.
Print
How To Make Wax Melts At Home
Description
Wax melts for your electric or candle powered wax burner.
Ingredients
- 1 cup beeswax pastilles
- 1/3 cup coconut oil
- 40–50 drops essential oil
Instructions
- Set up a double boiler with a glass measuring cup or glass bowl, a sauce pan, and a few jar rings. Set the double boiler up over medium low heat, and bring the water in the double boiler up to a simmer. Don’t let the double boiler go over a simmer.
- Measure and pour the beeswax into the cup, and add the coconut oil. Let melt, and stir as it is melting. If you wish to add color to your homemade wax melts, now would be the time to add some candle dye, or shimmer.
- While the mixture is melting, find your wax molds. Silicone molds, like the small ones for chocolates, candy, or ice cubes work well. If you’re using non-silicon molds, spray them with a silica mold spray to aid the release of the wax melt.
- When the wax and oil is combined and melted together, add your favorite essential oils, or essential oils blend. I recommend 40-50 drops to keep the scent strong over all the wax melts. You may wish to use fewer drops if using a strong oil like peppermint, and a few more drops if using a softer scent like lavender. You could even add in whole or ground herbs like cinnamon, if you prefer to avoid essential oils.
- Remove the melted melt mixture from the double boiler saucepan, and carefully pour the mixture into your prepared molds.
- Set the molds on a flat surface to cool. Pop out your diy wax melts once cool.
- Package the melts up in pretty cellophane bags, or a glass jar to keep them sealed. Use 1-3 melts in your wax warmer as needed for scent and atmosphere. Wax melts can make a great gift.
Ingredients:
- 1 cup beeswax pastilles
- 1/3 cup coconut oil
- 40-50 drops essential oil
Directions:
- Set up a double boiler with a glass measuring cup or glass bowl, a sauce pan, and a few jar rings. Set the double boiler up over medium low heat, and bring the water in the double boiler up to a simmer. Don’t let the double boiler go over a simmer.
- Measure and pour the beeswax into the cup, and add the coconut oil. Let melt, and stir as it is melting. If you wish to add color to your homemade wax melts, now would be the time to add some candle dye, or shimmer.
- While the mixture is melting, find your wax molds. Silicone molds, like the small ones for chocolates, candy, or ice cubes work well. If you’re using non-silicon molds, spray them with a silica mold spray to aid the release of the wax melt.
- When the wax and oil is combined and melted together, add your favorite essential oils, or essential oils blend. I recommend 40-50 drops to keep the scent strong over all the wax melts. You may wish to use fewer drops if using a strong oil like peppermint, and a few more drops if using a softer scent like lavender. You could even add in whole or ground herbs like cinnamon, if you prefer to avoid essential oils.
- Remove the melted melt mixture from the double boiler saucepan, and carefully pour the mixture into your prepared molds.
- Set the molds on a flat surface to cool. Pop out your diy wax melts once cool.
- Package the melts up in pretty cellophane bags, or a glass jar to keep them sealed. Use 1-3 melts in your wax warmer as needed for scent and atmosphere. Wax melts can make a great gift.
Another name for wax melts is wax tarts. You can find a wax melt recipe for that variation here.
Note: If you’re using a wax burner around young kids or pets make sure to use kid and pet safe essential oils. Spearmint is a good replacement for peppermint for pet and kid safety. A personal favorite is lavender essential oil, both for calming scents, and because it’s kid and pet safe.
Variations and Tricks:
You can make these in batches by doubling or tripling the amount of beeswax and coconut oil used. Then, when they are melted together in the double boiler you can split them into smaller glass bowls and add different scents before pouring the molds. This is a great way to make a wide variety of wax tarts for gifts, or gift baskets, in a single afternoon.
Other scent variations for these include Christmas tree scented blends, orange or lemon essential oils, or even some fragrance oils like tonka bean, or patchouli. Just keep your scents to natural ingredients, and avoid artificial fragrance oils or liquids.
If you don’t have fresh beeswax pastilles you can repurpose candle wax from partially used beeswax candles. Often pillar candles will have a lot of leftover wax after the wick is burned down. This can be safely re-purposed for your wax burner. Avoid paraffin wax, however, for your electric wax melter as paraffin can release toxins into the air while beeswax purifies your indoor air.
You may be tempted to make soy wax melts. Soy wax has a different melt point, texture, and appearance than beeswax. Beeswax also has tons of other uses, like these ones. If you are re-purposing soy wax, go ahead, as it’s safer than paraffin. But, especially around young children, I prefer using beeswax myself.
If you don’t have a wax burner for your newly made scented wax cubes, you can make a homemade melter with a double boiler and a glass mason jar. Simply set up your jar over a low heat, or on top of your woodstove or gas heater, and drop a few of the wax melts in. Monitor carefully if using an active burner, and top of the water as needed. An herbal simmer may also fit into your scent print needs.
Getting Started?
There are many uses for herbs and herbal essential oils. This simple recipe focuses on combining oils with a carrier to make an aromatherapy wax melt. Not only does it refresh your home’s smell, you can chose oils that are rejuvinating, uplifting, or energizing. Or, you can chose ones that are calming, aid sleep, and promote relaxation. The choice and wealth of variations are up to you.
Want to learn more about herbs, essential oils, and your health? Join the DIY Herb of the Month Club
Get to know your herbal allies by studying one herb at a time


Leave a Reply