Growing potatoes in containers expands your growing space while giving you abundant harvests of tasty and versatile spuds. Containers can be used year after year. So once you master growing potatoes in containers you’ll be set for abundant harvests every time. But there are a few key steps to make sure you get the best yield possible from your containers.
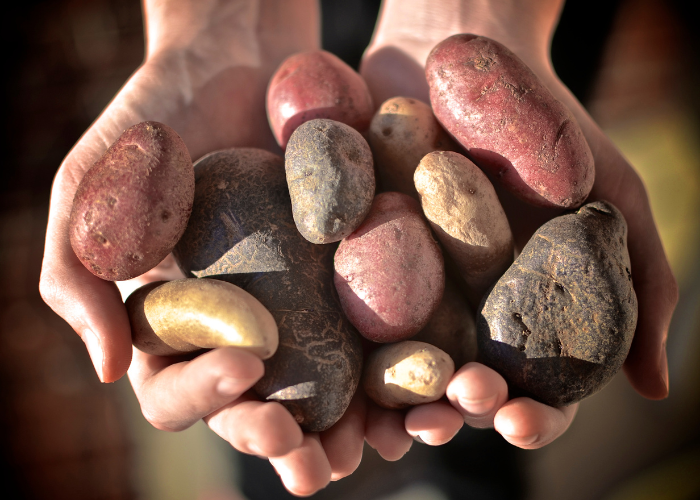
Potatoes are a versatile crop that is especially beneficial in a survival garden, a victory garden, or a garden you need to feed your family. Potatoes contain all the vitamins and minerals your body needs except vitamin A, D, and calcium. They require much less work than grains to get food to the table — no threshing, winnowing, grinding, or sifting. They take up less space in the garden than grains and can even be grown in containers if garden space is scarce. Homegrown potatoes taste better than grocery store potatoes. When you grow your own potatoes you have a wide variety of spuds to choose from including white, yellow, red, or blue fleshed potatoes.
However, potatoes take 4 to 5 months to grow and that uses up valuable garden space during the growing season, that can be used for higher value crops such as herbs, greens, and tomatoes. When grown in containers, potatoes can be placed in out of the way corners around the garden, leaving garden space for premium crops. Potatoes can also be grown in containers on balconies or patios for those with no space to garden.
When growing potatoes in containers there is no need to “hill up” the potato plants during growth. The container can be filled to the top, watered, and left to grow on its own. Other than weekly watering there is very little work needed to get a good harvest. Potatoes grown in containers are virtually weed-free.
Growing potatoes in containers makes them less prone to harvest damage from spading forks or harvest tools. Harvesting is simple. Just tip the container into a wheel barrow and sift through the dirt with your hands to find the tubers.
Potato yields are dependent on variety, weather, soil fertility, and growing space. However, you can expect from 3 to 10 pounds of harvest for every pound of potatoes you plant. Early potatoes are generally smaller with scantier harvests than main season potatoes.
6 Stages of Potato Growth
Potatoes are grown vegetatively from the same tubers that you eat. Certified disease free seed potatoes are tested for pathogens like scab and blight. Though you can save your own seed potatoes, If your area is prone to one of these disease use certified seed potatoes rather than saving your own seed.
Understanding the stages of potato growth can help you choose the best varieties of potatoes for your location, and let you plan your plantings.
Stage 1: Chitting the potatoes
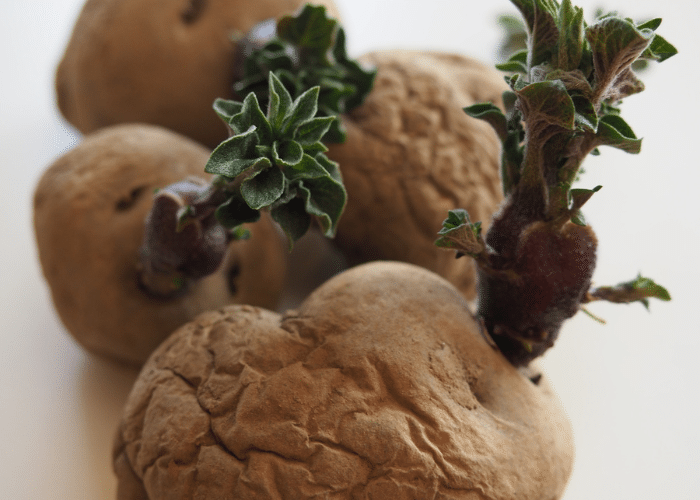
In the first stage of potato growth the spuds break dormancy and begin to grow eyes. It can happen in the dark in a bag in the back of the pantry. These long, pale sprouts or shoots, called stolon, are not what you want for maximum growth. Break them off of the potatoes and discard them. The tubers will grow new eyes in about 2 weeks. For the strongest start, seed potatoes should be chitted.
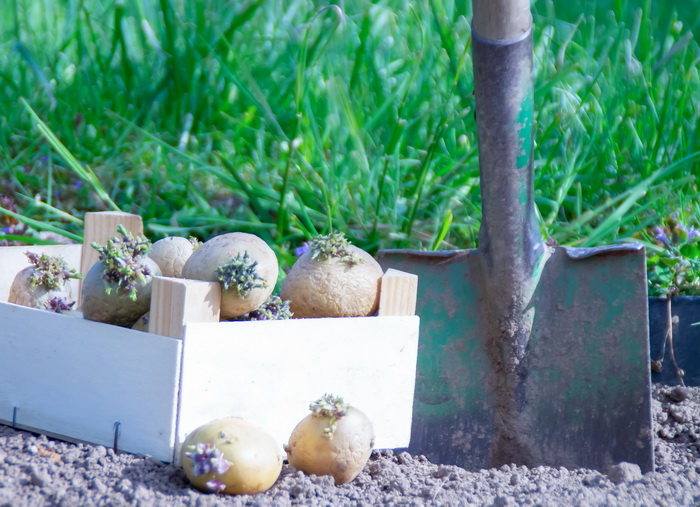
To chit your potatoes and get them ready for planting, put them in a shallow tray, egg carton, or box. Expose the potatoes to light from a sunny window or from a grow light. The potatoes will send out eyes and the eyes will be short, leafy, and green. This process takes about 30 to 40 days and will give you a head start on the season. This is valuable if you are growing in a short season area or if your climate suffers from late blight. Start chitting your potatoes 8 weeks before your last frost date — around St. Patrick’s Day in most of North America in USDA zone 5 to 8, or April 1st in zone 2b to 4..
When planting main season potatoes in a short season area, chitting can give you 14 to 30 days of additional growing season, by ensuring that your main season potatoes emerge early and maintain strong growth throughout the growing season.
Stage 2: Emergence
The potatoes can be planted in containers 14 days before the last frost date in your area. It takes 14 to 20 days for the potatoes to emerge from the soil with their deep green leaves. By the time they emerge all danger of frost will be past.
Stage 3: Root and tuber development
In 14 to 30 days after emergence the potatoes form baby potatoes at the end of the stolon. If you were to dig up a plant at this stage, you’d see tiny potatoes about the size of a jelly bean at the terminus of each stolon or root branch. Potatoes continue to form at the end of the roots throughout the growing season. This is a key stage in the potato growing process. Ensure that the potatoes receive adequate water during this stage to prevent potato scab from forming on the tubers. (See below)
Stage 4: Tuber growth
Over the next 45 to 90 days the tubers enlarge. The potato tubers double in size every week during this stage. The plant flowers in white, pink, or purple flowers. Remove these flowers from the plant so that the plant continues to send its energy into the tubers. Those who want to develop new potato varieties use these flowers to hybridize potatoes and save seed from the resulting fruit. However, if you aren’t researching new potato varieties, removing the flowers will give you bigger potatoes. For many home gardeners, seeing potato plants in flower is the sign that there are potatoes to harvest for new potatoes.
Once you see flowers you can feel under that plant with your fingers and secure a few new potatoes for a meal. Though it’s important not to disturb the soil too much, so that the remaining potatoes continue to develop on the plants.
Stage 5: Maturity
90 to 120 days after emergence the leaves on the potato plants turn yellow and begin to die back. During this stage the skin on the tubers toughens and the potato tubers stop expanding. When 1/2 of the leaves have yellowed the plant is ready to harvest. Stop watering the pots when you see the leaves are 1/2 yellowed. 2 weeks later you’ll be able to harvest your potatoes. If you are growing potatoes in containers, harvest potatoes by tipping out the container into a wheel barrow and digging through the soil with your hands to find the potatoes. In an 8 to 10 gallon pot you can expect a 5 to 7 pound harvest in early potatoes or a 10 to 15 pound harvest of late season potatoes if growing conditions are optimal.
Stage 6: Hardening off and storage
The potatoes need a week or two to harden off before you store them. Do not wash them. This can weaken the skins and leave room for mold and bacteria to cause rot. Lay them out on newspapers or in shallow boxes in a warm, dry spot, out of direct sunlight. I place them in shallow boxes in my basement. After a week or two the skins will firm up and any soil that was clinging to the potato can be brushed off with your hand. Sort the potatoes by size and variety. Store in boxes or net bags that will allow air flow around the potatoes. Protect the potatoes from light. I stack my boxes on top of each other to block light and cover the top box with a bath towel. Keep them in a cool spot (45 to 50F) with moderate humidity levels, such as a cold room, root cellar, or unfinished basement. Protect the spuds from freezing temperatures.
Types of Potatoes
There are 4 main types of potatoes early potatoes, midseason potatoes, late season potatoes, and fingerling potatoes.
Early potatoes
Early potatoes produce mature potatoes in 50 to 70 days after planting. They are determinant potatoes that produce their tubers on a single layer in the garden. These potatoes do not require hilling in the garden because they only produce potatoes on one level. But they should be well mulched to prevent their fruit from turning green on exposure to light. (Green potatoes are toxic and should not be eaten) These potatoes are generally smaller than main season potatoes with a lower weight at harvest time. They have thinner skins than main season varieties. And they store well for 6 months. These potato varieties are delicious as new potatoes and as “creamers”. They are also great in potato salad, mashed, fried, or boiled. They are usually harvested before late blight can destroy the crop, so they are good choice for areas that are prone to late blight. If they are left too long in the ground after the plant dies back, they can start to grow, reducing the quality of the harvest
Early potatoes are called “determinant” potatoes in the USA, and “earlies” in UK. These will be the best potatoes for growing potatoes in containers, if your containers are on the small side.
Early potato varieties
- Alta Blush
- Alta Rose
- Bellanita
- Caribe
- Carlton
- Irish Cobbler
- Norland
- Rode Eersteling
- Sieglinde
-
White Warba
- Russet Norkotah
Midseason Potatoes
Midseason potatoes take 70 to 90 days to reach maturity. Mid season varieties will produce more potatoes than early potatoes and typically do not get as large. Many of our tastiest potatoes fall into this category. Many of the buttery, yellow fleshed potatoes are midseason varieties. Midseason potatoes are determinant potatoes, forming their tubers sideways from the plant but along one layer. They do not need to be hilled up but should be well mulched to exclude sunlight from the forming tubers. Midseason potatoes are called “Second Earlies” in UK. They generally reach maturity before late blight is a problem.
Midseason Potato Varieties
- Kennebec
- Arizona
- Ballerina
- Bridget
- Chieftain
- Dakota Pearl
- Goldrush
- Nicola
- Purple Viking
- Red Gold
- Red Pontiac
- Roko
- Sangre
- Viking
- Yukon Gold
Late Season Potatoes
Late Season Potatoes are indeterminant potatoes that form potatoes all along the underground stalk. They take 100 to 120 days to reach maturity. Some later varieties can even take 120 to 150 days to reach maturity. High producers with heavy tubers, these are the potatoes that need to be hilled up several times during the growing season, if you grow them in the garden. The skin on late season potatoes is thicker and firmer to allow them to keep through the winter. These potatoes are maturing at the time that late blight affects the crop, so grow blight resistant varieties. Heavy producers, they need a little more space than the determinant varieties to grow to their full size. In UK these potatoes are called “Main Crop” or “Mains”.
Late Season Potato Varieties
- Rudolf
- German Butterball
- Russet Burbank
- Bintje
- Russian Blue
Fingerling Potatoes
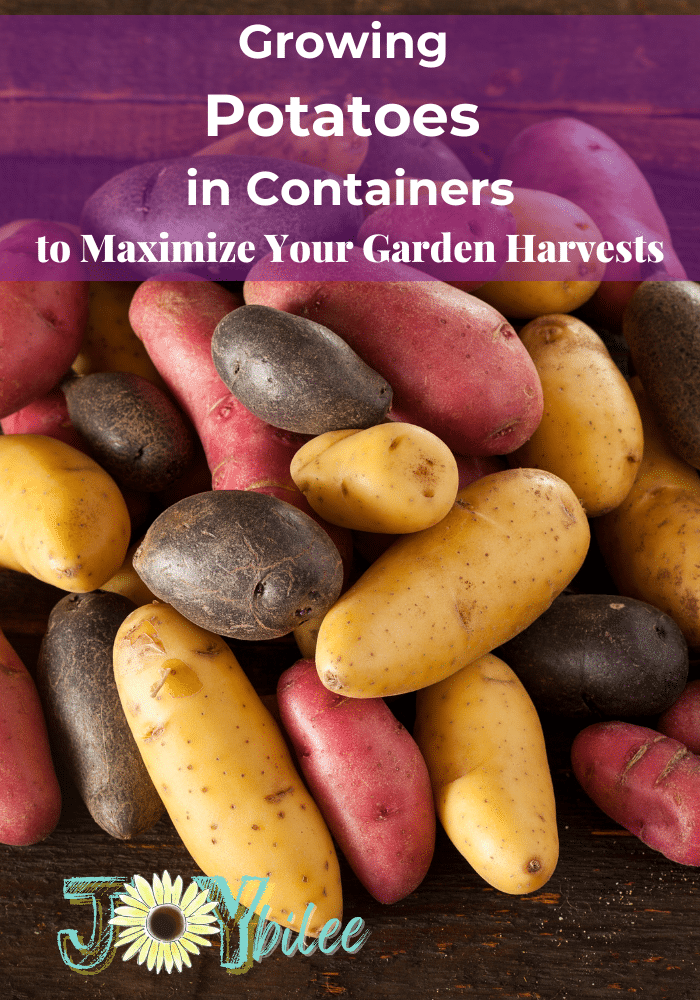
These potatoes have a unique shape and flavor. They are smaller than other potatoes, maturing at 2 to 3 ounces per potato. They grow long and oblong, like a finger. These are especially good salad potatoes with a waxy texture. There are fingerling potatoes in early, mid, and main season. Fingerling potatoes can be harvested anytime after the plant flowers for thin skinned “new potatoes” or they can be left until the leaves are 1/3rd yellow, for fingerling potatoes that will keep through the winter. Mature fingerling potatoes can be as large as the smaller early potatoes.
Fingerling Potato Varieties
- Amarosa (red flesh, main season)
- French Fingerling (Main season, Late — 120 to 150 days to maturity)
- Bellanita (Yellow skin, yellow flesh, Early Season, determinant)
- Banana (Yellow skin, yellow flesh, Main Season)
- Pink Fir Apple (Heritage variety, pink skin, yellow flesh, Late — 120 to 150 days to maturity)
Growing potatoes in containers
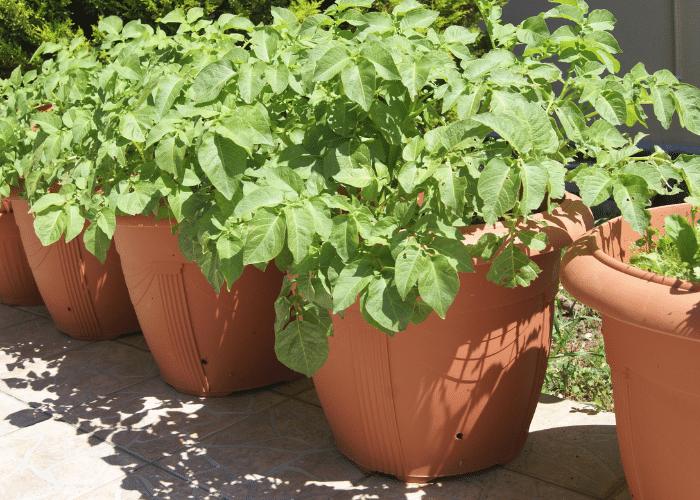
While potatoes can be grown in the garden, they will occupy that garden space for the entire growing season. If you are short on garden space, putting potatoes in containers can increase the harvest. Containers can be moved around the garden to keep the plants in full sun as the season progresses. If you don’t have a garden, you can grow potatoes in containers on a deck or even on a balcony. While potatoes can be grown in a high tunnel or greenhouse in the early spring, by midsummers high temperatures inside the greenhouse will stop the potatoes from growing. Remove them from the greenhouse in the height of summer. They can be returned to the greenhouse or high tunnel if the weather threatens frost in September, to extend the growing season.
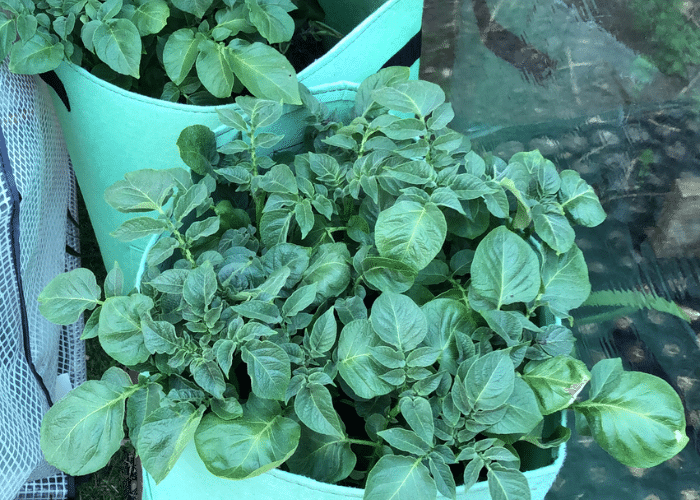
Possible containers:
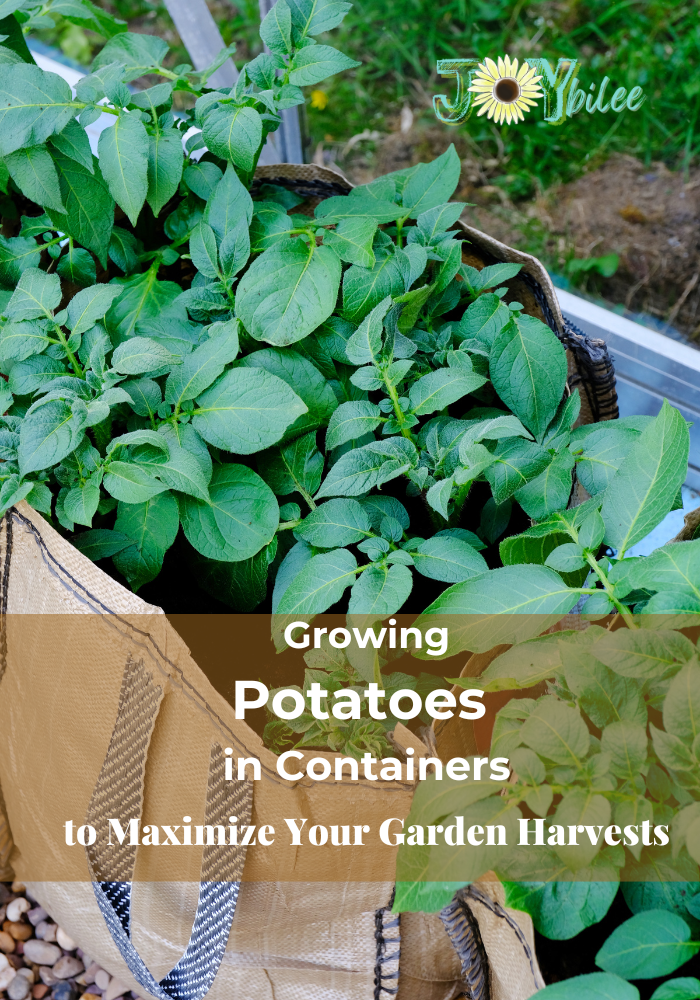
Any container with at least 12 inches of space across the container is suitable for growing potatoes. The container should have adequate drainage. If necessary add more drainage holes so that the potatoes aren’t sitting in water. Fabric grow bags may dry out too quickly in drought and lessen the yields, but they are suitable if you can keep them watered.
- 8 to 10 gallon Grow bags
- Garbage cans
- 5-gallon buckets
- 8 to 10 gallon pots
- Greenstalk Planter
- Compost pile
Whatever container(s) you choose to use, these instructions can be adapted to your preferred method. Plan to plant 2 main season potatoes or 4 early or midseason potatoes per 10 gallon container. If you are planting in a 5 gallon bucket, for instance, plant 1 main season potato or 2 early of Mid Season seed potatoes per container.
Growing Medium
Compost, potting soil, or other soil mix can be used as growing medium in your containers. Garden soil can be used provided that it has never been used to grow potatoes previously. Potatoes carry a number of pathogenic soil pests that can persist in garden soil for years. When growing potatoes in containers it is better to begin with fresh, sterile potting soil or compost to ensure that the soil is disease free. Soil used in containers to grow potatoes can be added to the garden or compost bins, when the season is over. The fertility will be gone after growing potatoes in containers, but it can be used as a soil conditioner.
Potatoes grow best in acidic soil of 5.0 to 6.0 pH. Though they will tolerate pH outside of this range the tuber formation may suffer.
Organic fertilizer
Potatoes require high phosphorus, and moderate potassium levels for disease resistance and root development. High nitrogen fertilizer will promote lush green growth at the expense of tuber development. Ideally your fertilizer should be in the NPK range of 3-9-3. You can mix your own fertilizer by combining the following:
- 1 part bone meal
- 1 part blood meal
- 1 part fish bone meal
- 1/2 part kelp meal
You’ll need 1/4 to 1/2 cup of this fertilizer for each 8 to 10 gallon pot at planting time.
Steps to Planting Potatoes in 8 to 10-gallon Containers
- Chit potatoes for 4 to 6 weeks until each potato has at least two eyes with deep green leaves growing from it.(See directions above)
- Fill an 8 to 10-gallon pot one third full of your growing medium. Add 1/4 cup of organic fertilizer. Mix the fertilizer into the growing medium with your hand.
- Imagine the bottom of the container divided into 4 quadrants. Plant 2 chitted potatoes, one in each of two quadrants opposite each other in the container, with the green leaves upright. To get larger potatoes, if the plant has several chits developing, scrape off all but 2 chits before you place the potato in the soil, with the chits upright.
- Fill the container 2/3rds full. Add 1/4 cup of organic fertilizer. Mix in with your hand.
- For early and midseason potatoes add 2 more chitted potatoes in the quadrants left vacant from the first row of potatoes, planting a total of 4 potatoes per container.. For late season potatoes omit this step, planting only 2 late season potatoes in the container.
- Fill the container to within one inch of the top with growing medium. Water the container until water comes out the holes. Wait 15 minutes. Water again until the water comes out the holes in the bottom of the container. There is no need to “hill up” potatoes grown in containers and doing so risks damaging the plants.
- Mulch with straw, grass clippings, or wood chips to retain moisture and block out weeds. Place the container in full sun or partial sun.
- Water the container once a week or more often. Do not allow the soil to dry out during the first 3 months of growing. As the leaves die off and yellow in the fall, stop watering. This will encourage the plants to stop production and mature the spuds that are growing in the container.
- Harvest your potatoes 2 weeks after you stop watering.
In a smaller container plant fewer potatoes. For instance, plant just 2 potatoes early potatoes or 1 late season potato in a 5 gallon bucket.
12 Spring and Fall Vegetables to Grow in the Shoulder Seasons
Potato Diseases
Common Scab is a bacterial disease that shows up on the skin of the potato, leaving dark spots and a corky texture. While no potato varieties are entirely immune there are some varieties that have a resistance to scab, such as Russet Burbank, Norland, or Nicola. Planting scab resistant varieties can help. Keeping soil moisture levels even in the 4 to 6 weeks during stolen formation and the beginning of tuber formation (stage 3). Amending soil pH can also help. Do not lime the potato bed in the spring before you plant potatoes.
Late Blight is another bacterial disease in potatoes. Caused by the water mold Phytophthora infestans, late blight is especially damaging during cool, wet weather in the fall. Late blight is the disease that caused the Irish Potato Famine (1845-52). The bacterium affects all plant parts. The small lesions appear as dark, water-soaked spots on the leaves. These leaf spots quickly enlarge, and a white mold appears on the lower surface of the leaves. The leaves turn brown and shrivel within 2 weeks of the first symptoms. Infected potatoes have a dry, corky rot that may be brown or reddish. Tubers are symptomless at the initial stages of infection but often develop symptoms in storage. The fungus produces a foul odor when the infection is severe. Infected plants and tubers should not be composted.
Choose blight resistant varieties, such as Kennebec or Chieftain. Purchase certified disease-free seed potatoes. Protect plants from getting wet leaves. Deal with blight as soon as it occurs by harvesting potatoes early. Burn or otherwise discard any infected plants or tubers.
Hollow Heart is a physiological disease caused by rapid tuber development after a period of moisture stress. It is characterized by a brown cavity in the center of the tuber. Ensuring that the potatoes have adequate moisture levels in the early period of their development and choosing resistant varieties such as Sangre can mitigate this cosmetic defect.
Potato Beetles are common pests of both home gardener and commercial potato farmers. The common black and yellow-striped “potato bug” is the most serious insect pest of potatoes. Both the striped beetle and the black-spotted, red larva feed on potato leaves. If left untreated they can reduce yields and even kill the plants. The bug is a serious pest of other plants in the solanum family including tomatoes, peppers, and eggplant. To get rid of it take a small whisk broom and a bucket of soapy water and sweep the beetle and larvae into the bucket while they are distracted by feeding on your plants.
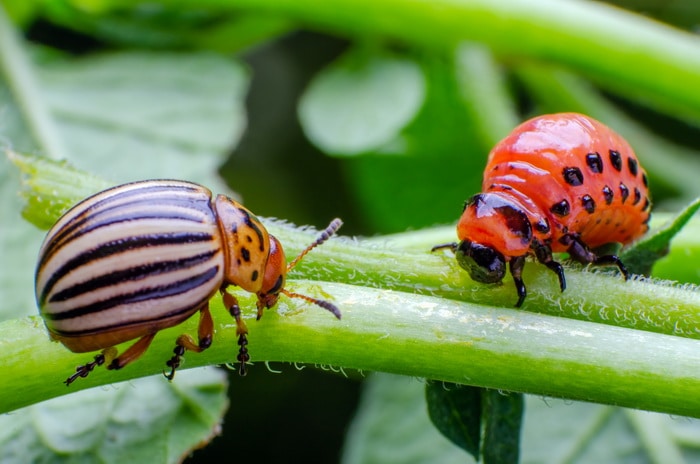
This is a Colorado Potato Bug and its larvae. This is not a lady bug.
Slugs and Snails can damage the developing tubers inside the soil. They gain access to the plants through the holes in the bottom and sides of containers. Younger plants and those with newly formed tubers are the most susceptible to damage. Collect slugs with traps and drown them in soapy water. Diligently patrolling the garden for slugs over a few weeks can significantly reduce their population. Slugs have a two year life cycle so diligence now will pay off with fewer slugs in the garden over two seasons.
Growing Potatoes in Containers
Potatoes are a key survival crop in temperate climates. They can be grown where there are at least 70 frost free days in the growing season. There are a wide variety of potatoes with different flavors and textures that can be grown in the home garden. But they take up a lot of space. By growing a wide variety of potatoes in containers you can maximize your harvest in very little space, while also leaving your prime garden real estate for more valuable crops like tomatoes or greens.


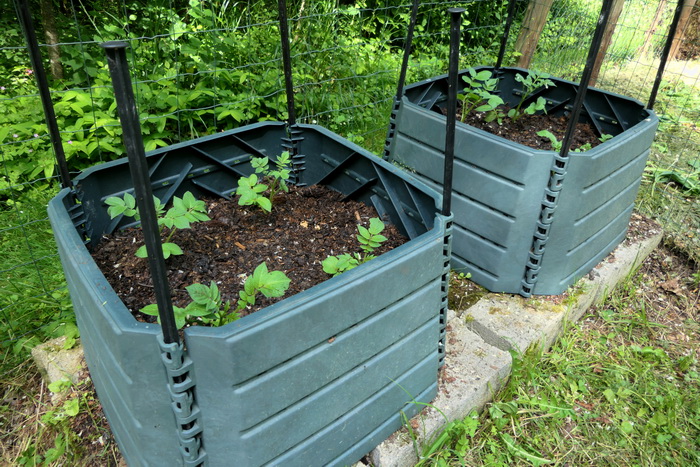

Good afternoon! I just read your extraordinary article on growing potatoes in containers and wondering if you can tell me what kind of container is the one pictured below “Fingerling Potato Varieties” and above the section “Possible containers”? It looks like layers can be added to make it the height you might need. Looks fabulous, but I can’t find anything like it online. It isn’t one of the greenstalk planters as far as I can tell. Thank you for all your expertise that you share!
Thankyou for that…lots of good info l didn’t know. l will begin harvesting in a couple of weeks, as it’s now Autumn here in Australia. l can’t wait to see how things went, and work out what l need to do differently next season. God bless.