Make the best short crust gluten-free pastry that is light and flaky, yet holds together when it is rolled out and handled. Grab the recipe.
Gluten-free baking is notoriously crumbly and dry. It lacks the gluten for wheat flour to stabalize the crumb and achieve that light, flaky short crust mouth-feel. But what a gluten free shortcrust pastry recipe lacks in texture can be made up by using a variety of gluten-free flours or gluten free flour blends that provide a lighter crumb.
I’ve been experimenting with gluten free shortcrust pastry trying to get the best recipe to roll out for butter tarts, quiche, and apple pie. I wanted my gluten-free pastry to have some important characteristics:
- Flaky and tender, not like cardboard
- Easy to roll out
- Holds its shape when lifted off the floured board onto the pie pan or tart pan
- Buttery flavour
- Gluten-free pie crust that browns evenly
- Doesn’t tear apart when manipulated
- Can be worked and reworked without getting tough
Gluten-free pastry dough should be better than pastry made with all-purpose flour since it has no gluten to toughen the pie crust with repeat handling.
A few keys to the best gluten-free pastry dough
Use a blend of flours
My favorite commercial gluten free flour blend is a mixture of rice flour, buckwheat flour, tapioca starch, and potato starch, plus xanthan gum, which is added to help the dough stay together. I found that using the flour blend alone produced a short crust with a cardboard-y texture that lacked the flakiness of wheaten pastry. The xanthan gum was too heavy and the starch was too pasty and dry.
My ideal blend of flours for pie crust includes the addition of gluten-free oat flour to imitate the texture of wheat flour. Gluten free oatmeal, blended in a high powered blender like Vitamix or Blendex gives a silky, fine flour that is idea for this recipe. Use 1 1/2 cups of gluten-free certified oatmeal for each cup of oat flour that you need. Blend the oatmeal using 3 cups at a time for 45 seconds in a Vitamix blender for 2 cups of fine, silky oat flour to use in this gluten free pastry recipe.
I also add tapioca starch to lighten the dough so that it is less dense, plus my favorite blend gluten-free flour. If you don’t have a ready-made gluten free flour use equal parts rice flour, potato starch, tapioca starch plus 1 teaspoon of xanthan gum for each cup of flour in the blend.
Use real butter
Butter gives this pastry a delicate flavour and that flaky pastry texture that is the goal for a sweet pastry. Vegan butter could be used but I haven’t made this with vegan butter so you’ll need to do your own experiments to find the ideal amount of vegan butter to replace the butter called for in this recipe.
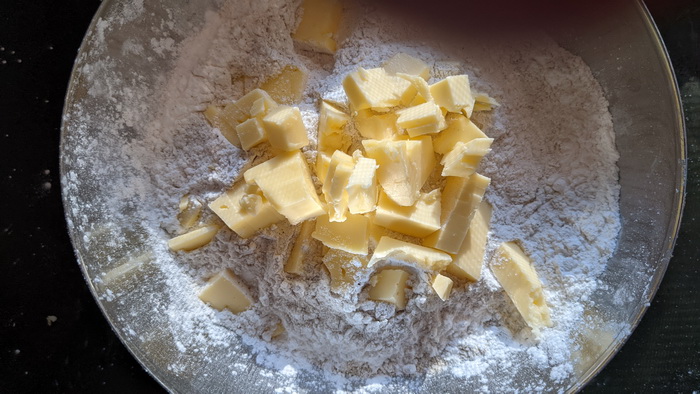
The butter is worked into the flour blend with your hands or with a pastry cutter until the dough is crumbly and the butter is broken into pea size pieces. If you break the butter into crumb size pieces you’ll lose some of that flakiness. Opt for pea size butter. It will become smaller as the dough is rolled out.
Use cold hands
The butter melts during baking to leave spaces in the dough. This is what gives pie crust its flakiness. While you are working the dough with your hands you don’t want to prematurely melt the butter. I like to work in front of an open window, in the winter, to keep the butter chilled.
Chill the dough
While this step is often skipped when making gluten pie crusts, its very important when working the the blended flours of gluten-free baking. The dough needs time to absorb the moisture uniformly. Chilling the dough for an hour or even overnight can make the dough easier to handle and improve the texture of the baked pie crust.
Add an egg to the cold water
The egg helps the dough hold together, which is especially important with gluten free pastry. The lecithin in the egg makes the dough more pliable and easier to handle. It also gives the crust beautiful color.
Add vinegar or lemon juice to the cold water
Vinegar or lemon juice are antioxidants that help keep the crust color when the crust is stored for a few days in the fridge. Without the acid the crust will turn gray and oxidize. But some say it also makes the dough more tender. I always add it to my pastry, as I think it gives the dough a nice flavor that is slightly tart.
Gluten-free dough can’t be overworked so go ahead and roll and reroll
Sometimes with gluten free pastry the dough will tear when you lift it from the parchment paper. Don’t worry. Just reform the dough and re-roll. Since there is no gluten in the flour the dough won’t become overworked. Gluten free dough can be rolled out several times.
Can other flours be used?
I haven’t experimented with coconut flour or sorghum flour. Almond flour made the dough too heavy and I lost the light, flaky crust I was aiming for. There is buckwheat flour in my 1:1 gluten free flour blend (1/4 cup per 1 cup of blended flour) and it gives a nice texture. By adding other flours to the 1:1 gluten free flour blend I am able to dilute the xanthan gum and that makes a lighter, more flakey dough. In my opinion there is too much xanthan gum in most gluten-free flour blends.
This gluten-free pastry dough recipe makes enough for 24 tarts or 2 pastry shells or 1 double crust 9 inch pie.
Print
Light and Flaky Gluten Free Pastry for Tarts and Pies
- Prep Time: 15 minutes
- Cook Time: 30 minutes
- Total Time: 45 minutes
- Yield: 24 tarts shells or 1 double crust pie 1x
- Category: gluten-free baking
Description
This gluten free pastry dough has the mouth feel of wheaten crust but its easier to handle and produces a light, flaky short crust that bakes beautifully.
Ingredients
- 1 cup gluten-free oat flour*
- 1 cup tapioca starch
- 1 cup Gluten free flour blend
- 1 cup butter, cubed
- 1 egg + 1 tablespoon cider vinegar + enough water to make 1 cup
- ½ teaspoon salt
Instructions
- To make gluten-free oat flour* blend 1 ½ cups certified gluten-free oatmeal in a high powered blender until it is finely ground to the consistency of flour, about 1 minute.
- Add oat flour, tapioca starch, and gluten free flour blend (1/3 cup rice flour, 1/3 cup tapioca starch, 1/3 cup potato starch, 1 teaspoon xanthan gum) to a bowl. Cube the butter into ¼ inch cubes. Using your fingers blend in the butter with the flour until it is the size of small peas. The butter will break apart more when it is rolled.
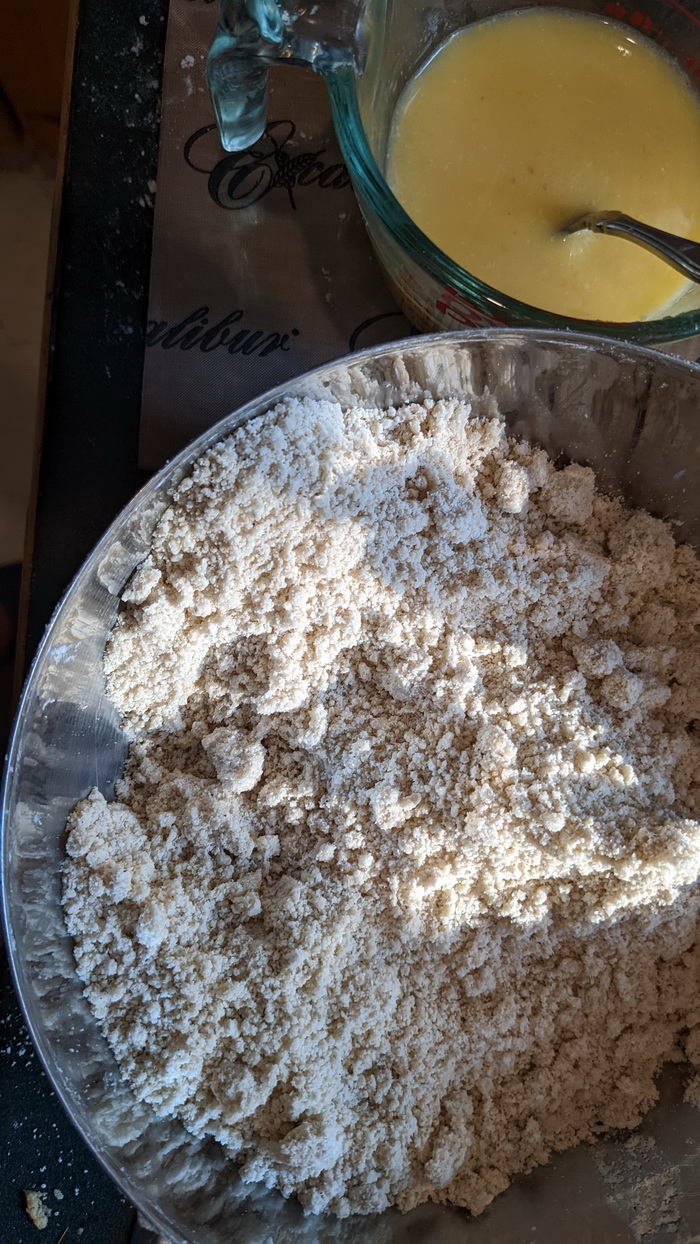
- In a one cup fluid measuring cup, add the egg and cider vinegar. Beat with a fork until well blended. Top up the glass measuring cup to the one cup mark with water. Stir to fully mix.
- Make a well in the center of the flour mixture. Add ½ of the egg mixture to the well in the flour. Using a fork, mix the flour into the egg mixture, until all the liquid is used up. Add more liquid, one tablespoon at a time until the dough comes together to form a soft ball. Knead the dough briefly, add the remainder of the liquid. Form a smooth ball. Cover with plastic wrap or a cloth. Refrigerate the dough for 60 minutes. [At this point the dough can be divided into two equal parts, wrapped in plastic wrap and frozen for later use.]
- Cut the dough in half. Working with one half of the dough at a time, roll out the dough on a piece of parchment paper. I use this reusable parchment paper. Rotate the circle of dough ¼ turn after each roll to make a 1/8th inch thin circle that is at least 10 to 11 inches in circumference.
- Lift the dough and place in a greased and floured 9 inch pie plate or cast iron pan.
- Fill the dough lined pan with a filling. Roll out the second part of the dough and cover the pie
For a double crust pie, bake at 375°F for 30 minutes or until the crust is golden brown and the filling bubbles. For tarts bake for 15 minutes at 375F.
Notes
For a lovely golden brown crust brush the edges of the crust with beaten egg.
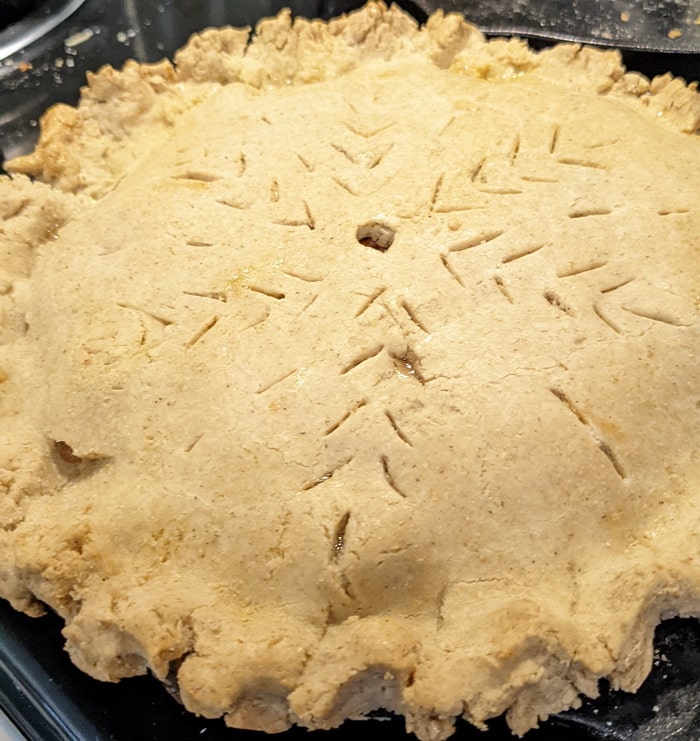
Gluten-Free Pie Crust
Yield: 1 double pie crust or 2 single pie crusts or 24 tart shells
Ingredients:
- 1 cup gluten free oat flour
- 1 cup tapioca starch
- 1 cup Gluten free flour blend
- 1 cup butter, cubed
- 1 egg + 1 tablespoon cider vinegar + enough water to make 1 cup
- ½ teaspoon salt
Instructions:
- Make gluten-free oat flour by blending 1 ½ cups certified gluten free oatmeal in a high powered blender until it is finely ground to the consistency of flour, about 1 minute.
- Add oat flour, tapioca starch, and gluten free flour blend (1/3 cup rice flour, 1/3 cup tapioca starch, 1/3 cup potato starch, 1 teaspoon xanthan gum) to a large mixing bowl. Cube butter into ¼ inch cubes. Using your fingers blend in the butter with the flour until it feels like coarse meal.
- In a one cup fluid measuring cup, add the egg and cider vinegar. Beat with a fork until well blended. Top up to the one cup mark with water. Stir to fully mix.
- Make a well in the center of the flour mixture. Add ½ of the egg mixture to the well in the flour. Using a fork, mix the flour into the egg mixture, until all the liquid is used up. Add more liquid, one tablespoon at a time until the dough comes together to form a soft ball. Knead the dough briefly, add the remainder of the liquid. Knead the dough again to form a smooth ball. Cover the dough with cling film or a cloth. Refrigerate the dough for 60 minutes.
- Cut the dough in half. Working with one half of the dough at a time, using a rolling pin, roll out the dough on a piece of parchment paper or other lightly floured surface. I use this reusable parchment paper. Rotate the circle of dough ¼ turn after each roll to make a 1/8th inch thin circle that is at least 10 to 11 inches in circumference.
- Lift the dough and place in a greased and floured 9 inch pie plate or 9 inch cast iron pie pan.
- Fill the dough lined pan with a filling. Roll out the second part of the dough and cover the pie
- For a double crust pie, bake at 375°F for 30 minutes or until the crust is golden brown and the filling bubbles.
Once you have a lovely short crust gluten free pastry dough to work with take out your tart and pie recipes.
Here are some of my favorite ways to use this gluten-free pastry recipe:
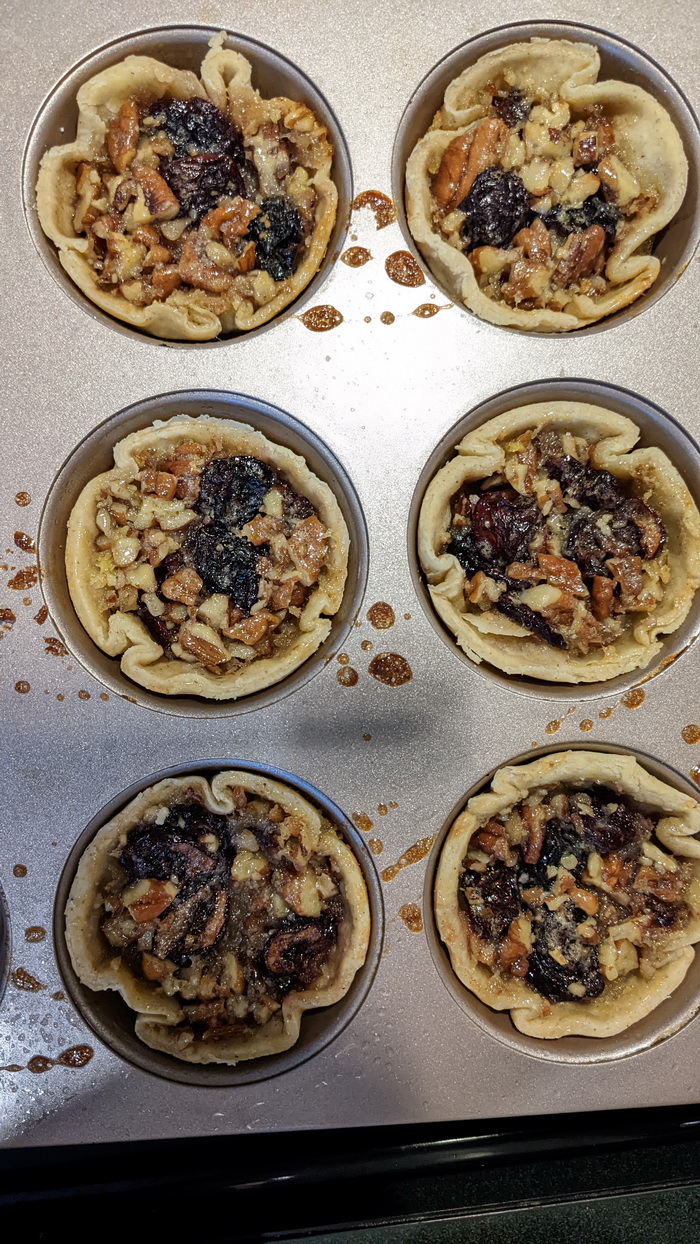
Butter Tarts are a must here in Canada for Holiday baking. My daughter has already requested them for this year. You’ll find my recipe here. Its not a traditional butter tart. I use craisins instead of raisins and I love to add chopped pecans, as well. Grab my recipe here.
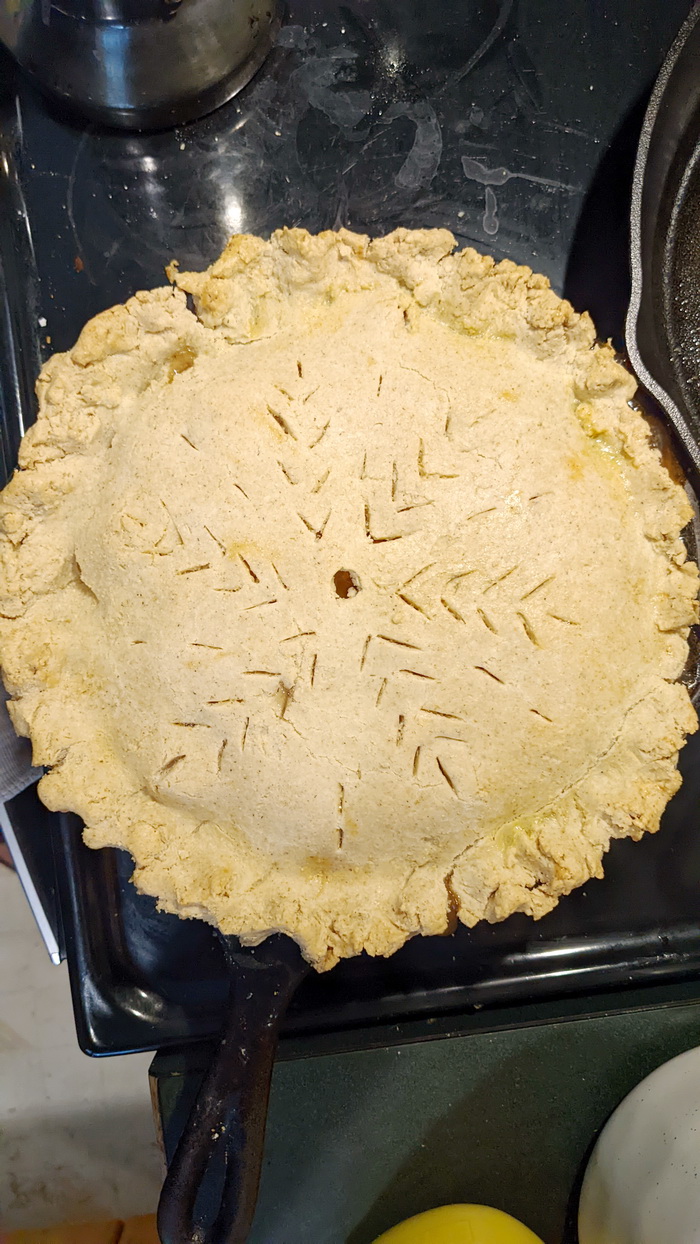
Apple Pie is Mr. Joybilee’s favorite. I canned apple pie filling this year while the apples were abundant so I will just need to stir in some tapioca starch to thicken the canned filling and add it to my prepared crust. Pro Tip: To keep the bottom crust from getting soggy with damp pie fillings, Mix a blend of 1 tablespoon granulated sugar plus 1 tablespoon gluten-free flour. Sprinkle this mixture to lightly cover the bottom of the pie crust before you add your filling. The sugar caramelizes forming a barrier while the extra flour absorbs any extra moisture. Wait for the filling to bubble before removing the pie from the oven.
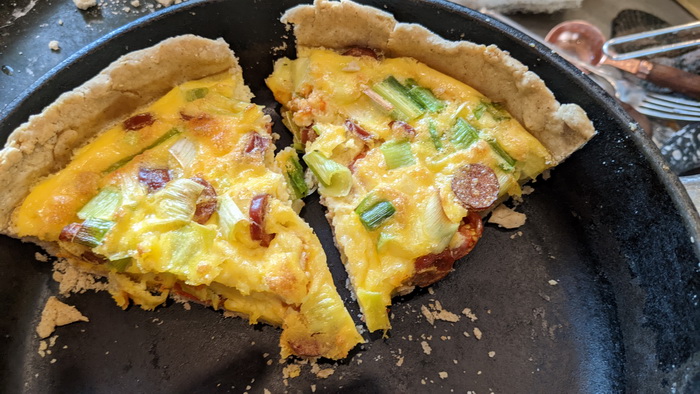
Quiche is my go-to breakfast recipe for Christmas morning. The egg mixture in the pie plate bakes while we do farm chores and breakfast is ready by the time we are done. It sounds complicated but it can be made ahead and reheated, too.
The recipes for butter tarts, quiche, and apple pie are coming soon.



Leave a Reply