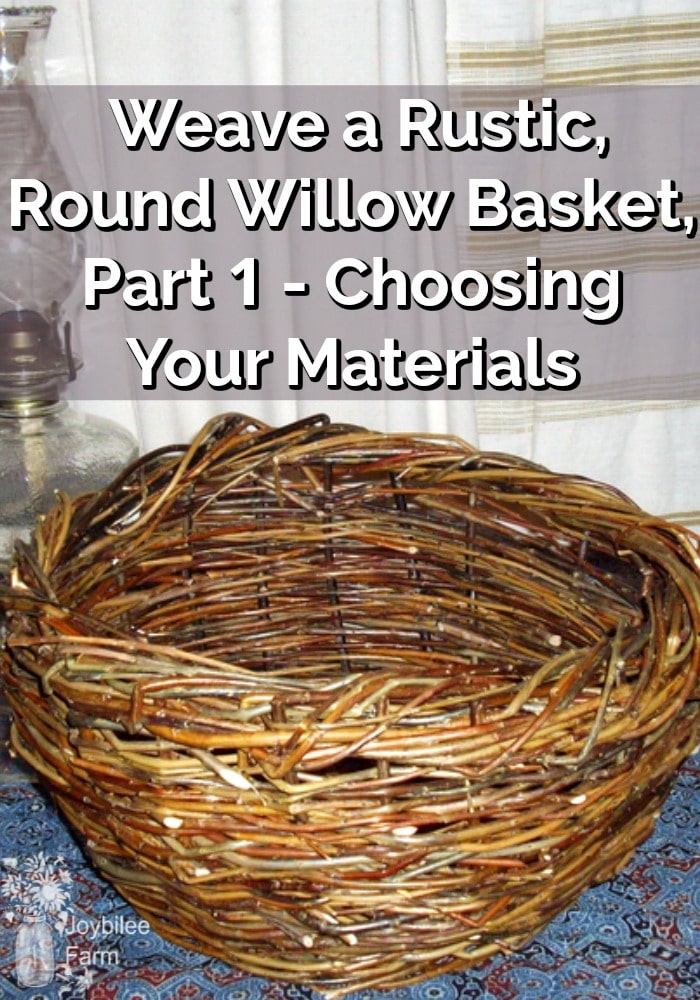
Weave a Rustic, Round Willow Basket, Part 1 – Choosing Your Materials
Basket weaving is a skill that can be learned. This is part 1 of the tutorial, where I’m going to help you learn which willow rods are best suited for your project. Check out all 5 parts of this series to learn how you can make your own willow basket.

Part 1 – sourcing your materials
One of the joys of homesteading is being able to spend an afternoon, crafting something that you need, with your own hands, out of materials that you grew yourself. There is a deep satisfaction in knowing that your materials are renewable, organic, sustainable, and readily available when you want to make something. There is profound pleasure in the making, enjoying both the process and the fruit. Basket-making is like this. Each basket that you make renews your joy and increases your skills. Don’t deny yourself the pleasure of this ancient art. Not only is it a joyful pursuit, but it will give you a way to supplement your income, should hard times come.
When you learn basket making from a kit, with materials sourced overseas, your first attempts look pretty good but lack the rustic charm of a basket made with local materials. I encourage you to weave from wildcrafted materials and enjoy the exercise and fresh air that harvesting allows.
This is a several-part article because to give you everything you need to know from start to finish would require a book. Instead, I’ll break it down into brief lessons and when I’m done you’ll have a good resource that you can refer back to online.
Choose straight willow branches from first-year growth
Willow basket weaving uses round willow weavers and rods from 1st-year growth. In the second year, the tender bark on first-year branches becomes hard and woody and the weavers lose some of their suppleness. In the 2nd and 3rd year, the straight rods will branch and become stronger. 2nd and 3rd-year branches work well for willow furniture making but lack the flexibility of 1st-year branches. As a general rule, first-year branches have coloured bark and peel easily in early spring, just after the sap rises. 2nd year branches silver over and the bark becomes thicker and harder. By the 4th and 5th year, your willow plantation will boast logs that are big enough to be used as fence posts, fence weavers, or fuel logs.
Traditionally every farm in Europe and in the early years of North America maintained a willow plantation that served as a windbreak, a shelterbelt for livestock, a hedge grow where medicinal plants were found, and a place to find materials for fencing, furniture making, and basket weaving. These were not accidental and wild but were planted intentionally with special varieties of willow, hazel, fruit and nut trees, herbs, and berries. If you have an old homestead, you may have one of these areas, grown over and just waiting for managed harvesting to bring it back into production.
Basket weaving needs straight, unbranched weavers for both rustic and refined baskets. Special willow varieties, traditionally used for basket making, can be grown and harvested every spring, and by the third year of annual harvesting, will provide materials for several baskets. If you have a willow tree already growing on your place, you can check its suitableness for basket weaving by taking a green, 1-year branch and bending it around your wrist. Basket weaving varieties are supple and will bend without breaking.
Good quality willow rods
- Are long, thin, and free of branching
- Have a constant diameter along their length
- Are pliant and elastic
- Have a small pith relative to the amount of wood
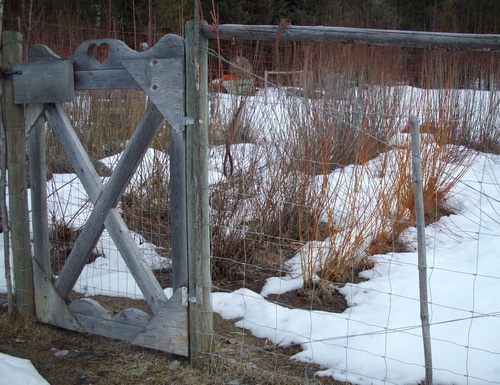
How to grow a willow plantation of your own
If you find a suitable variety on your property, you can grow your own willow plantation by harvesting several first-year rods and using those rods as cuttings to start a fresh plantation. One advantage of this is knowing that this particular willow clone is already growing well in your climate and soil conditions and will thrive in a new spot.
Prepare the ground for planting
Choose a well-drained part of your property. Contrary to common belief, willows do not like to have their roots constantly wet. Prepare the ground well by weeding and adding humus or finished compost into the soil. Firm in the soil. Cut the rods to 10 inches in length with an angle on the bottom, so that you can discern the bottom of the rod from the top. Push the rods into the ground where you want them to grow, leaving about 4 inches above the soil surface. The willow rod will grow leaves above the ground and roots below. Mulch well or lay down a weed block. You’ll need to water well during the first and second growing season and keep the planting weed-free. In the second Spring after planting, you’ll be able to harvest the rods and allow the stool to keep producing. Protect this immature planting from livestock grazing, A well-maintained willow plantation will give you willow rods and willow weavers for more than 25 years.

Harvesting the willow rod
You can watch a video of how to harvest willow rods here. Willow stools that are properly maintained will give you years of harvests. Ideally, willow rods for weaving baskets should be harvested in the spring, after the sap begins to flow and before bud break. This is when the bark will peel the most easily. Although it’s not necessary to peel the willow bark, you may want to in order to use it medicinally. If you want to do this, do it when you harvest the rods, rather than waiting for the rods to dry.
Dry the brown willow rods
While you can weave with green, freshly harvested rods, your basket will be sturdier and the rods will be more flexible for weaving, if you dry the rods for at least a month, and even up to a year or more, before soaking them and using them for weaving. As the basket dries after weaving, green rods will shrink and your basket will have gaping holes and loose weavers if made with freshly harvested rods. Dried and soaked weavers, tend to retain their size and shape on drying after the basket is made.
So as a rule of thumb, if you are weaving a quick harvesting basket, that you only plan to use once or twice, go ahead and weave it with green, freshly harvested rods. If you plan to weave a basket that you hope will have a few seasons of usefulness, allow the rods to dry for at least a month (or for years) before soaking them for basket weaving.
Bundle the harvested rods according to length, and thickness. Tie the bundles in 3 places to keep the bundle secure. As the rods dry, the bundle will shrink and your ties will become looser. You can retie the bundles once they are completely dry.
Preparing the rods for basket weaving
Pick a bundle of willow matched for width and length. You’ll need about 70 – 80 rods to make a medium size basket. This basket will be rustic and without a handle. If you wish to put a handle on the basket you can add an additional 20 rods to the soaking tub.
Soak your Willow
Soak them in a bathtub in hot tap water. Lay a weight such as a building brick or 2, on top of the bundle to immerse it. After a 24 hour soaking, your rods will be ready to mellow and use. Drain the bathtub. Stand the willows upright and allow the majority of the water to drain off, while you hold them. Wrap them with a dark towel. The tannins in the willows may stain the towel, so use a towel that you don’t mind messing up.
Let them lie in the towel, keeping them wrapped so they don’t dry out. This step is called mellowing and ensures that the moisture is evenly distributed throughout the rod, preventing brittleness.
Now you are ready to begin your basket. As you work, keep the rods wrapped, to keep them from drying out. Mellowed willow rods should be kept in a cool place and used within 5 days to a week — prevent them from moulding while they mellow. If you need to leave your work, wrap your working basket in a towel as well to keep it from drying out. If it does dry before you are finished, you can spritz it with a spray of water or by soaking it again, briefly.
Part 2 coming next week
In the next part of this tutorial, I’ll show you how to start your basket and weave the bottom.


When harvesting willow and River Birch for furniture “benders,” I usually recut the bottoms and put the wood into barrels of water immediately after returning home and use them ASAP. The day of cutting, they are the most “bendy,” the next day they are also pretty good, but after that they quickly become stiffer and the bending much more difficult. Obviously, you want to have the chair or loveseat base already assembled before going out to collect the benders. Trellises are a fun (and easy) project for gaining experience and the feel for bending as well. OH, and the AROMA of a green willow chair drying is heavenly–and can be appreciated for years!–if the furniture is protected from the weather.