Build a sweet pea planter and enjoy the heady scent and delicate flowers for weeks in the early summer or fall. Sweet peas are hardy and frost tolerant to extend your bloom time right into fall, in the North. In warmer areas, plant in the fall for the earliest spring blooms.
**Sponsored Post**
I love sweet peas with their heady scent, delicate petals, and long bloom times. But we didn’t have a tidy place for them to grow. When True Leaf Market approached me to partner with them on a project, I thought building a sweet pea planter would be a fun collaboration, that would enhance my garden and give lots of flowers for bouquets later in the summer.
Sweet peas grow great in containers. They are shallow rooted so they don’t need a lot of depth for roots. Give them good soil that has a bit of phosphorous for flower growth and something to climb on and they will reward you with weeks of blooms for bouquets, for pollinators, and for garden beauty. All parts of the plant are toxic though, so be cautions around children and teach them not to eat the seeds.
Sweet peas prefer cooler temperatures so if you live in a hot area, plant them in the Fall so that they are ready to grow vigorously in early spring. For you, their blooms will be done when the summer heat comes. If you live where nights are cool though, sweet peas will reward you with heady blooms in the middle of August and last for several weeks before the hard frost hits. They can handle a light frost.
Sweet Pea Planter
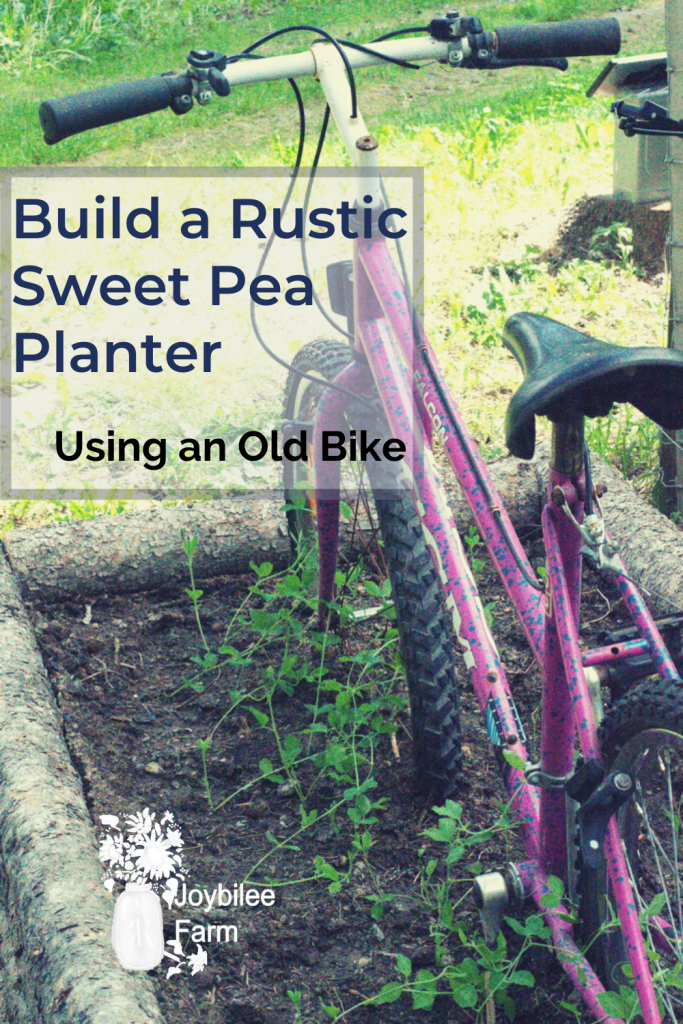
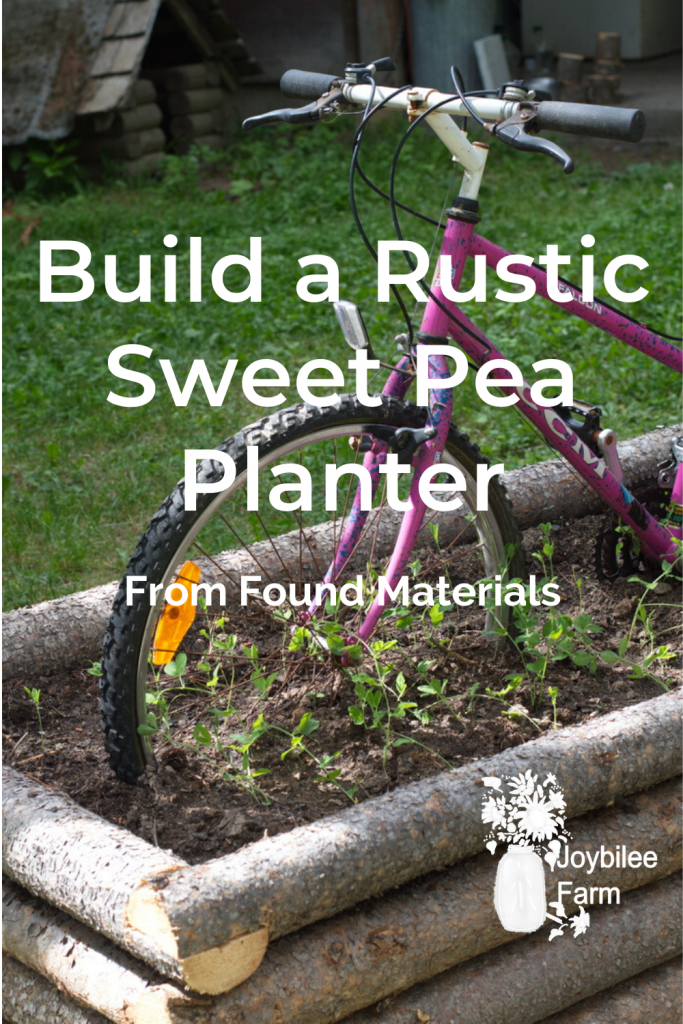
I got the idea for this sweet pea planter when I found my old bike bent under a load of snow. I hadn’t ridden it in over 25 years. The spokes and chain were rusty and the rubber tires were weathered beyond repair. But I thought it would be an ideal focal point for climbing vines in a planter.
I wanted to create a planter entirely out of materials that were found on our rural property, that would be either natural or recycled. We chose pine logs left from thinning the forest to build a fire break on our rural property. Dimensional lumber could also be used in this project.
Lodge pole pine grows straight and tall. If you have a chipper-shredder mulch the green needles with their branches for garden mulch. Use the straight trunks in this project. Mr. Joybilee was onboard for this project and designed and created the planter, while I chose the seeds and did the planting. I love a good collaboration, don’t you?

Sweet Pea Planter Project Plans
Goal
Create a garden planter with an old bike as the feature for sweet peas to climb on, that will provide fragrant flowers for bouquets and for pollinators.
Design Considerations
For simplicity a rectangular shape was chosen for the sweet pea planter. To provide adequate depth of soil and moisture retention the garden bed should be at least eighteen inches deep. This gave our bed fifteen inches of soil and foundation.
The bike was placed in the center of the garden bed with extra room in front and behind the bike for other flowers. You can position the bike anywhere you like in your garden bed. To show that it is a bicycle the bike will have to be upright. The wheels will be in the soil about 6” to 8”, less than half the wheel diameter, so that the bicycle chain is visible above the soil surface.
Place your flower garden bed where it receives at least 8 hours of sunlight per day. The spot should have reasonable drainage, have access to water, and should not impede traffic or the usual activities in that area of your garden. While you could move it afterwards, it will be very heavy to move, so choose the final location before you build the sweet pea planter.
Materials
- Old bicycle
- 28 Four inch nails
- 6 foot rod or rebar
- 8 inches of 18 gauge wire
- 88 linear feet of logs or dimensional lumber
- 1/2 cubic yard of soil/compost
- 2 packages of sweet pea seeds
Equipment and Tools
- Wheel barrow
- Shovel
- Workmate bench
- Hand saw, crosscut saw, or chainsaw
- Maul or sledge hammer
- Hammer
- Axe
- Pliers
- Spirit level
To build this sweet pea planter you will need an old bicycle. The material for the planter depends on what you have on hand and can afford. This one is built from lodge pole pine logs. You could use any straight trees, dimensional lumber (2x4s and exterior grade plywood), cinder blocks, bricks, or stones and mortar. It will need to be strong enough to contain the soil needed for the bed and not be damaged by frequent watering.
I used 28 x 4 inch nails to hold the logs in place. You will also need something to tie the bike to so that it stays upright. I used a 6’ grounding rod. You could also use rebar or a wooden stake. I would recommend sinking the steel rod at least 2 feet into the ground below the garden bed to give you good stability, to ensure that the bike remains anchored, upright in the planter, in windy weather.
Layout
Consider the position for your new garden planter. You want to feature the sweet pea planter, with its bike. This bed is placed near the driveway for visibility. There is room to walk around the bed without running into fences or trees. The planter should receive 8 hours of sunlight per day, for blooming plants.

Collecting the Logs
Now you are ready to collect the material for this sweet pea planter. This bed took 88 linear feet of Lodge Pole Pine to build. The length of the bed was 8’ and the width was 3’. Collect the logs at a place where you can evaluate which logs you want to use for each layer. Using logs is just a little trickier than using dimensional lumber for this project.

(Leuco is helping me sort the logs.)
Notching the logs
The logs will rest on top of each layer. You do not need to achieve a tight joint. The soil will stay in place even if there are small holes or gaps between the logs. The joint I used is a half lap joint. I use a workmate bench to hold the logs stable.
The first row is the trickiest. Figure out where each log is going to go. If there is a slope where you are building put the butt end of the log (or larger end) downhill. This will slowly lift up the lower end of the bed and make it less sloped. To measure for the half lap joint, the width of one log “A” is where you will cut on Log “B”. The width of log “B” is where you will cut Log “A”.
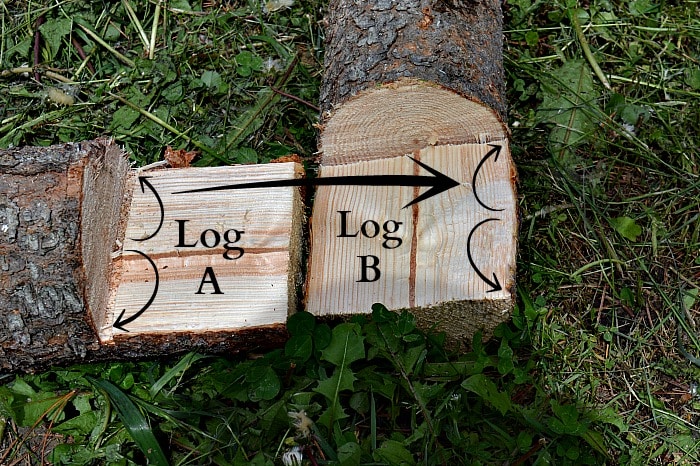
To make the joint cut half way through your log. I used a chain saw but a hand saw or cross cut saw will work as well. (Use safety precautions according to your tools and skill level). Try to make your cuts match on each end of the log. Take an axe and a hammer to knock the cut portion off of the log. You might have to smooth the cut a bit to get it looking like the image above. You will be cutting two ends on each log for a total of eight cuts per layer. Then put your cut ends together.

As your first layer is set together, you can see the start of your garden bed in position.

Make adjustments as needed
When I had the four initial logs in place it looked awkward and definitely not level. I added some bricks to make it level so that I could assess my options.

With the bed needing to be raised so much on the lower end it really wouldn’t work in that position. So I moved the garden bed to a different location.
While the garden bed doesn’t need to be perfectly level it shouldn’t be sloped that much. It would be harder to secure the bike if the bed isn’t close to level.
When you have the bed in the right position, use the 4” nails to join the lap joints. Use one nail in each corner.
Now select the next logs that you are going to use. Place them on your first row just like I’ve got my 4th row done here.

By putting the logs in position it will be easier to measure and mark each log. Cut out the half lap joints. Place either the long logs or the short logs in position. Use a 4” nail, through the half lap, to secure it to the logs underneath. Make sure the other logs will fit in place before you nail the second log in position. Then place the logs so that the next row is complete. Nail these logs into place as well. Repeat as necessary to complete your garden box.

Setting up the Bike and Filling the Sweet Pea Planter with Soil
Start by placing cardboard on the ground inside of your box, to block any grass or weed from coming up from beneath the planter.

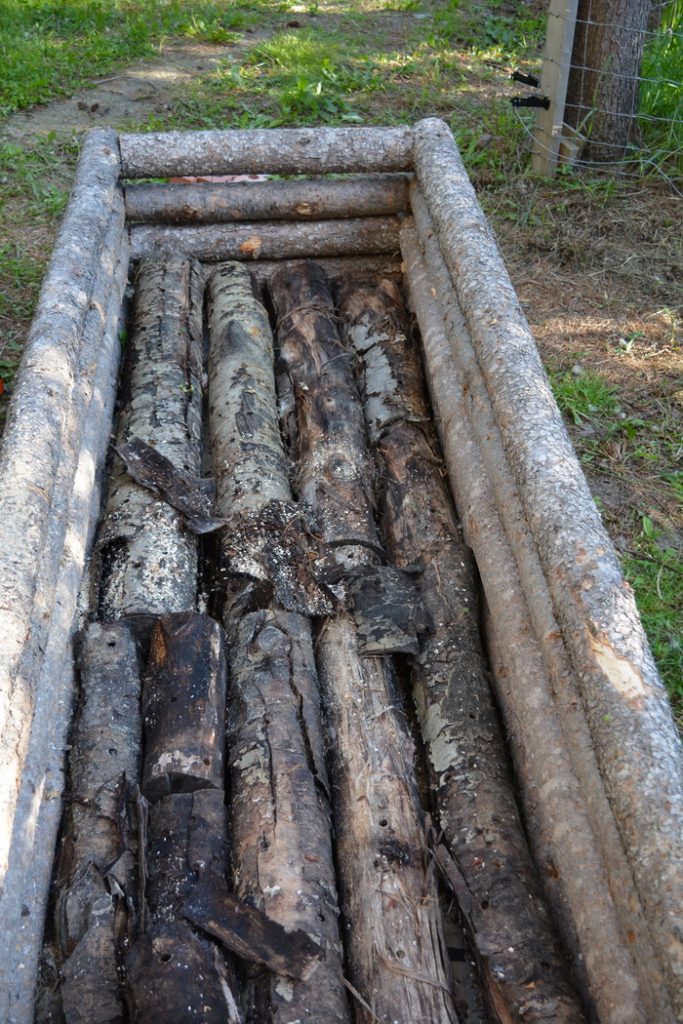
Next fill in 6” to 8” of the bed with material you have on hand. For this bed I’ve put in Alder logs that we had used for growing mushrooms. You could use tree branches, prunings, wood debris, cardboard or any compostable material. Avoid using food scraps that might attract mice or rats to your planter. Avoid seedy weeds that might sprout in your planter.
Place your bicycle into the bed and determine if it is high enough to show the wheels and pedals.
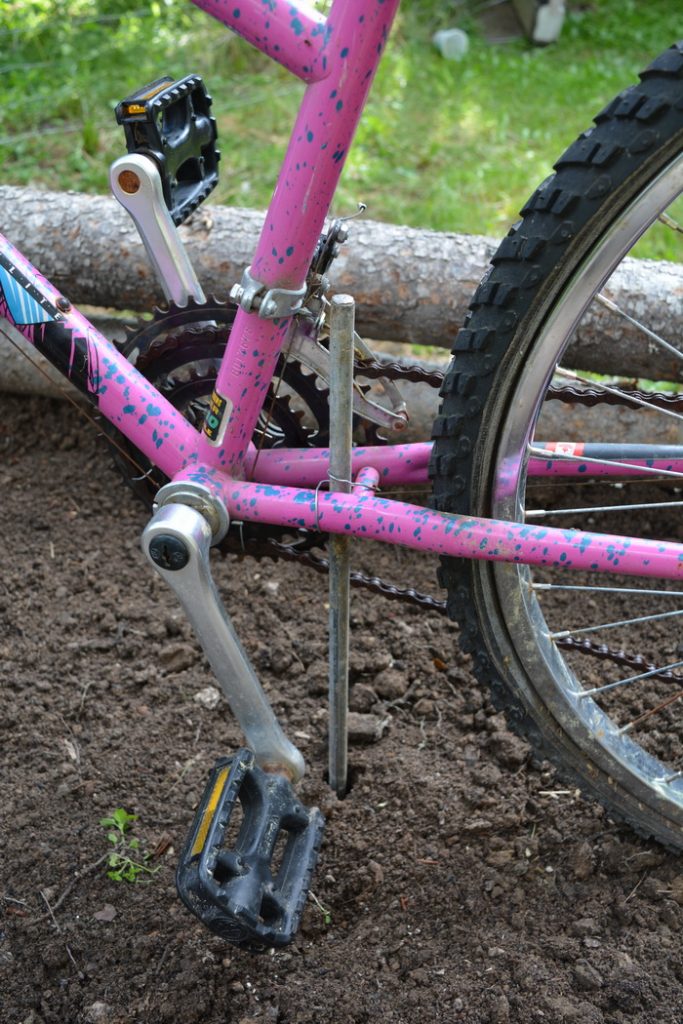
I want to raise the bike so I will have to add some dirt to elevate it. First pound a metal post or rod in the middle of the bed that you will be able to attach the bike to. I used a 6’ grounding rod. A maul or sledge hammer is useful to get the rod into the ground. I was able to use a post pounder initially until the rod was too short.
Don’t rush to get that rod deep in the ground. Take your time to ensure that enough rod is exposed to give you a good support for your bike.
I put two wheel barrow loads of dirt into the bed. Place the bike into the bed next to your metal rod. Adjust the rod to its final height. Now attach the bike to the grounding rod using wire.
Continue to add dirt to your bed until you are 4” – 6” from your final height. Then add finished compost, mixed with some soil, to top up the bed. Spread the soil around so that it looks good for you.

Planting the Sweet Pea Planter
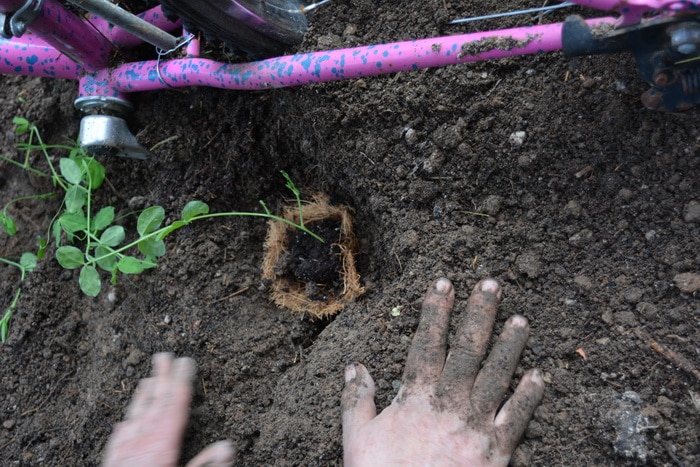
The sweet pea seeds came from True Leaf Market Seed Company for this project. I started 1 ten gram package of sweet pea seeds indoors in May so that we’d have a head start on sweet pea flowers this year. I planted them in coconut coir pots. When started this way, the seedlings don’t suffer from transplant shock. The pots are planted along with the seedlings and the porous pots allow the roots to grow right through the pots.
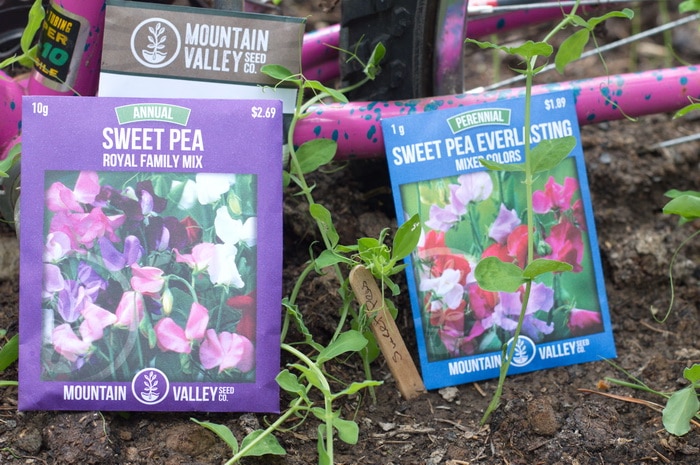
I chose two varieties for this project from True Leaf Market Seed Company: Royal Family Mix and Knee High Mix.
Royal Family Mix, a tall sweet pea with traditional sweet pea fragrance and bold colored blooms in red, purple, lavender, salmon, rose, and white. The vines grow 4 to 5 feet with a long bloom time and traditional sweet pea fragrance. Royal Family is somewhat heat tolerant, but in my climate that isn’t as much of a concern. Here in zone 3, in the mountains, the fact that this sweet pea is frost tolerant is a more important feature. I used 1 10 gram package of this variety to fill one side of the bicycle in two rows.
The second sweet pea variety I planted is True Leaf Market’s Knee High Mix. This is a shorter sweet pea variety but still tall enough for the bicycle planter at 2 to 3 feet high. This variety has a vivid mix of lavender, scarlet, cream, pink, purple, red, and white blooms that are excellent choices for planters, containers and other confined spaces because they don’t vine. I used two 3 gram packages of this variety to fill one side of the planter, in two rows.
True Leaf Market also sent along a perennial sweet pea seed. Hardy in zones 4 to 7, Sweet Pea Everlasting promises five to six foot long vines. This sweet pea would make an excellent living screen, vigorously covering fences and trellises. I didn’t use Sweet Pea Everlasting in this planter because they don’t bloom till their second year. They would be a good choice to plant directly in the ground, along a fence or trellis on the outskirts of your garden. This variety reseeds easily and is persistent once it is established. The flowers in this mixture come in rose, magenta, cream, red, pink, and white. While the flowers are pretty and the vines are strong, this sweet pea variety is not as strongly scented as the annual varieties.
Transplanting Sweet Peas
Sweet peas can be difficult to germinate. They have a hard seed coat that prevent water from swelling the seed. To overcome this difficulty sweet pea seeds must be prepared by soaking or scarification. I soaked one 10 gram package of the Royal Family Mix, sweet pea seeds for 48 hours. First I soaked them for 24 hours. Then I rinsed them and drained them with fresh water. Then I soaked them again for an additional 24 hour, for a total of 48 hour. I did not scarify them. I planted them in potting soil in coir pots with 2 seeds per pot. Germination was almost 100% so we had ample sweet peas to plant out, when the sweet pea planter was ready.
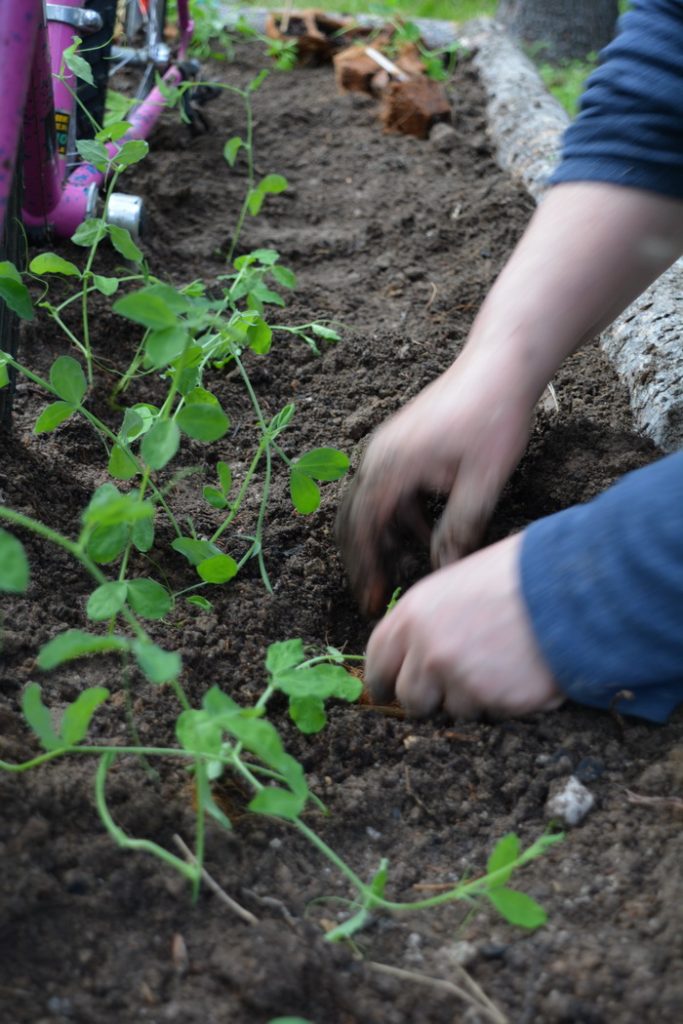
I started the Knee High Mix about a week before the sweet pea planter was finished. I soaked this package for 48 hours in the same way that I did the Royal Family mix. But instead of planting it out in coir pots, I just put the seeds in a container with potting soil to get it started. In less than a week, this seed had sprouted vigorously and was sending out that long straight shoot, characteristic of pea plants. To my surprise, every seed sprouted. I planted these directly into the planter. And within two days the true leaves were forming.
Planters such as this one can be planted closer together than seeds planted in the ground. The sun, soil fertility, and water are optimized for growth. I planted two rows of sweet peas on either side of the bicycle, planting the starts 4 inches apart with rows 6 inches apart. I planted the germinated sweet pea seed the same way on the other side of the bike.
The plants took off immediately with no visible set back. About a week after planting I pinched back the tops of the Royal Family sweet peas to cause the plants to fill out with additional side shoots.
The front and back of the bicycle I left free of sweet pea plants, and instead planted nasturtium seeds. I chose nasturtium so that they will trail down covering the logs of the planter in the front and back. I also stuck in a few calendula seeds in the corners because I can never have too many calendula plants. Both nasturtium and calendula are frost hardy and will bloom until we have a hard frost, in early October, in my area, so this planter will offer focal interest into the fall.
How often to water?
I watered the transplants in immediately after planting and then again 2 days later. We are still having rain here along with cooler temperatures so the weather has been ideal for the sweet peas to make rapid growth. The plants will be well rooted before we get hot weather in July. Of course, “hot’ is relative. Once the plants are established there is enough volume in the sweet pea planter that we can water twice a week in hot weather without fear of the planter drying out. If you live where it is warmer, you might need to water more often.
Updates:
3 weeks later:
Those sweet peas grew fast. The tallest sweet peas are reaching over the front tire. The sweet peas that were planted directly into this planter are now 8 to 12 inches high and beginning to climb.
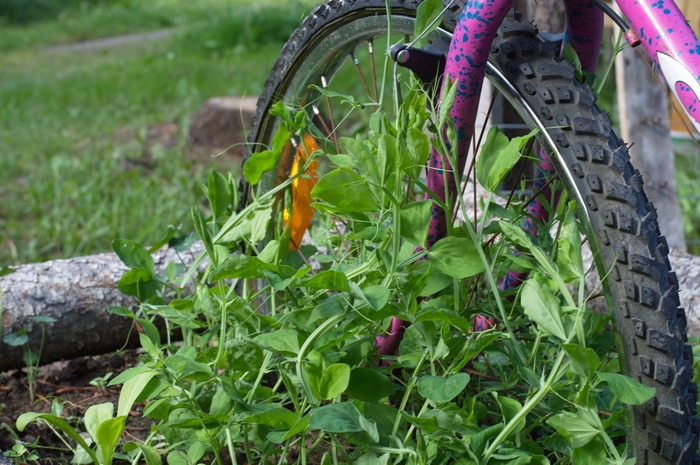
I planted nasturtium seeds in a single row in the from and back of the planter so that when they are in bloom the flower will cascade over the ends of the planter for an additional splash of color. Here they are after 3 weeks of growth. Nasturtium will keep blooming till you get a killing frost so even after the sweet peas fade you’ll continue to have interest in the planter.
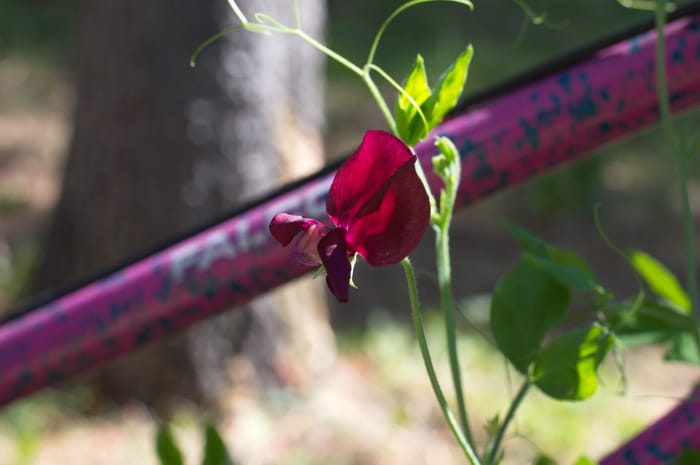
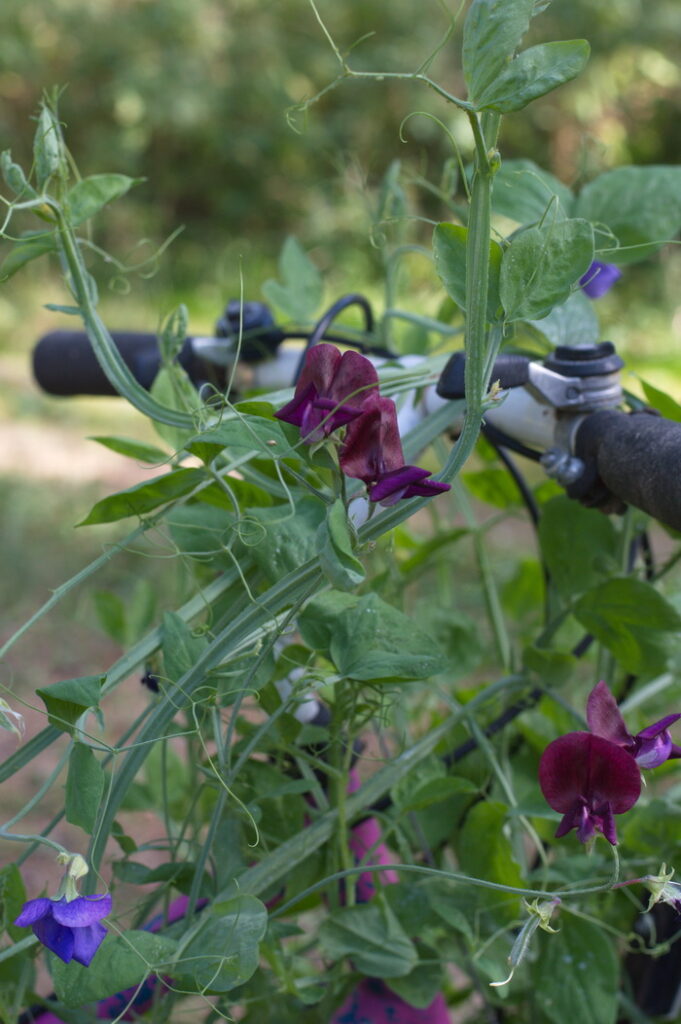
Here’s what our planter looked like in August
Your turn:
What found materials can you re-purpose for a flower planter now? Let us know in the comments what you have on hand to use in the garden.
**This post is a collaboration with True Leaf Market.



Leave a Reply