Did you know that you can eat pea shoots? Pea shoots are the small beginnings of pea vines from seed to the 2nd leaf stage, where the lacy tendrils start to unfurl. Called micro greens, they are sweet and tender like the nicest sugar snap peas, munched raw right out of the pot. Like other micro greens they are full of antioxidants, enzymes, and vitamins. Pea shoots and other micro greens should be in your winter growing plans. Further, home grown pea shoots are sweeter and more tender than commercially grown pea shoots.
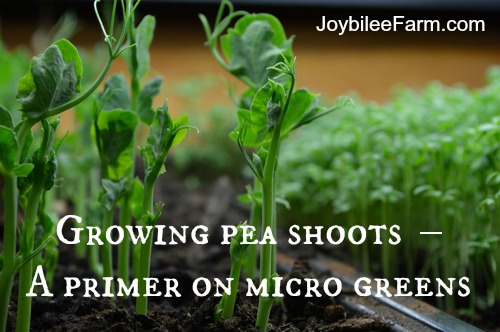
Pea seeds have a short viability span of only three years. After that you’ll want to test germination before you count on them for your spring garden. While pea seeds are cheap, their shortened viability means that you might have a few packages of pea seeds hanging around in your seed storage. Why not put them to good use this winter by growing pea micro greens? Any variety of garden pea will make sweet, succulent pea shoots for winter stir fries, salads, green juicing, or even eating right from the planting pot. In fact, the first bite will remind you of snacking right from the garden in summer. Let’s get started.
What you’ll need:
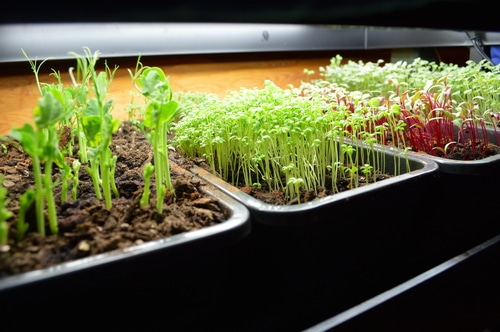
You’ll need 2 – 3 tbsp. pea seeds, a glass jar, some soil, and a growing container. If you live in the North Country you’ll also want a grow light. If you live further south you may be able to get by with just a window sill. It depends on how much light you get from the window. If you aren’t sure, don’t wait until you get a grow light to grow some micro greens. Just start and see how they grow. If they get long and lanky start thinking about supplemental lighting for your next try at growing micro greens.
I have the Grow Light Garden micro green set-up that I purchased from West Coast Seed. It has a plastic tray, with a draining rack that holds the seed trays up out of the moisture. And the grow lights – two full spectrum florescent tubes — can be raised or lowered to meet the needs of your growing plants. It is also available in the USA from Amazon here.
I found similar grow lights, without the plastic trays set up, at Lee Valley Tools, a mail order garden supply company out of Ottawa. It has a system of florescent tubes that can be attached under a kitchen cabinet – growing plants can be raised or lowered under the cabinet to provide the light needed to grow microgreens on your kitchen counter. Amazon carries these T5 full spectrum lights here.
To grow pea shoots begin by soaking pea seeds overnight in water. Drain in the morning.
Add organic seed starter soil mix or a mixture of vermi-compost and seed starter mix to seed starter pots or a container that you’ve added drainage holes to. This is a good use of the plastic clam shell containers that baby greens come in. Add drainage holes, if necessary, with a hot nail. Put 2 inches of soil in the container. No need for more than that. Scatter the soaked pea seeds on top – you’re looking for a dense scattering of 60 to 70% seed covering the soil surface. 3 tbsp of pea seeds was enough for my 4 x 14 inch starter pot. Sprinkle with 1 more inch of soil. Water well and drain.
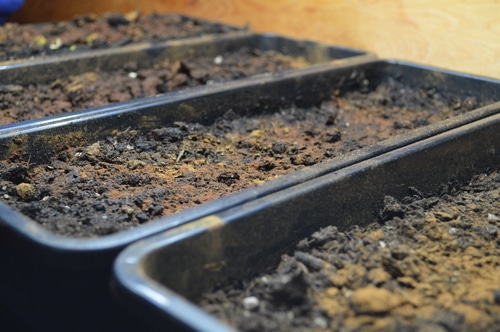
I like to add a strong sprinkle of cinnamon on the surface of the soil to inhibit fungal soil diseases like damping off.
Put the grow light within 4 inches of the surface of the soil. You don’t need to turn on the grow light until the shoots emerge from the soil surface.
Use a spray bottle and spritz your peas when the soil surface begins to dry. You may need to spritz twice a day, once the pea seeds start to grow. They will grow rapidly if given enough light and moisture.
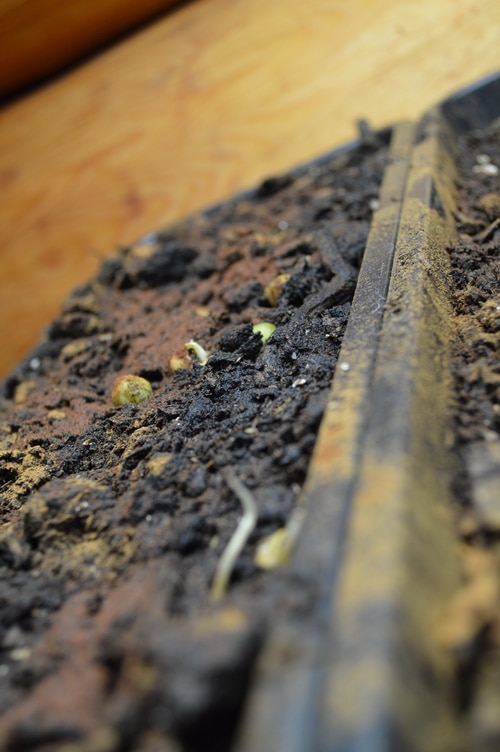
Adapt the height of the grow lights as the shoots grow, keeping it always 4 to 6 inches above the height of the growing plants.
Peas, like all plants begin with a set of seed leaves. These are the first leaves to emerge when the plant comes above the surface of the soil. Within a week to 10 days the pea tendril will emerge, followed by the first set of true leaves. Your pea shoots are ready to harvest any time after these true leaves open. You can wait another week and you’ll have bigger leaves and more tender-sweetness. From soaking the seeds to your harvest is 10 days to 2 weeks. By 3 weeks, you should be harvesting the remainder of the pea shoots.
Start another batch of pea shoots by soaking the pea seeds at the 2 week point, of your first batch. You can keep them up to 3 days in the sprouting jar, rinsing twice a day with fresh water. Past that the pea sprouts tend to break down. Plant the pea sprouts on top of the soil where the old pea shoots were harvested from. Add an inch of fresh soil on top. The new pea shoots will draw from the fertility of the old shoots. You can keep adding fresh pea sprouts on top of the old sprout roots for 3 harvests before dumping the pot out and starting fresh, provided that you have no signs of the following problems.
How to harvest pea shoots and other microgreens
Microgreens are harvested by clipping off the leafy bits just above the soil surface, once the true leaves appear. They are a one cut crop, unlike mescalun greens that are cut and come again. Once you harvest you can replant on the same soil, that holds the roots of the previous crop.
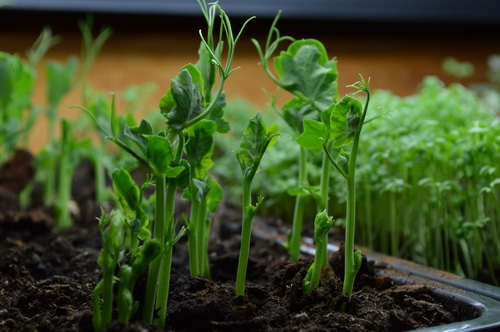
Which pea variety to use to grow pea shoots:
I used the varieties that I had on hand – sugar snap peas, Oregon sugar pod peas, Green Arrow, Alderman Tall Telephone. Other varieties of peas work just as well, even field peas. If you don’t have any peas seeds on hand, you can buy pea seeds especially selected for micro-green growth.
HANES is growing pea sprouts today, too. HANES is using Dwarf Grey Sugar Pea from Johnny Select Seeds. Amazon carries a variety of sprouting seeds specifically for micro greens pea shoots, too.
Problems growing pea shoots or microgreens indoors
Damping off disease
Damping-off disease, a fungal disease, can cause your plants to wither at the soil surface and suddenly collapse. To prevent it, begin with sterilized potting soil. Sprinkle the soil surface with cinnamon, turmeric, or other antibacterial, antifungal spices that you have in your spice cupboard. This is another good use for outdated spices that may have lost some of their flavour.
If you’ve had problems with damping-off in the past, be sure to thoroughly wash and sterilize all your pots and utensils before you plant your micro greens.
Add 1 tbsp of hydrogen peroxide per 1 quart of water to your spritzing and watering water, to increase the oxygen in the soil and get rid of mould spores. Help your plants grow quickly by ensuring that your soil mix is organic and contains the nutrients that rapidly growing plants need. You can increase the nutrients by making a seaweed tea or manure tea to water your seedlings with. Kelp fertilizer is especially good for indoor plants as it doesn’t have the stench that fish fertilizer has, and contains many micronutrients needed by growing plants. If you can’t find kelp fertilizer try moo-tea bags for indoor plants. Moo-tea is manure that has been sanitized and deodorized, making it ideal for indoor gardening.
White fly infestations
White fly larvae are the bane of the greenhouse industry. You may never see a white fly in your home. But if you bring any seedlings home from a nursery you may end up with an infestation in a few short weeks. White flies breed in bedding plants. They lay their eggs under the soil surface, and in the crevices of leaves. You may not notice them until you see the adults flying around your plants, when you water.
To control an infestation, vacuum the adults as soon as you see them. You can interrupt their lifecycle if you can prevent the adults from laying their eggs. So don’t hesitate to vacuum the adults. The larvae suck the plant juices from the leaves of your plants and cause damage. You may not notice it so much in rapidly growing microgreens, but don’t ignore it, or your houseplants will become infested, as well.
If you can’t manage the problem by vacuuming consider waiting a few weeks between planting your next set of microgreens. In the meantime, freeze the pots outside or in your freezer, to kill the larvae. Bring them inside to thaw and then freeze a second time. This deep freeze is usually enough to kill all life stages of the white fly.
Tall, lanky, slow growing plants
This can happen if you are growing your plants on a window sill in the North. In December, January, and February, the light is inadequate for window sill growing, in Northern areas. Grow your plants under a grow light. Keep the grow light to within 4 to 6 inches of the top of the plants. Ensure that the plants are getting adequate water and add some kelp fertilizer or moo-tea to the watering regime twice during the last 10 days of the growing period.

Off grid growing
Off grid growing in the north in winter has a unique set of problems. You are living off grid and your solar panels don’t provide adequate power in winter to run a grow light. Or the limited power that you do have needs to be used sparingly. You can increase the light coming in your windows with mirrors that multiply the light effects, just like you would in shady areas in your garden. You may need to supplement with additional battery light to ensure that your plants are getting 12 hours of light each day. 15 hours would be better, but a minimum of 12 hours should ensure adequate plant growth in peas. Many heritage sweet pea varieties are sensitive to day length.
What about beans?
While peas make tasty sprouts and shoots for fresh eating, beans contain phytates that can cause stomach aches and malabsorption of minerals. Soaking beans and sprouting inhibit phytates. However, bean sprouts should be consumed raw only sparingly. It is better to lightly steam bean sprouts before eating. For this reason I wouldn’t recommend eating bean plants raw. But why not try mung beans, lentils, or adzuki beans as microgreens and see if you like them? They would be a tasty addition to a winter stir fry.
More about Microgreens?
According to a 2012 research study in the Journal of Agricultural and Food Chemistry, “In general, microgreens contain considerably higher concentrations of vitamins and carotenoids than their mature plant counterparts, although large variations were found among the 25 species tested. In comparison with nutritional concentrations in mature leaves, the microgreen cotyledon leaves possessed higher nutritional densities.”
Commercial pea shoots in this study contained 50 mg. of vitamin C, 45 mg of vitamin E, as well as a significant amount of vitamin A and lutein per each 100 gram serving.
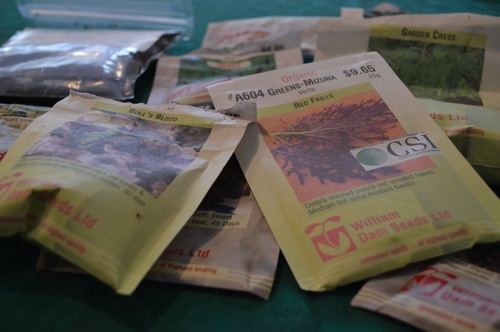
Micro greens, like pea shoots, are a good way to use up your old seed packets, the ones that might have a less than perfect germination rate. Thickly planted micro greens aren’t affected so much by poor germination as your summer garden plans might be. I’ll talk to you more about the different garden plants that make awesome micro greens in another post. For now know that any plant that you might grow for sprouts can be grown as micro greens.
Don’t wait to learn everything there is to know about micro greens before you start. Grab a packet of pea seeds and get them soaking today. You’ve got this.


Can pigeonpeas be used for microgreens? There is almost no info on using pigeonpeas for shoots/microgreens.
I DID find info on eating cockscomb microgreens… go figure.
It sound like you got a leaf-free variety of green peas that only produces tendrils. You can stir fry the tendrils.
i bought organic GREEN PEAS and it is a failure
my other greens matured in 7-10days, but these are 20 days now and still not matured with a hair like looking on top.
i dont even know what to do with them
Not all varieties of peas are suitable for microgreens. Some contain neurotoxins.
https://www.youtube.com/watch?v=A1bLHgJh-5w
Garden Peas & Field Peas are fine but it’s not always easy to tell what variety you have.
You can just buy organic peas sold for microgreen use but for those looking for cheap sources, the Goya whole green Peas are a Striker Field Pea and are OK. They are available cheaply in many ethnic food stores.
You won’t need to soak the sunflower seeds like I did for the peas. I’m glad you are going to try it. One thing is to keep the soil moist but not sopping. I spritz mine twice a day as they are growing and I stopped watering them except for the spritzing.