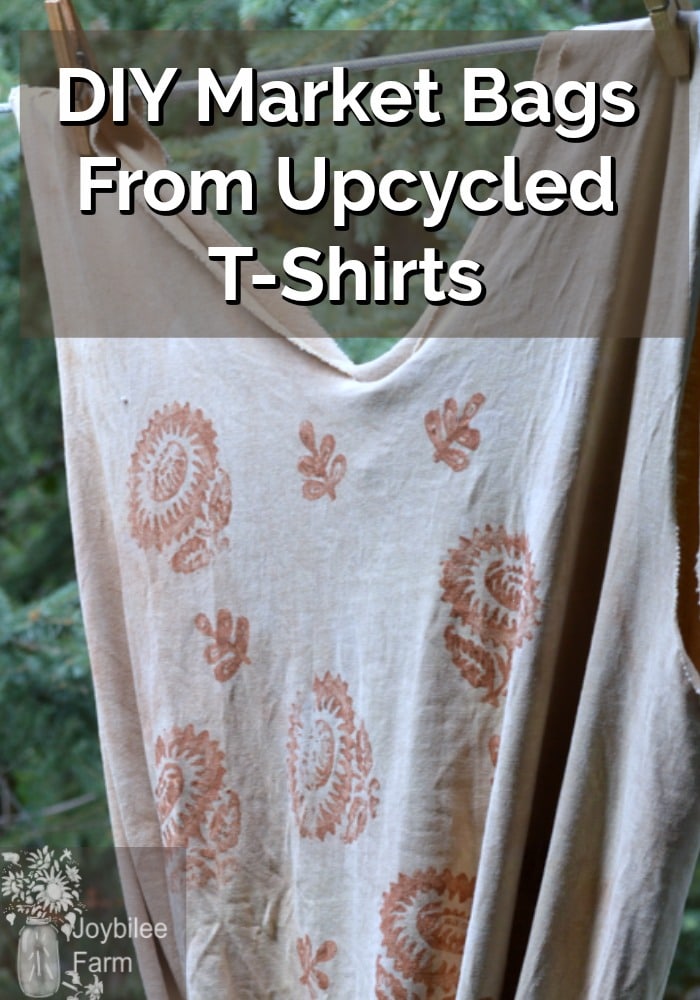
T-shirt material makes the ideal grocery bag because it’s stretchy – allowing for lots of groceries to be packed in. It’s lightweight, breathable and washable. Learn how to DIY your own t-shirt bag here, with no sewing needed!

Upcycle a t-shirt into a bag
– no sewing skills required
I keep forgetting to take reusable grocery bags to the store. The store cloth bags are a poly material that collects dust and lint and doesn’t wash easily. The cloth bags that I’ve bought are heavy and cumbersome, and not very pretty. And they take ages to dry between washings. You knew that we are supposed to wash our bags between trips to the grocery store? If you read my post about DIY antibacterial hand wipes, you’ll understand why. Even putting bananas in the bottom of a shopping cart could mess up the cleanliness of your market bags and the hygiene of your food.
On the other hand, I have a stash of white undershirts, the ones with sleeves, that are past their prime. The neckline is worn but the fabric is still serviceable.
T-shirt material makes the ideal grocery bag because it’s stretchy – allowing for lots of groceries to be packed in. It’s lightweight and breathable. It washes in a regular washer load. It dries quickly on the line. And it’s practically free.
If you prefer to use a printed T-shirt for this project, skip the natural dye instructions and jump right to the “Make a T-Shirt Bag” instructions below.
What you’ll need for your T-Shirt transformation:
A used white t-shirt or as many as you want to transform
Sharp scissors
Natural dye plants like walnut hulls, flower heads (yarrow, goldenrod, mullein, marguerite, chamomile, for instance), bedstraw roots, cochineal scale insects, woad leaves.
Alum
Myrobolan or other tannin sources (oak bark, grape skins, mullein leaves)
A carved wooden block or rubber stamp – you can carve one
Gold, copper, bronze, or silver textile paint or gutta
A watercolour paintbrush or craft paintbrush
An iron
Directions:
Note you can do several T-shirts at once through the preparation steps.
Preparation for natural dyes:
Wash the T-shirt well by adding ¼ c. of washing soda to the wash water. Rinse.
Soak the T-shirt overnight in warm water with 2 tbsp. of myrobolan or powdered tannin or several cups of bark, or other tannin sources. Stir it a few times to saturate the fabric completely. Remove from the water and wring out.
Add 1 tsp. of cream of tartar and 1 tbsp. Potassium alum to hot water in a large pot. Place your wet t-shirts in the pot and stir. Simmer for 20 min with the t-shirts. Shut off heat and allow it to cool naturally. Remove T-shirts. You can dry the t-shirts at this point and save them for later, or proceed with wet t-shirts.
Prepare the dye bath:
Take your plant materials and prepare a dye bath according to the specific plant that you’ve chosen. If you are dyeing yellow with flowers, add 1 tbsp. of baking soda to the dye bath, to help extract the colour. Red dye baths should be simmered but not boiled. Boiling brings out the brown colours. Indigo blues need special reduction dye vats and are fairly involved. Save the indigo dyeing for when you have lots of material to dye, to make it worth your while.
For yellow:
Use 8 cups of plant material
Add 1 tbsp. baking soda to the extraction water
Simmer for 1 hour – don’t boil rapidly.
Turn off the heat and allow it to cool naturally.
Strain the dye bath. Retain the dye liquor.
Place t-shirts in the dye liquor and bring them back to a simmer. Simmer for 1 hour. Turn off heat and allow the heat to return to room temperature naturally. Remove T-shirt. Rinse in freshwater until the water is clear. Hang to dry.
For Walnut brown:
Simmer 4 cups of walnut hulls for 1 hour. Turn off the heat and leave overnight. Strain and reserve dye liquor. Add t-shirts and simmer for 1 hour. Turn off heat. Allow them to cool naturally. Remove T-shirt. Rinse in freshwater until the water is clear. Hang to dry. For more detailed instructions see this post on natural dyeing using walnuts.
For reds, blues, greens, or purples, follow the directions in your natural dye resource to extract the colour from your natural dye materials. Hang to dry.

How to Make the T-Shirt Bag (no sewing required)
Once the t-shirt is dyed the colour that you want and has dried fully, you are ready to make your T-Shirt bag.
Cutting the t-shirt:
Cut the neck and sleeves of the t-shirt to make the bag opening and the handles. Reserve the cut material. I like to add a tie at the top of the bag and to do this I cut a strip of fabric from the shoulder to the middle of the bag on all four quarters of the bag, leaving the strip attached at the throat area of the t-shirt. Add cut strip from shoulder to throat on two of the four sides so that you have three strands to braid.
Braid the neck material so that you have two braids in the centre of the top of the bag. This will give you two braided ties to close the bag.

Painting and embellishing your T-Shirt bag:
This is the fun part.
Put heavy paper between the two layers of your t-shirt to keep the paint from saturating the two layers. Lay down newspaper on your work surface to protect it from paint. Spread out your t-shirt on a firm surface like a counter or table.
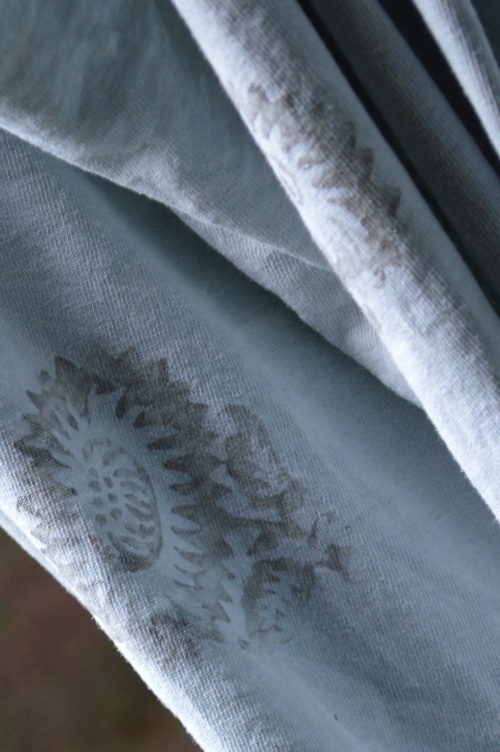
Take your fabric paint, a paintbrush, and your stamp. Use your paintbrush to paint a light coating of fabric paint on your stamp. Carefully lay your charged stamp on your t-shirt face and press firmly with your hand once. Lift the stamp off carefully.
Reapply the fabric paint to the stamp or wooden block. Press the stamp/block firmly but carefully on your t-shirt surface, press down on the back of the stamp with your hands. Don’t shift the position of the stamp as you press. Lift the stamp off carefully. Repeat as you wish.
Allow the fabric paint to dry fully. Iron with a hot iron according to the manufacturer’s instructions, to set the fabric paint.
Closing the bottom of the T-Shirt bag:

Cut the reserved sleeve material:
Cut the sleeve material across the sleeve at the top of the shoulder. You want 3 strands of stretchy fabric about an inch wide. Cut off the seam. Pull the strands taught to stretch them out.
At the hem of the t-shirt, make three cuts into the t-shirt, dividing the bottom of the t-shirt into equal thirds. Make the cuts, so that they just go through the hem, up to the hemstitching, and no further.
Note you can make more cuts in the hem and thread through a greater number of strands, but always one strand threaded through each section of the hem. The more strands you thread through, the tighter the bottom of the bag will be.
Threading the strips through the hem:
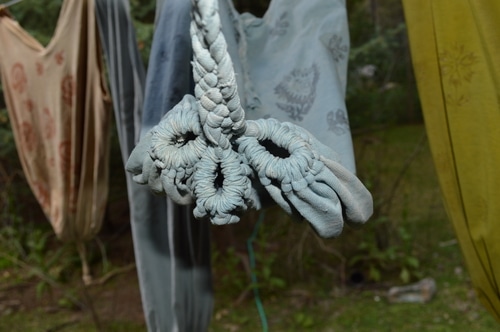
Using a safety pin, thread each of the strands of fabric through the t-shirt hem, so that each end comes out one of the cuts. You’ll have a strand of fabric coming out on both sides of each cut.
Now pull these strands tight, bunching up the fabric. You’ll have 3 circles at the bottom of your T-Shirt bag. Braid the 6 loose strands into a single braid. Finish your braid with an overhand knot.
Done!
Washing instructions for your T-Shirt bag:
Your T-Shirt bag should be washed in cold water. Check the fabric paint/gutta washing instructions to preserve the painted detail on your bag.
Back to you:
How do you remember to bring your reusable cloth grocery bags into the store? I’m always forgetting until I’m standing in line at the till. I need some help here.


Nice idea! Recycling tees that way is quite a good idea and I’m sure my girls will love it. Thank you for sharing!
Sounds like a fun project! Thanks for sharing.
I wish you could come visit, too.
These are so lovely! I so want to make these with the kids as soon as we get settled. I especially love those natural dyes – I wish we could come and visit so you could teach us all about natural dyes yourself!