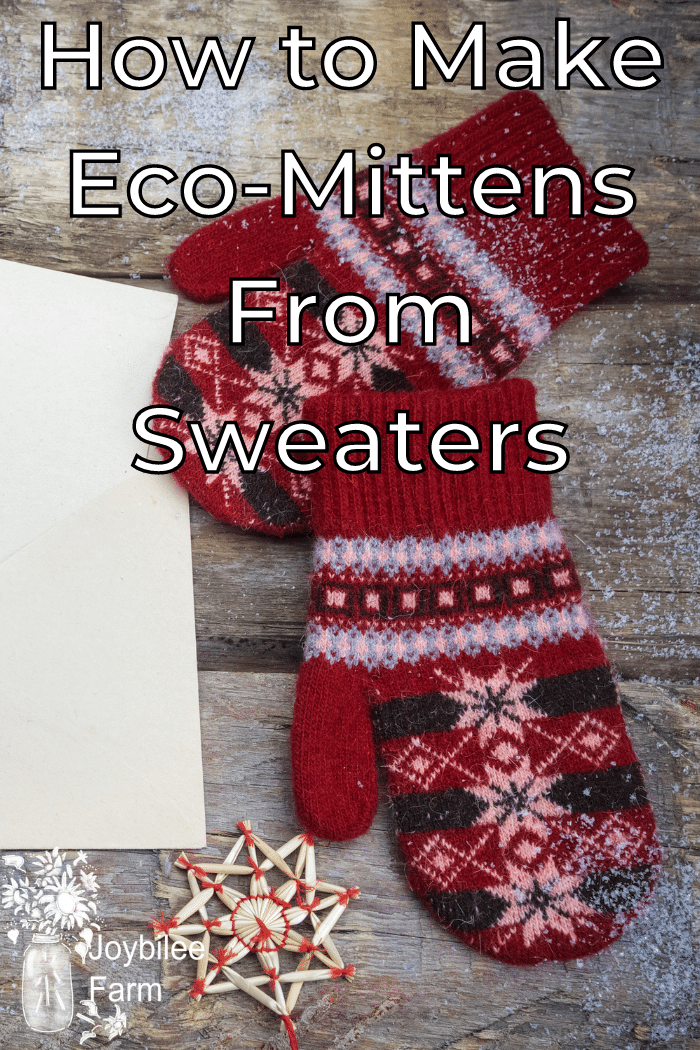
Make your own eco-friendly and up-cycled mittens for free from felted sweaters and leather scraps. This tutorial is simple and easy to follow, and you can easily make mittens for your family, or as gifts. Get the most out of accidentally, or deliberately, felted sweaters!
Homestead Winter Problem
At 6 am Mr. Joybilee was searching through the closets and piles of hats, scarves, and mittens for the work-fingerless-gloves that he wore last winter. No luck. They seem to have been misplaced. It was negative 21C here and he wasn’t looking forward to handling bales of hay and those frosty steel cans of grain, to feed the sheep, with no mittens.
While I couldn’t do anything about his immediate problem, I thought I could solve the problem by nightfall. Now although I wasn’t looking forward to spending this sunny day sitting and knitting two fingerless mitts, it wasn’t the worst way to spend the day. Then a casual comment left on my Facebook page inspired a quick fix. (Thanks, IRonnie)
Homestead Solution from the scrap bag
A few weeks ago we cleaned out closets and drawers and found, buried in the bottom of (mumble, mumble)’s drawers several 100% wool sweaters that had some minor moth damage. I immediately threw them in a hotter-than-hot washing machine to felt them. I hung them up to dry and then cut off any moth-frayed bits and cut them into flat pieces of felt. With no project in mind, I piled them in a corner of my workroom/living room and went back to drying apples and getting ready for winter. After the comment on my Facebook page, I looked at this pile of lost sweaters with new inspiration.
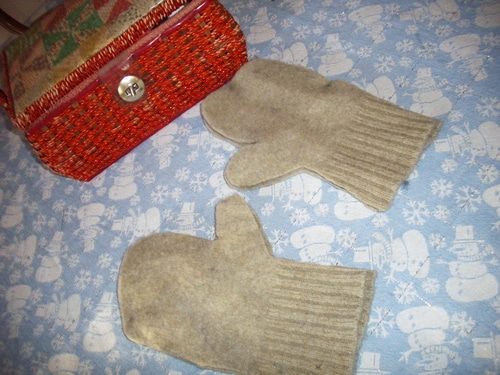
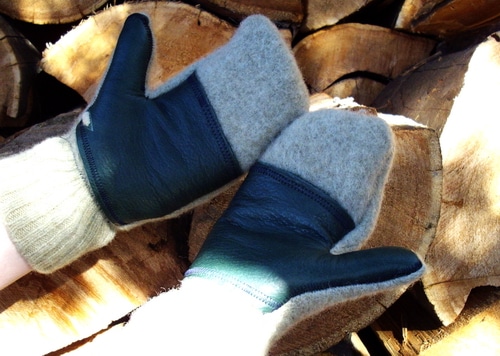
Mittens made from felted sweaters and scraps of upholstery leather
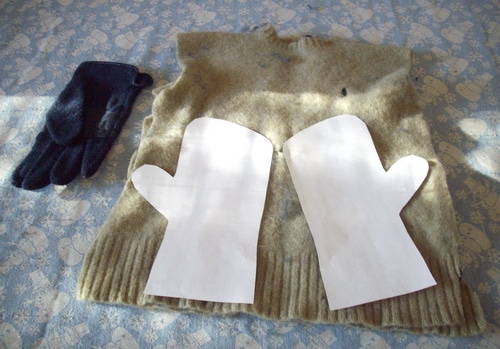
I found a single glove that fit, Mr. Joybilee, and used it as a measurement to create a mitten pattern. I cut out two paper patterns – one for the left mitt and one for the right mitt. While I could have cut out a right mitten and a left mitten using a single pattern, I prefer to cut out two pattern pieces and layout two patterns to ensure that I don’t accidentally cut out two right or two left mitts. Experience has taught me to be safe whenever mirror-opposites are needed in a sewing project.
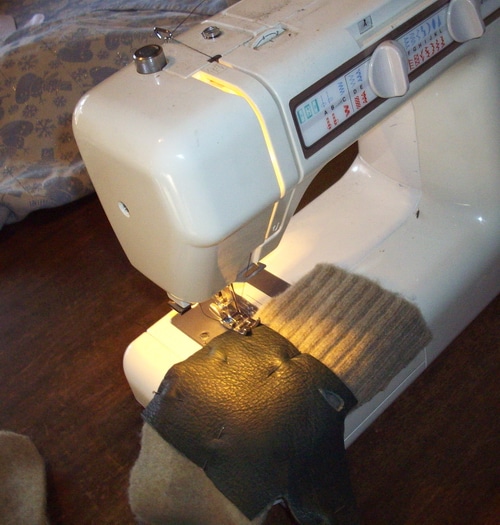
Since homestead gloves and mitts get a lot of abuse with binder twine, wire fencing, and rough wooden doors and hay feeders, I reinforced the palms and thumbs with leather scraps before sewing the mitts together on my Janome sewing machine. The leather came from a bag of leather upholstery samples that I picked up at a thrift shop over 10 years ago.
If you ever find a bag of leather upholstery samples at a thrift store, buy it fast before someone else does. They are pliable, can easily be sewed by hand or with your sewing machine, and in the colours that you will most likely use for slippers, mittens, pillows, and other homestead applications. I’ve even used a piece to fix a wobbly spinning wheel treadle. Scrap leather pieces are “gold.”
Tutorial: Easy step by step Instructions
Step 1: Create a paper pattern
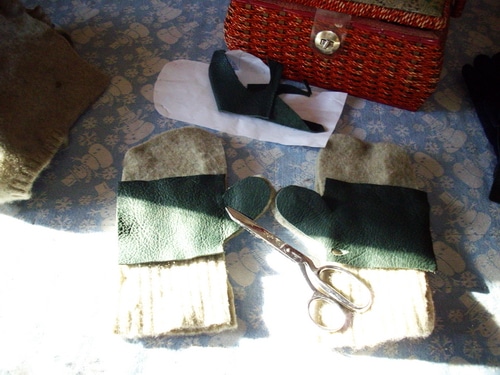
Grab a piece of computer printing paper and trace around the outside of a glove or mitten that fits the person you intend to create work mitts for. Add ¼- 1/2 inch all around – especially around the thumb. Make two patterns – one for the right mitt and one for the left mitt.
Step 2: Layout your pattern on a felted sweater
I laid my two paper mittens on a felted sweater body, using the sweater ribbing as the cuff for the mitten. Pin it securely in place on a smooth surface (not on top of a table cloth, or you may cut the table cloth, accidentally.) Cut all the way around the pattern, leaving the ribbing edge uncut and natural. When you get to the thumb you may need to cut the felt a little deeper into the thumb join to give flexibility. I cut into the thumb joint about ¼ inch.
Step 3: Cut out the leather palm reinforcement
Using your paper pattern align your scrap leather pieces across the palm and up the thumb and cut out a right and a left leather palm reinforcement – one for each mitten.
Step 4: Sew the leather onto the palm piece of each of your mittens.
Pin the leather piece onto the palm of your mitten fabric. Be careful to do a left and a right palm. I like to pin them both at the same time so I don’t make a mistake here. I put the suede side of the leather against the fabric and the smooth side of the leather facing out. But you can reverse this if you prefer.
Using your sewing machine’s zigzag stitch and thread that matches or contrasts to the sweater fabric, sew along the leather to secure it to the felted sweater fabric. The sweater may stretch under the leather as you sew. Use your hands to keep the two pieces together along the cut line as much as possible. This is especially important on the thumb because any extra bulk in the final seam will hinder your ease of turning the thumb in the final stage. It may also make the thumb tight and inflexible.
Step 5: Attach a 4-inch piece of 5/8ths inch elastic to the cuff of each mitten
Cut a 5/8ths inch elastic – 4 inches long, you will cut off the excess at the end of this step. Place it along the mitten palm, where the sweater body meets the ribbing. Sew it, by securing one end with a zigzag stitch and then slightly stretching the elastic as you zigzag it into place. By gently stretching the elastic you will gather in the sweater ribbing and snug up the cuff. You’ll end up with about an inch of excess elastic. Cut the excess elastic off on the edge of the fabric. Attach the elastic only on the palm piece – not on the outside piece of the mitten.
Step 6: Stitch the outside and palm side of the mitten together
Pin the two pieces of the mitten right side together. Using a straight stitch on your sewing machine, stitch the two pieces together, matching up the thumb and the sides. Leave the cuff open.
Trim any excess fabric on the mitten’s thumb joint and thumb tip, close to the seam. Don’t cut into the seam but cut within ¼ inch of it. Felted sweater fabric and leather won’t fray, so you can cut close to the seam.
Step 7: Turn the mitten right side out
Turn the mitten right side out. To turn the thumb right side out, push your own thumb inside the mitten at the thumb opening. Once you have it started, use the handle of a wooden spoon to ease the thumb right side out. This may take some work. Your thumb will not be too tight if you added a seam allowance to the mitten pattern. If the final thumb seems tight, push a tube inside the thumb opening to stretch it slightly for a few hours and the leather will stretch, so that the thumb fits more comfortably.
Step 8: Repeat step 6 and 7 for the second mitten
Step 9: Repair any holes that you find in the sweater fabric or leather to reinforce any weakness in the mittens.
Since you are working with felted sweaters, you may find that there are holes in the fabric that you used to cut out for the mittens. You can repair those holes now with a piece of yarn and a yarn needle. You can also decorate the fabric to camouflage any holes or imperfections in the felted fabric.
Take a picture and post it on my Facebook page and show me what you’ve created.
Hints to personalize the mittens for gift-giving
I omitted the decorations on Mr. Joybilee’s work mittens because I was in a hurry to have them ready before night chores. However, you could decorate the outside with needle felting, applique, embroidery, or patchwork if you wanted to. If this is your plan, do the applique, embroidery, or patchwork before you sew them together.
Hint: If you are making these for a child or a woman, you can needle felt hearts or pictures on the outside piece of the mitten after sewing together. It may seem easier to do this before sewing together but needle felting will draw in the wool and make the outside of the mitten smaller than the palm piece. You could also needle felt the felted sweater before cutting out the mittens, to ensure that the front and back are exactly the same sizes.
After making a pair of these and seeing how easy they came together, I’m getting excited to make a few more decorative ones for Christmas gifts.
©Joybilee Farm, for personal use only, all rights reserved.



I’m also wondering about the washing of these…
OK, I grew up with woollen mittens and with leather mittens. I played in the snow until they were soggy all the way through. The woollen mittens were washable; the leather ones decidedly NOT. So, how does one wash them with leather parts sewn on? Or does one just never wash them at all? Just use to pieces and toss?
What a nice way to introduce them to your culture.