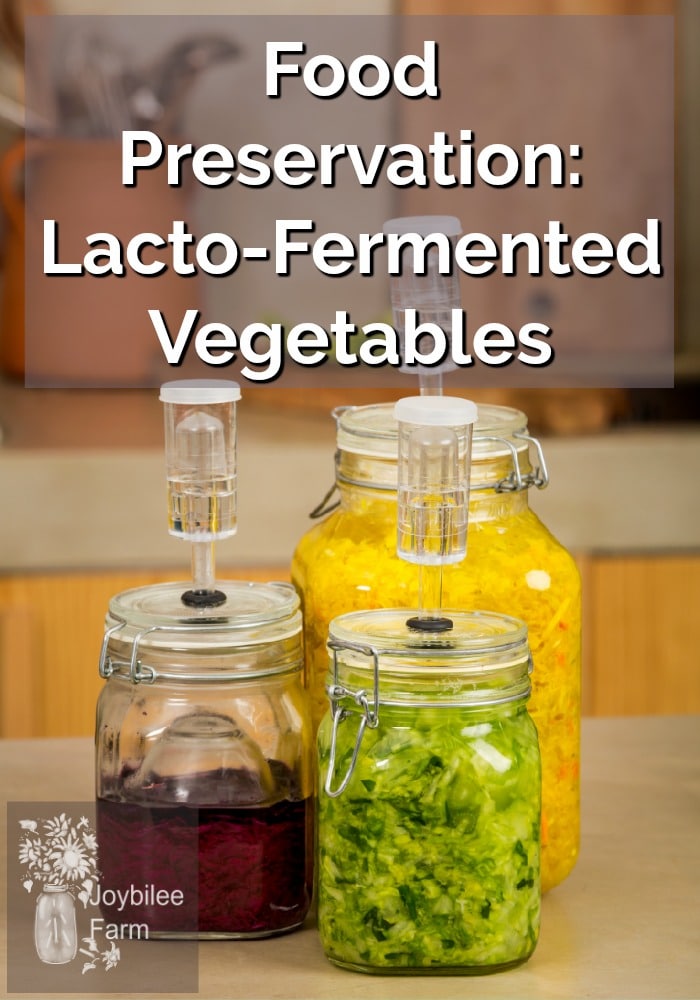
Lacto-fermented vegetables are a traditional way to preserve vegetables without refrigeration. Lacto-fermentation preserves vegetables by converting water, starches, sugars, and proteins, with good microbes, preventing spoilage and increasing the nutritive properties.
Lacto-fermentation is a traditional technique for preserving low acid foods like vegetables, meat, fish, and some grains and legumes. Lacto-fermentation depends on salt to halt spoilage organisms, giving lacto-bacteria a chance to colonize the vegetable before spoilage organisms take over. Once a vat or bottle of lacto-fermented vegetables is fully colonized with the correct micro-organisms, the spoilage bacteria doesn’t stand a chance. Lacto-bacteria is aggressively protective of their colony, which is a benefit to us because lacto-bacteria are the same microbes that we need to have a healthy microbiome. It’s a win-win for us and our favourite microbes.
Vegetables preserved by lacto-fermentation increase their nutrition with digestive enzymes and probiotic richness. Another win for us.
Using whole or chopped vegetables in lacto-fermentation
There are two main types of lacto-fermented vegetables. When we make pickles we generally use larger vegetables like pickling cucumbers or carrot sticks. Since it takes longer for lacto-bacteria to colonize these denser vegetables we use 3.5 to 5 % brine. For 3 cups of brine — enough to fill a quart jar with whole pickling cucumbers or carrot sticks use 2 tablespoons of fine grain Himalayan salt. This will give you a 5% brine solution.
When using cut up vegetables such as sauerkraut or kimchi, a 5% brine would be too salty so we decrease the salt to a 2 to 3% brine. These cut up or shredded vegetables colonize with lacto-bacteria much faster, because they have more surface area exposed to the lacto-bacteria. So they don’t need as much salt to keep bad bacteria in check. I use between 2 teaspoons and 1 tablespoon of fine grain Himalayan salt per quart of shredded vegetables. If you like it a little less salty, use the lower amount.
Traditionally lacto-fermented vegetables have several health benefits:
- They increase the nutrition you get from the food
- Lacto-fermented vegetables increase digestion and absorption of nutrients
- They aid with weight loss
- Increase in B vitamins, including B-12
- Increase Omega-3 fatty acids
- Lacto-fermented vegetables support a healthy immune system
- Increase digestive enzymes
- Increase probiotics like lactase and lactic acid,
- They fight off harmful bacteria in the gut.
- They tonify the cannabinoid system of the body working in synergy with other herbs
How do you make lacto-fermented vegetables?
Traditional lacto-fermented vegetables like Kimchi, Sauerkraut, Miso, and pickles are made by washing vegetables, chopping, salting (brining) and placing them in a crock or a jar. The salt inhibits harmful bacterial growth while encouraging lacto-bacteria to proliferate. This is the traditional way that people throughout the world continue to preserve their food without refrigeration.
You can increase the lacto-bacteria by inoculating your culture with whey, much in the same way that bread is inoculated with yeast to encourage the right kind of fermentation. But whey is not an essential part of lacto-fermentation.
Vegetables are weighted under the juice to allow for anaerobic fermentation and prevent mold. If vegetables rise above the liquid, mold can develop, and harmful bacteria can enter the product and spoil the food.
One way to prevent mold and other harmful bacteria from entering during fermentation is to use an airlock or specially designed fermentation lid that allows carbon dioxide to escape while preventing room air from entering the jar. Pair with a weight to keep the vegetables under the brine, and you should be good to start.
Equipment for lacto-fermenting Vegetables
- Fermentation lock like this or make your own using the directions below
- A glass weight to keep the vegetables under the brine
- Wide mouth Mason Jars
- A kraut pounder
How to make an airlock for lacto-fermenting in canning jars:
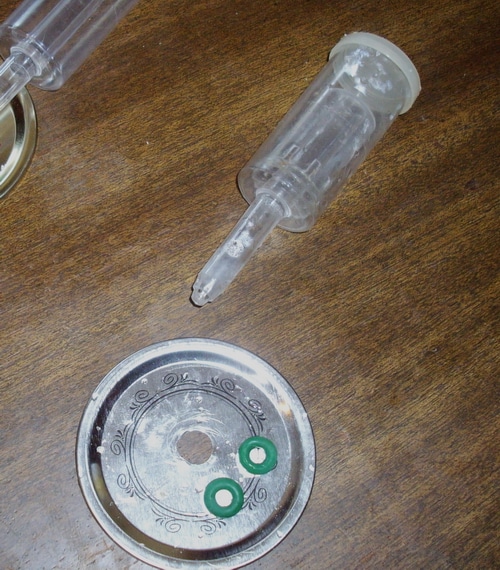
This makes 1 fermentation airlock for a wide mouth canning jar. You’ll need one fermentation lock for each fermenting jar you are using.
- A drill with a 15/32nd drill bit
- Scrap piece of wood to drill into
- A wine carboy airlock, without a rubber stopper
- 2 silicone grommets
- A canning snap lid for a wide mouth jar
Instructions for homemade airlocks
- Drill a hole into the center of the snap lid by placing the lid on a scrap piece of wood and drilling through the lid into the wood. Smooth out any rough edges.
- Place one silicone grommet on the airlock. Poke the airlock through the drilled hole in the snap lid.
- Attach the silicone grommet to the lid, making a tight seal.
To use the airlock, place boiled and cooled water in the airlock, attach the ring and screw it lightly onto filled jars.
Once you have a couple of wide-mouth jars fitted with airlock lids, you are ready to make sauerkraut.
Print
Lacto-Fermented Vegetables Prepared at Home the Easy Way
Description
Traditionally lacto-fermented sauerkraut is one of the easiest ferments to make at home. It uses just two ingredients and is ready in less than a month.
Ingredients
- 1 large cabbage (about 6 lbs) washed and cut finely
- 3 tablespoon Himalayan salt, fine grade
Instructions
- Chop up the cabbage and put 1/4 of it in a large bowl
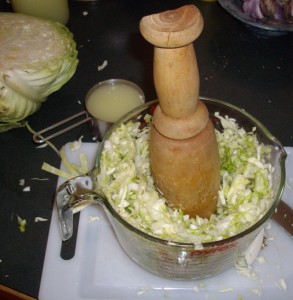
- Crush the cabbage it lightly with a kraut pounder.
- Add 1 tablespoon of salt and another 1/4 of the sliced cabbage. Pounded again.
- Add another 1 tablespoon of salt and another 1/4 of the cabbage. Pound again. All this pounding will mix the salt with the cabbage and release some juice.
- Continuing adding salt and cabbage until all the salt and all the cabbage is in the bowl. Pound with a kraut pounder to release the juices.
- Put the “pounded” cabbage into a 2-quart,wide mouth, Mason jar and press it into the jar. If there is not enough liquid to cover the cabbage top off the jar (to within 1 inch of the top) with boiled and cooled water
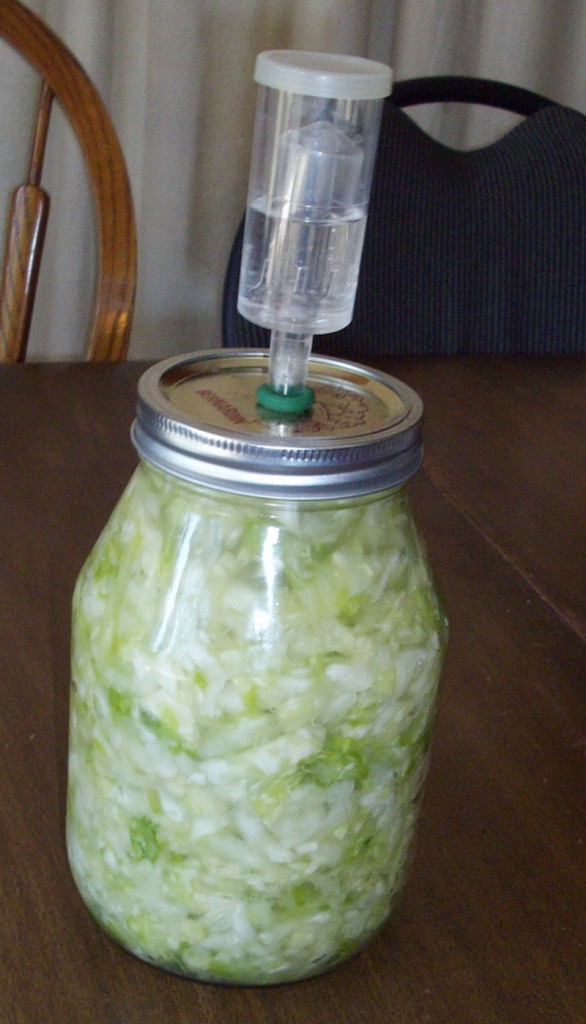
- Place the washed and sanitized airlock lid on the canning jar, ensuring that the spout on the airlock is clear of the liquid in the jar.
- Store the crock in a warm spot in your kitchen where temperatures are consistently around 70F. Allow to naturally ferment.
- Fermentation is complete when the pressure inside the jar causes the vegetables to sink in the jar.
- Remove the airlock and add a sanitized jar lid. Store in a cool spot in the back of your fridge or in a cold storage room. The flavor will be even nicer after a month.
Notes
Serve fermented vegetables daily to increase the benefits of probiotic rich foods in your diet.
Homemade Sauerkraut in Canning Jars
Sauerkraut is a traditional lacto-fermented vegetable
Ingredients:
- 1 large cabbage (about 6 lbs) washed and cut finely
- 3 tablespoon Himalayan salt, fine grade
Directions:
- Chop up the cabbage and put 1/4 of it in a large bowl
- Crush the cabbage lightly with a kraut pounder.
- Add 1 tablespoon of salt and another 1/4 of the sliced cabbage. Pounded again.
- Add another 1 tablespoon of salt and another 1/4 of the cabbage. Pound again. All this pounding will mix the salt with the cabbage and release some juice.
- Continuing adding salt and cabbage until all the salt and all the cabbage is in the bowl. Pound with a kraut pounder to release the juices.
- Put the “pounded” cabbage into a 2-quart, wide mouth, Mason jar and press it into the jar. If there is not enough liquid to cover the cabbage top off the jar (to within 1 inch of the top) with boiled and cooled water
- Place the washed and sanitized airlock lid on the canning jar, ensuring that the spout on the airlock is clear of the liquid in the jar.
Place the jar somewhere that the temperature is between 65F and 75F consistently. I have mine on the kitchen counter. If your home is warmer, you may want to put the fermenting jars in a cooler basement room.
One cabbage will fill two 2-quart jars or 4 quart jars. Traditionally fermented vegetables were stored in a crock in the root cellar and served up as needed. If you make small batches, you can store the unprocessed jars in the fridge or in a root cellar and use them as needed without ever having to heat up a canner. Be sure to keep it out of direct sunlight.
The Lacto-Fermenting Process
Allow the mixture to ferment for a week to 10 days. The contents will bubble and the float in the airlock will demonstrate that gases are coming out of the jar. The fermenting time varies according to temperature. After a while, the fermentation will cease, the pressure inside the jar will decrease and the vegetables are ready.
Remove the airlock and replace it with a sterilized 2 part canning lid. You can store this in your fridge now, or in a cold storage room. The flavour will continue to improve over time.
Do not can this. Heat treating this will destroy the beneficial bacteria that you need. Instead, store it in a cool spot either in the back of your fridge or in a cool room. It will keep safely for a year as long as the vegetables remain below the surface of the brine.
Traditionally, sauerkraut was kept in the keg, in a cool storage area, and served out as needed, while a weight kept the vegetables below the surface liquid.
The taste of naturally fermented vegetables is free of acidic sharpness, like vinegar pickles. Plus, natural sea salt doesn’t cause heart problems like iodized salt. Serve as a condiment or a side dish.
Mennonite sauerkraut
Recently we had friends over for dinner and talked about Mennonite sauerkraut. My friends both had mothers that made sauerkraut in a crock every fall. One mother used plain cabbage and salt, the other mother added onions, carrots, and oregano to her kraut. It’s interesting what you can preserve by fermentation.
Both women stored their finished vegetables in the fermenting crock and scooped them out of the crock to serve. Our conversation turned to Bratwurst and sauerkraut and a trip to Germany. Amazing how food associations remind us of happy memories.
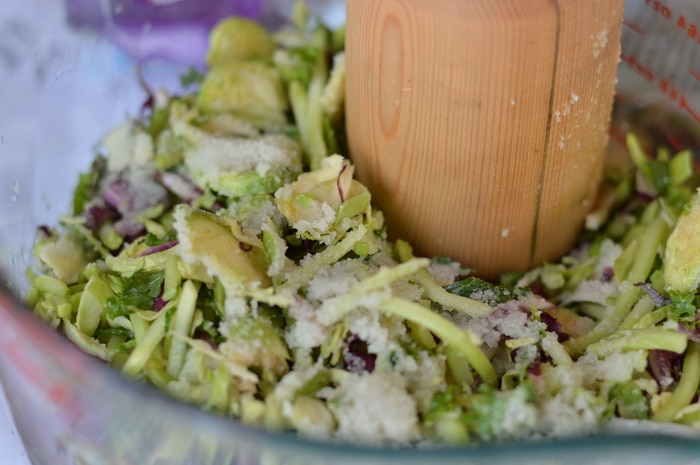
If that seemed like too much work for your first sauerkraut try this easy recipe that uses already prepared cabbage.
This is part of a series of articles on Food preservation:
See the other articles in this series on food preservation and self-sufficiency:
Food Preservation: Summer’s Bounty for Winter’s Scarcity
Food Preservation: Dehydrating Fruits and Vegetables
Food Preservation: Drying Herbs for food, teas, and medicines
Food Preservation: How to get free food when you don’t have land
10+ Fermented Foods to Help Heal Your Gut
How to Ferment Grape Leaves and Eat Them in Winter



Probably the lacto fermented bacteria. Rye has naturally occuring lacto bacteria.
My grandfather’s recipe for fermented cucumbers included a piece of rye bread on the top of the water in a crock covered with a tied-on dish towel which was removed after 3 days. What would have been the purpose of the rye bread? The yeast? I have made these and they are so good!