Description
Some elderberry varieties have a higher pH than the 4.6 recommended for safe water bath canning at home. Increasing the acidity of elderberry juice can improve the safety of home canned elderberry juice, jam, and jelly to prevent the growth of botulism.
Ingredients
Scale
- 8 cups elderberry juice
- 4 tablespoons lemon juice, bottled or 1 teaspoon citric acid
- sugar to taste (optional) (Honey may be added before serving)
Instructions
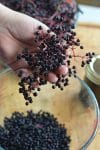
- Extract elderberry juice from fresh or frozen elderberries. Add 1 tablespoon lemon juice or 1/4 teaspoon citric acid per pint jar. Pour hot juice into jars over acid additive.
- Heat canning jar lids in a saucepan of simmering water to soften seal or treat them according to the manufacturers directions. Clean jar rims with clean towel to remove residual juice. Remove from pan, and place on jar rims of pint jars. Complete seal by screwing on the canning jar rings.
- Place in water bath canner. Fill canner with hot water to cover jars by 2 inches. Bring to a gentle rolling boil over medium heat. Boil for 10 minutes. Turn off heat. Let jars settle for 5 minutes before removing from the canner.
- Remove jars using a jar lifter, and place on a clean towel on the kitchen counter. Allow to cool naturally. This will complete the seals.
- Seal is completed when the top doesn’t give when pressed with your finger.
- When jars have cooled completely and seals have completed, remove the rings and wash the jars. Label and date the jars before storing in a cool, dry place.
- You can use this juice to make elderberry syrup, elderberry jellies, or other elderberry dishes.