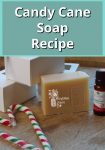
Description
This DIY cold processed soap has the aroma of Christmas morning. Enjoy the sweet candy cane scent that comes from a natural essential oils blend.
Ingredients
Scale
Water/Lye Portion:
- 300 ml strong peppermint tea
- 140 grams of sodium hydroxide (lye)
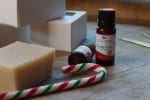
Oil portion:
- 300 grams of coconut oil
- 500 grams of olive oil
- 200 grams of cocoa butter
Essential oils (2%):
- 2 teaspoons Candy Cane Essential Oil Blend
Instructions
- While wearing safety goggles and rubber gloves, weigh lye on a paper plate.
- Add lye to cold peppermint tea in a glass measuring cup. The lye will heat up the water and release caustic fumes. Do not breathe in the fumes.
- Stir the lye in the tea with a wooden spoon to completely dissolve all lye crystals. Allow the lye solution to reduce in temperature to 100°F to 105°F.
Meanwhile:
- Measure the oils in an 8 cup glass measuring cup.
- Place the glass measuring cup in a warm place or in the microwave to fully melt the oils.
- Remove the oils from the heat when some of the oils remain solid and are floating on the top of the oil. Stir the oils to melt the remaining oils using the residual heat. Allow the oils to cool to 100°F to 105°F.
- When both the oil and the lye are cooled to 100°F to 125°F, pour the lye solution into the liquid oils.
- Use a stick blender to blend the lye solution and the oils together. Continue stirring until the mixture reaches a thin trace.
At this point:
- Stir in the candy cane essential oil blend.
- Continue blending with a stick blender until the soap is well blended and a trail of soap dripped on the surface of the soap, remains on the surface.
- Just a few more minutes after trace, pour the soap recipe into a prepared mold. Scrape the sides of the bowl to get as much of the soap as possible into the mold.
12. Cover the soap with plastic wrap or a lid, and allow it to set completely.
- Keep the soap warm by wrapping the mold in a towel. The soap will go through a gel phase indicative of saponification. Leave the soap overnight to complete saponification.
Notes
In the morning remove the soap from the molds. Wait until it is completely cool before cutting. Cut into bars. Stack the bars on a flat surface to cure for 3 to 6 weeks before packaging it.