Description
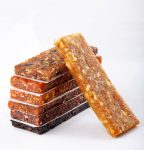
Raw fruit and nut snacks that are paleo, gluten-free, non-GMO, kosher, vegan, soy-free, and dairy-free, plus have no added sugar.
Ingredients
Scale
- 2 cups of chopped dates
- 2 cups of raw cashews, sunflower seeds, or almonds
- 1 cup of coconut flakes + (1 cup of coconut flakes for coconut milk)
- ¼ cup virgin coconut oil, melted
- ½ cup organic raisins
- ½ cup dried cranberries
- ¼ cup flax, freshly ground
Instructions
- Line an 8-inch x 11-inch straight-sided pan with a piece of parchment paper or plastic wrap, so that the paper hangs over the long edges. Set aside
- Fit a food processor with a metal blade
- Add the cashews or other nuts or seeds, ground flaxseed, to the processor and pulse until they are uniformly finely chopped (think fresh bread crumb texture)
- Add the coconut flakes and pulse again until finely chopped and uniform with the nuts
- Pour the coconut/nut mixture into a large mixing bowl and set it aside
- Add half of the dates to the food processor and process until a paste forms and clumps together in the work bowl
- Open the food processor and add in half of the coconut cream and pulp leftover from processing, 2 tablespoons virgin coconut oil, and half of the nut/coconut mixture
- Replace the lid and process until evenly combined. Scrape into the prepared pan
- Repeat with the remaining dates, nut/coconut mixture, 2 tablespoons virgin coconut oil, and coconut milk/coconut pulp
- When all of the ingredients have been processed, add raisins and cranberries to the processed mixture in the bowl and mix well with a wooden spoon or hands
- Wet your hands and use them to press the mixture as evenly over the bottom of the pan as possible
- Fold the excess parchment over the bars to cover them
- Roll your rolling pin over the top to smooth the surface, if desired
- Refrigerate for at least 2 hours before moving onto the slicing
- Use the excess parchment paper as a sling to transfer the now-firm bars from the pan to a large cutting board
- Cut into squares and store in the refrigerator in a tightly covered container
Notes
- If you have a nut allergy, sunflower or pumpkin seeds can be substituted for the nuts in the recipe
- An unrefrigerated bar will be good for 48 hours, covered, at room temperature
- Wrap them individually in parchment paper or plastic wrap and keep them in the freezer
- (Optional) Extend the shelf life at room temperature by drying the bars in your dehydrator for a few hours, until dry to the touch
- You can add extras like flax, chia seeds, or green powder for extra nutritive punch

